ROS Introduction
Chapter description
You will learn basic information about ROS and what concepts are at the heart of each ROS application. You will become familiar with the ROSbot platform, which will be used to learn ROS. After setting up the environment, the first task will be to start and visualize the camera frames. The tutorial can be performed both on the real platform and in the simulation.
You can run this tutorial on:
Repository containing the final effect after doing all the ROS Tutorials you can find here
What is ROS?
"The Robot Operating System (ROS) is a flexible framework for writing robot software. It is a collection of tools, libraries, and conventions that aim to simplify the task of creating complex and robust robot behavior across a wide variety of robotic platforms." - according to the official ROS webpage.
![]()
We prepared a set of tutorials to help you start building advanced robots. They are prepared to work with Husarion ROSbots but they are also a valuable portion of knowledge for anybody interested in ROS.
System structure
ROS is a software suite that allows for quick and easy building of autonomous robotic systems. ROS should be considered as a set of tools for creating new solutions or adjusting already existing ones. A major advantage of this system is a great set of drivers and implemented algorithms widely used in robotics.
Nodes
The base unit in ROS is called a node. Nodes are in charge of handling devices or computing algorithms - each node for a separate task. Nodes can communicate with each other using topics or services. ROS software is distributed in packages. A single package is usually developed for performing one type of task and can contain one or multiple nodes.
Topics
In ROS, topic is a data stream used to exchange information between nodes. Topics are used to send frequent messages of one type, such as sensor readouts or information on motor goal speed. Each topic is registered under a unique name and with a defined message type. Nodes can connect to the topic to either publish messages or subscribe to them. For a given topic, one node can not publish and subscribe to it at the same time, but there are no restrictions on the number of different nodes publishing or subscribing.
Services
Communication through services resembles a client-server model. In this mode, one node (the server) registers a service in the system. Then, any other node can ask that service and get a response. In contrast to topics, services allow for two-way communication, as a request can also contain some data.
Visualization of this structure taken from official ROS2 Documentation
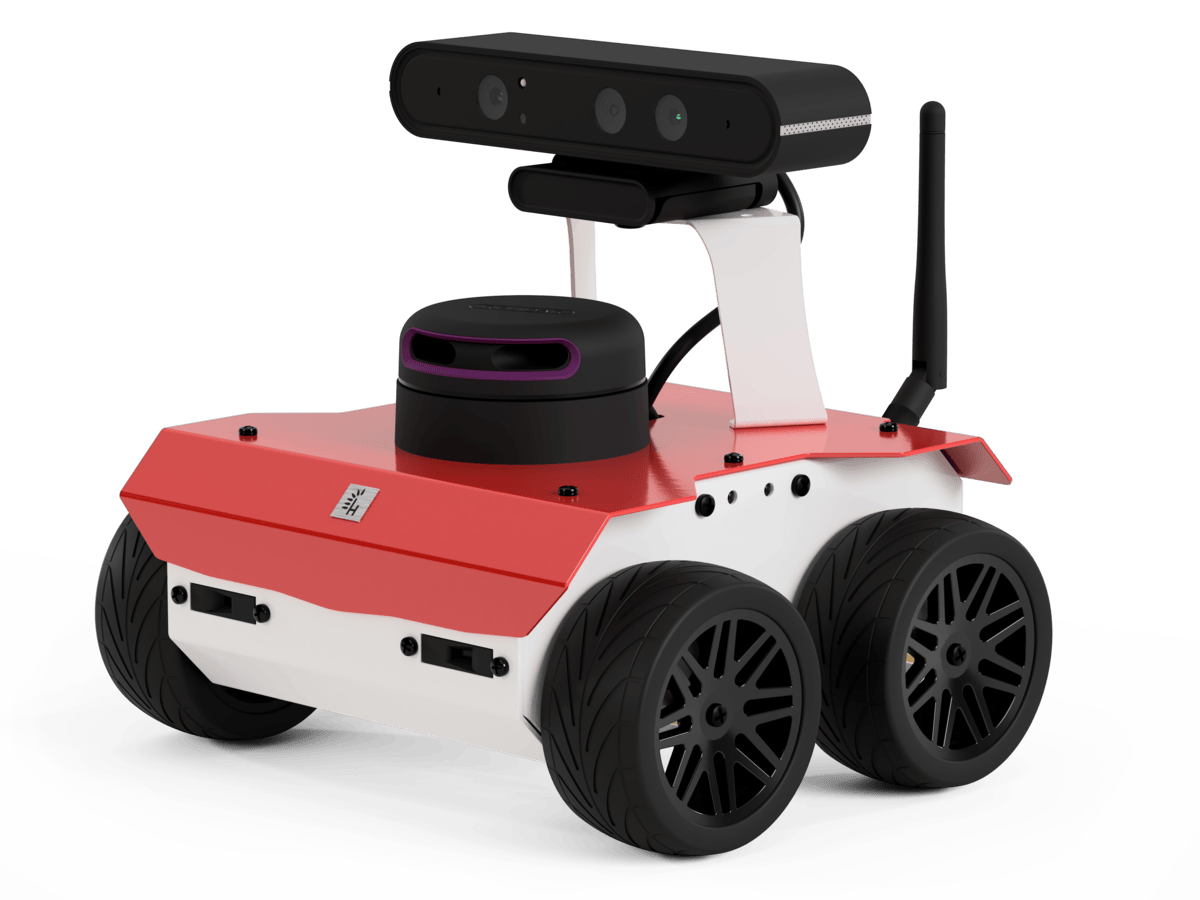
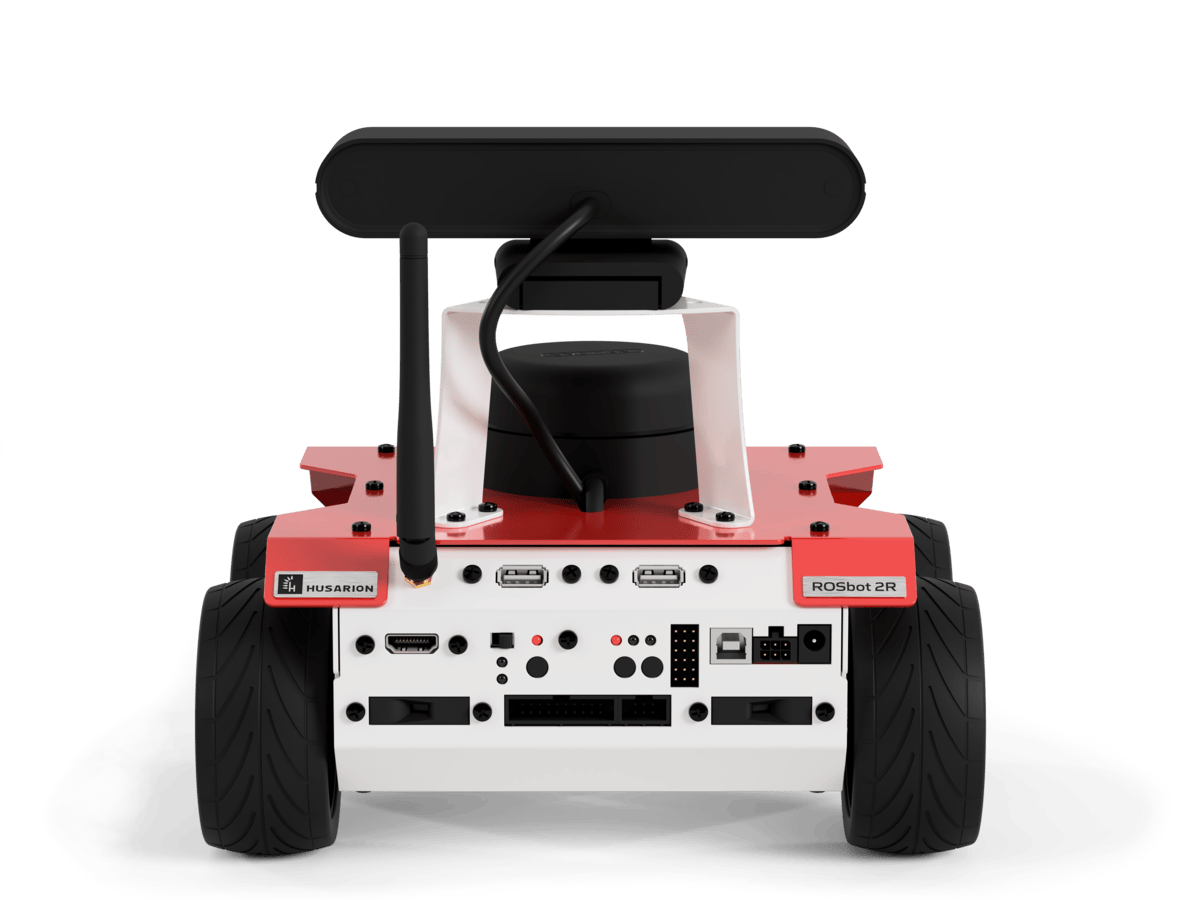
ROSbot platform
This tutorial is created for ROSbot, open-source robot platform. You can read more about it here: ROSbot (2R | 2 PRO | 2).
The platform contains:
- 1 × Husarion CORE2-ROS
- 1 × RPLIDAR A2/A3 360°
- 1 x RGBD camera Orbbec Astra
- 1 × IMU BNO055/MPU-9250
- 4 × VL53L0X Time-of-Flight distance sensor
And this is how it looks like:
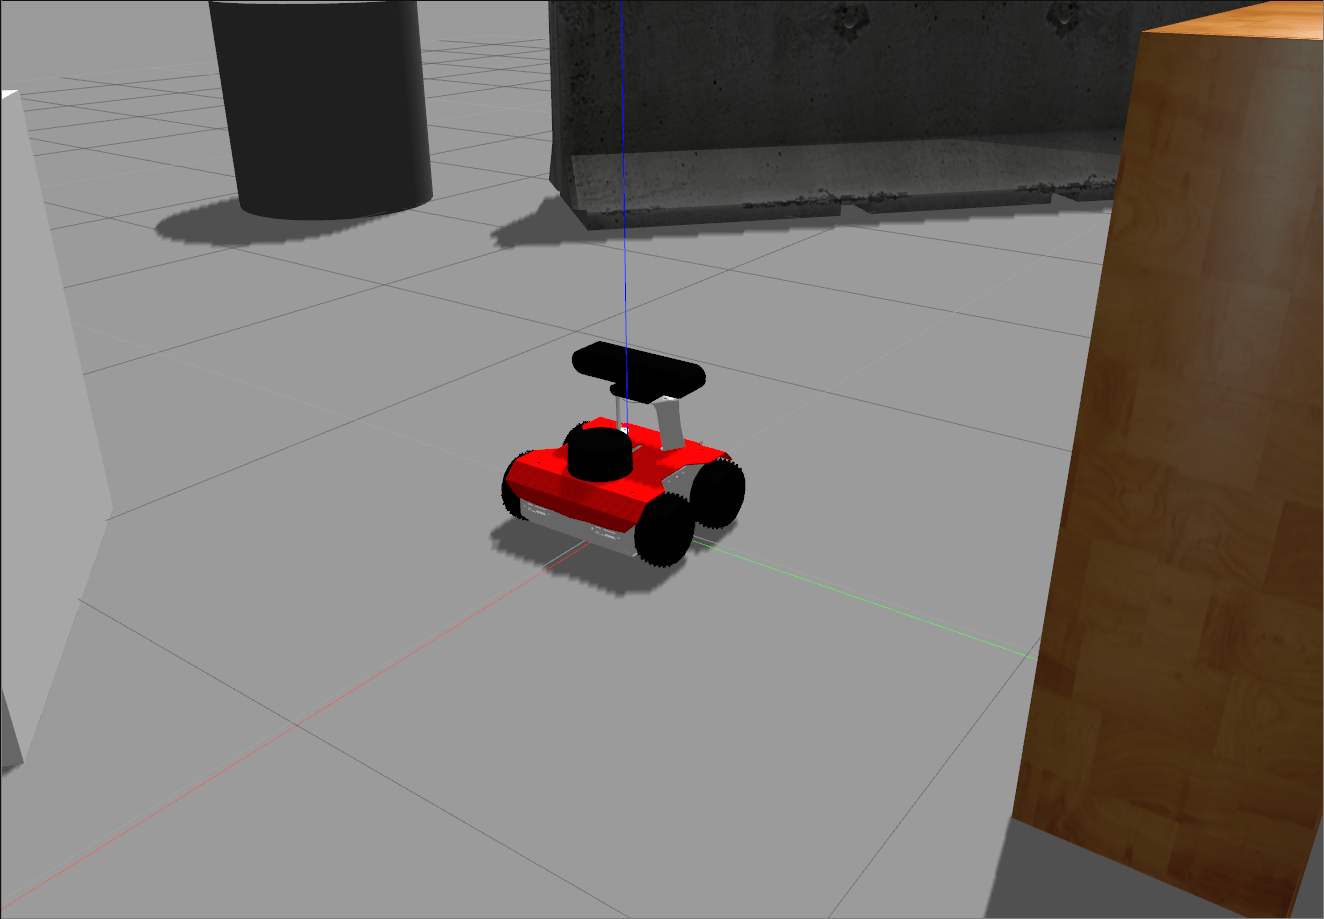
You can also go through ROS tutorials using ROSbot 2R simulation model in Gazebo environment instead of physical robot. It is available here, at our GitHub page.
Another option is to use virtual machine or ROS native installation, this requires at least Ubuntu 20.04 operating system and you will have to install ROS with Gazebo according to this guide. Native installation but will offer much better performance comparing to virtual machine.
You can also try online simulator at www.theconstructsim.com. It comes with all required packages installed and offer great computing power for a reasonable price.
Another option to run a simulation model is using AWS Robomaker.
We also created package with all nodes and launch files from our ROS tutorials. You can download ready to use pkg from GitHub page.
Environment setup
To get started with ROS, the simplest way is to connect via ssh to your ROSbot. It is also possible to test the functionality of ROS on your local computer by using the Gazebo simulator.
- ROSbot
- Local
Before you start working with ROS on the ROSbot platform, you need to connect to your device first. You can establish the connection in two ways: using ssh or via a remote desktop. Instructions on how to connect to ROSbot:
- via ssh in the LAN, see How To Start
- via ssh over the Internet you will find in VPN Access
- using Remote Desktop with the latest Husarion OS (with ROS Noetic)
To get started, please install ROS Noetic on Ubuntu 20.04.
First steps in ROS
Fundamentals of ROS - roscore
The roscore command is necessary for the proper execution of your future programs. roscore is a collection of nodes and programs that are prerequisites for a ROS based system. You must have roscore running for ROS nodes to communicate. The roscore command primarily starts the ROS Master along with other essential components, which provides naming and registration services for the rest of the nodes in the ROS system. Tracks publishers and subscribers to topics and services. The role of the Master is to enable individual ROS nodes to locate each other. Once these nodes are located, they communicate with each other in peer-to-peer mode.
Let's run roscore!
roscore
After running above command, you should see something like this:
husarion@husarion:~$ roscore
... logging to /home/husarion/.ros/log/62d1cef8-a7c2-11ed-bebc-c1b15b9d22fc/roslaunch-husarion-167068.log
Checking log directory for disk usage. This may take a while.
Press Ctrl-C to interrupt
Done checking log file disk usage. Usage is <1GB.

started roslaunch server http://127.0.0.1:39077/
ros_comm version 1.15.14


SUMMARY
========

PARAMETERS
 * /rosdistro: noetic
 * /rosversion: 1.15.14

NODES

auto-starting new master
process[master]: started with pid [167076]
ROS_MASTER_URI=http://127.0.0.1:11311/

setting /run_id to 62d1cef8-a7c2-11ed-bebc-c1b15b9d22fc
process[rosout-1]: started with pid [167086]
started core service [/rosout]
Note that you must always have roscore running to work in ROS.
While working with ROS, there are some tools that are most useful. Now you'll learn how to check available nodes and topics. For this we use two simple tools: rosnode and rostopic.
Examining nodes - rosnode
Theory
rosnode is a command line application for examining which nodes are registered in the system and also checking their statuses.
Using the application looks as follows:
rosnode command [node_name]
Most useful command could be:
list- display list of running nodesinfo- display info regarding selected nodekill- stop selected node
Detailed info could be found in ROS documentation.
Example
Let’s begin by checking the list of existing nodes. In the new terminal type in:
rosnode list
As the output you should get:
husarion@husarion:~$ rosnode list
/rosout
This means, that you have now one node running which name is /rosout and it is responsible for handling console log mechanism.
Next you can check some info about this node:
rosnode info /rosout
And as the output you should get:
husarion@husarion:~$ rosnode info /rosout
-------------------------------------
Node [/rosout]
Publications:
 * /rosout_agg [rosgraph_msgs/Log]

Subscriptions:
 * /rosout [unknown type]

Services:
 * /rosout/set_logger_level
 * /rosout/get_loggers

contacting node http://husarion:48067/ ...
Pid: 4594
You can see here that node /rosout is publishing to topic /rosout_agg, subscribing topic /rosout and offering two services: /rosout/set_logger_level and /rosout/get_loggers.
Examining topics - rostopic
Theory
Rostopic is a command line application for examining which topics are already being published and subscribed, checking details of the selected topic or reading messages being sent in it.
Using the application looks as follows:
rostopic command [topic_name]
Most useful command could be:
list- display list of topicsinfo- display info regarding selected topicecho- display messages published in the topic
Detailed info could be found in ROS documentation.
Example
Now we will check what topics are registered in the system and receivee some info about them. In new console type in:
rostopic list
You should get in the output:
husarion@husarion:~$ rostopic list
/rosout
/rosout_agg
This means that you have two topics registered in the system. Let’s get some info about first of them:
rostopic info /rosout
As the output you should get:
husarion@husarion:~$ rostopic info /rosout
Type: rosgraph_msgs/Log

Publishers: None

Subscribers:
 * /rosout (http://husarion:33119/)
From that you can read, that via topic /rosout only messages of type rosgraph_msgs/Log can be transmitted, there is no node that publishes to this topic and node /rosout subscribes it.
Now, let's try to get similar info about the second topic:
rostopic info /rosout_agg
As the output you should get:
husarion@husarion:~$ rostopic info /rosout_agg
Type: rosgraph_msgs/Log

Publishers:
 * /rosout (http://husarion:33119/)

Subscribers: None
From that you can read, that via topic /rosout_agg only messages of type rosgraph_msgs/Log can be transmitted, node /rosout publishes to this topic and there is no node that subscribes it.
Starting camera
In this section, we will set up ROS system that is equipped with a Orbbec Astra camera and show image from camera on display. Use remote desktop to connect to your ROSbot. You can also follow the tutorial in simulation mode using Gazebo and Husarion VM mentioned before.
- ROSbot
- Gazebo simulator
Now you will run few nodes for handling Astra camera device. For this task you should use astra.launch from package astra_camera. We will explain how launch file works later.
First, you need to install this package on your ROSbot from the ros_astra_camera repository.
1. Install dependencies
sudo apt install libgflags-dev  ros-$ROS_DISTRO-image-geometry \
ros-$ROS_DISTRO-camera-info-manager ros-$ROS_DISTRO-image-transport \
ros-$ROS_DISTRO-image-publisher libgoogle-glog-dev libusb-1.0-0-dev libeigen3-dev
2. Install libuvc
git clone https://github.com/libuvc/libuvc.git
cd libuvc
mkdir -p build && cd build
cmake .. && make -j4
sudo make install
sudo ldconfig
3. Create a ROS workspace (if you don't have one)
mkdir -p ~/astra_ws/src
4. Clone code from github
 cd ~/astra_ws/src
 git clone https://github.com/orbbec/ros_astra_camera.git
5. Build the package in workspace
cd ~/astra_ws
catkin_make --pkg astra_camera -DFILTER=OFF
The DFILTER parameter set to OFF decreases the quality of depth data, which is recommended for low-performance platform like ROSbot (ARM).
6. Install udev rules
cd ~/astra_ws
source ./devel/setup.bash
roscd astra_camera
./scripts/create_udev_rules
sudo udevadm control --reload && sudo  udevadm trigger
7. Finally, you can start camera nodes:
cd ~/astra_ws
source ./devel/setup.bash
roslaunch astra_camera astra.launch
As output you should get something like below:
husarion@husarion:~/astra_ws$ roslaunch astra_camera astra.launch
... logging to /home/husarion/.ros/log/62d1cef8-a7c2-11ed-bebc-c1b15b9d22fc/roslaunch-husarion-202412.log
Checking log directory for disk usage. This may take a while.
Press Ctrl-C to interrupt
Done checking log file disk usage. Usage is <1GB.

started roslaunch server http://127.0.0.1:35951/

SUMMARY
========

PARAMETERS
 * /camera/camera/camera_name: camera
 * /camera/camera/color_depth_synchronization: False
 * /camera/camera/color_format: RGB
 * /camera/camera/color_fps: 30
 * /camera/camera/color_height: 480
 * /camera/camera/color_info_uri:
 * /camera/camera/color_width: 640
 * /camera/camera/connection_delay: 100

(...)
The source command has to be typed any time when you open new terminal. To automatically source file, whenever you open a new terminal you can add a new line in .bashrc file or type.
echo 'source ~/astra_ws/devel/setup.sh' >> ~/.bashrc
Starting Gazebo
To start using Gazebo with ROSbot model you need to download our package with model and configuration files to ROS workspace directory. It isn't recomented to run simulation on ROSbot, due to the need for computing power. Meaning and structure of workspace will be discussed later, now you will just create it with:
mkdir -p ~/sim_ws/src
cd ~/sim_ws/src
git clone -b noetic https://github.com/husarion/rosbot_ros.git
To build the ROS project. We need to install all dependencies. This can be done manually or with the rosdep tools which install all the dependencies specified in the package.xml file. Let's use rosdep.
sudo apt update
sudo apt install python3-rosdep
sudo rosdep init
rosdep update
cd ~/sim_ws
rosdep install --from-paths src --ignore-src -r -y
Now build repository and source to your terminal new instructions.
catkin_make
source devel/setup.sh
The source command has to be typed any time when you open new terminal. To automatically source file, whenever you open a new terminal you can add a new line in .bashrc file or type.
echo 'source ~/sim_ws/devel/setup.sh' >> ~/.bashrc
From now your system is ready to run Gazebo with ROSbot. To start simulator use command:
roslaunch rosbot_bringup rosbot_tutorial.launch
Task 1
Use rosnode and rostopic tools to check if new nodes or topic appeared in the system. Next find some info regarding new node and topics.
Details
Starting image_view node
Now with ros node we can see that the camera has started. To get a camera image preview, we can run another node called image_view located in the package with the same name (what the package is and how to create it will be discussed in the next chapter).
ROS has two options for running nodes: rosrun and roslaunch. Let's start with first one.
rosrun
rosrun allows you to run an executable in an arbitrary package from anywhere without having to give its full path. rosrun execute only one file and you must have roscore running for it to work properly.
To start a new node, type rosrun and two more arguments: package_name and node_type, as shown below.
rosrun package_name node_type [options]
package_name and node_type are names of package and node that you want to run. rosrun executes node in the terminal and outputs text logs to the screen.
Possible options could be:
Defining node - bind specific identifier to a node.
__name:=new_node_name
There are two underscores before the name. If you want to learn more about naming convention used by ROS see ROS documentation.
Setting parameter.
_param:=value
There is an underscore before the parameter name. To find what kind of parameters you can set, and what type of data is accepted, check documentation for exact node.
Remapping topic name - change the name of the topic subscribed or published by a node.
old_topic_name:=new_topic_name
Example
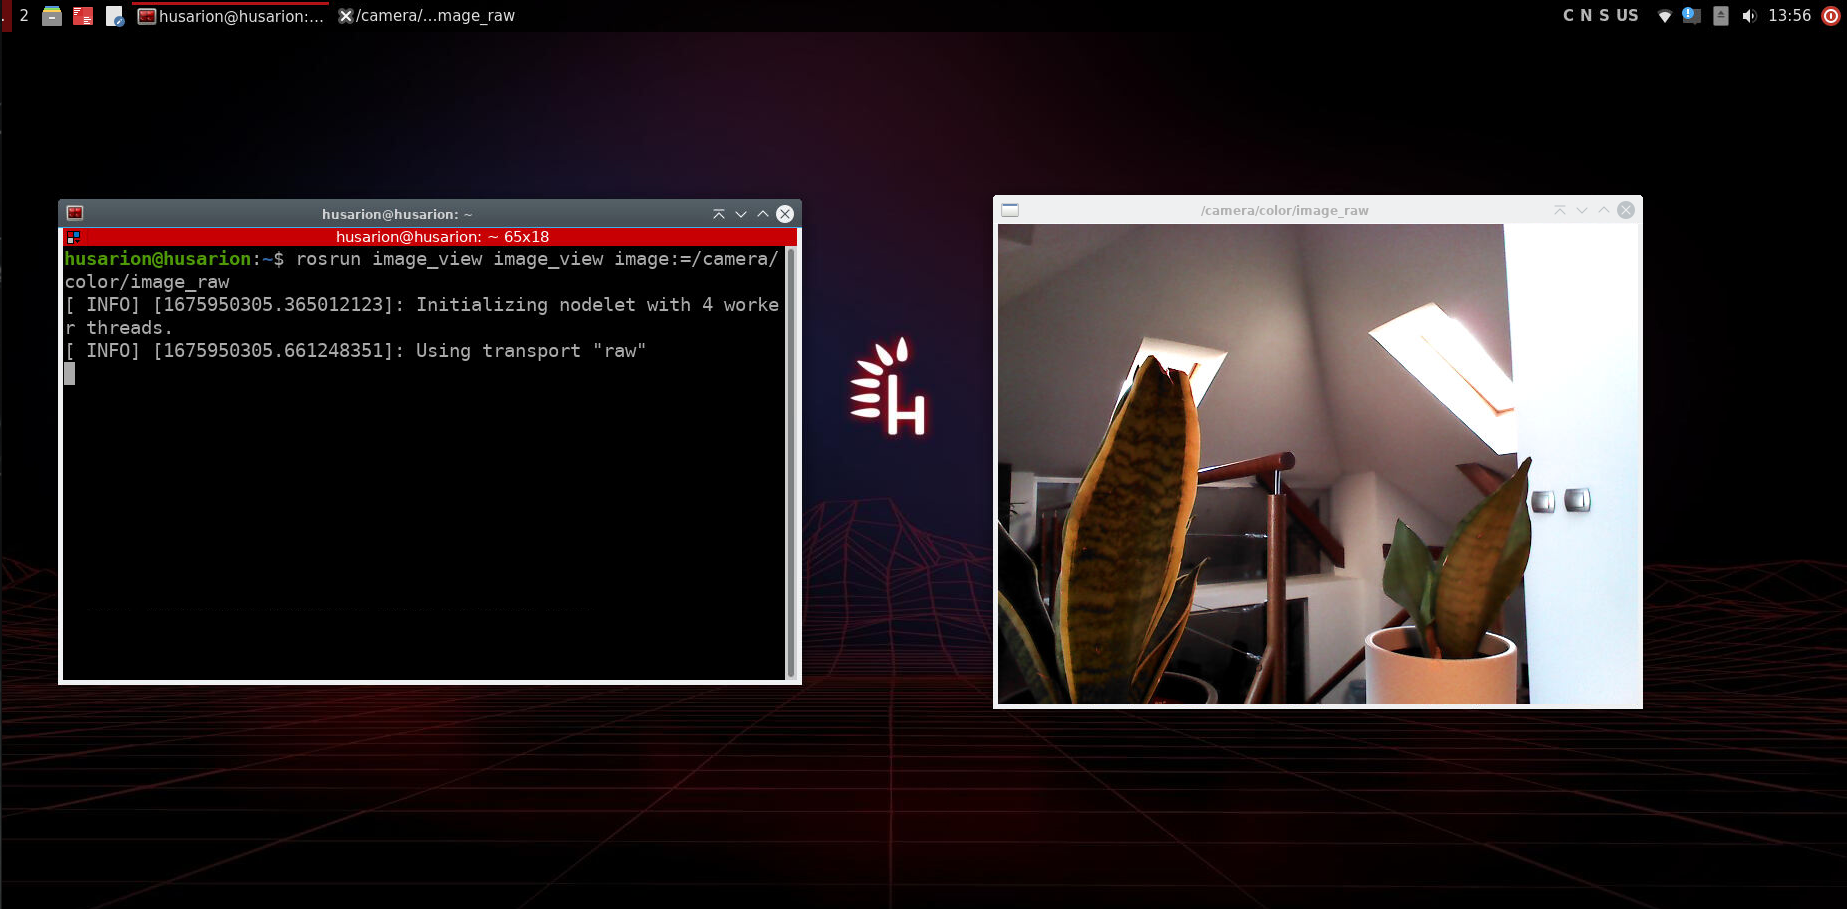
Let's run image_view node to visualizate an camera image. This node by default subscribes to topic image. You need to remap this name to topic published by the camera node. If you've done task 1, you should know that astra nodes publish a lot of topics. The one we are interested in is /camera/color/image_raw. To run image view node with remapping topic name type in the new terminal:
rosrun image_view image_view image:=/camera/color/image_raw
In case of error make sure to export DISPLAY variable.
export DISPLAY=:0
It is recommended to put this line in .bashrc so that it will be executed automatically every time you run the terminal.
echo 'export DISPLAY=:0' >> ~/.bashrc
As the output you should see the items in front of your camera.
roslaunch
roslaunch is a tool that simplifies running of multiple nodes at the same time. This tool uses .launch files which contain configuration of all nodes to be run. Usage of roslaunch is simple and similar to rosrun command. One key difference is that roslaunch automatically starts roscore if it is not already running.
To execute the launch file type:
roslaunch package file.launch
or
roslaunch file.launch
The first one is for the case when you use launch file provided with the package (you can run it from any folder). The second option is when you use standalone launch file (you must run it in the folder where the launch file is located or point the path to it).
Structure of the .launch file
File structure is defined in a markup language derived from XML and similar to HTML. Content of the .launch file is inserted between the start and end tags: <launch>...</launch> (root element). Other elements including those that define nodes should be placed between them.
To add node to launch, you need define node element:
<node pkg="package_name" type="node" name="id" required="true" output="screen">
</node>
Where fields pkg, type and name are required, and the rest are optional.
Meaning of each field:
pkg- name of the epackagetype- node to be runname- id which will be binded to the noderequired- if true, all nodes in the.launchfile will be stopped if this node stops or fails, default value is falseoutput- if value isscreennode output will be directed to screen, if value islogoutput will be directed to log file, default is log.
For each node, parameters can be set, or topics can be remapped.
For setting parameter use element param:
<param name="name" value="value"/>
Meaning of the fields:
name- name of the parametervalue- desired value of the parameter
For remapping the topic names use element remap:
<remap from="/old" to="/new"/>
Meaning of the fields:
from- old topic's nameto- desired topic's name
Example
In this section we will start the same nodes as in the previous example, but this time with use of roslaunch tool, which will automatically launch the image_view node and the real camera or Gazebo simulator depending on the use_gazebo parameter.
At first you need to create a new .launch file:
nano /home/husarion/tutorial_1.launch
and paste the following content:
<launch>

    <arg name="use_gazebo" default="false"/>

    <include unless="$(arg use_gazebo)" file="$(find astra_camera)/launch/astra.launch"/>
    <include if="$(arg use_gazebo)" file="$(find rosbot_bringup)/launch/rosbot_tutorial.launch"/>

    <node pkg="image_view" type="image_view" name="image_view">
        <remap from="/image" to="/camera/color/image_raw"/>
    </node>

</launch>
Press ctrl + o and then ctrl + x to save and quit.
Next, close all consoles and nodes that are already running, go to new terminal and run:
- ROSbot
- Gazebo simulator
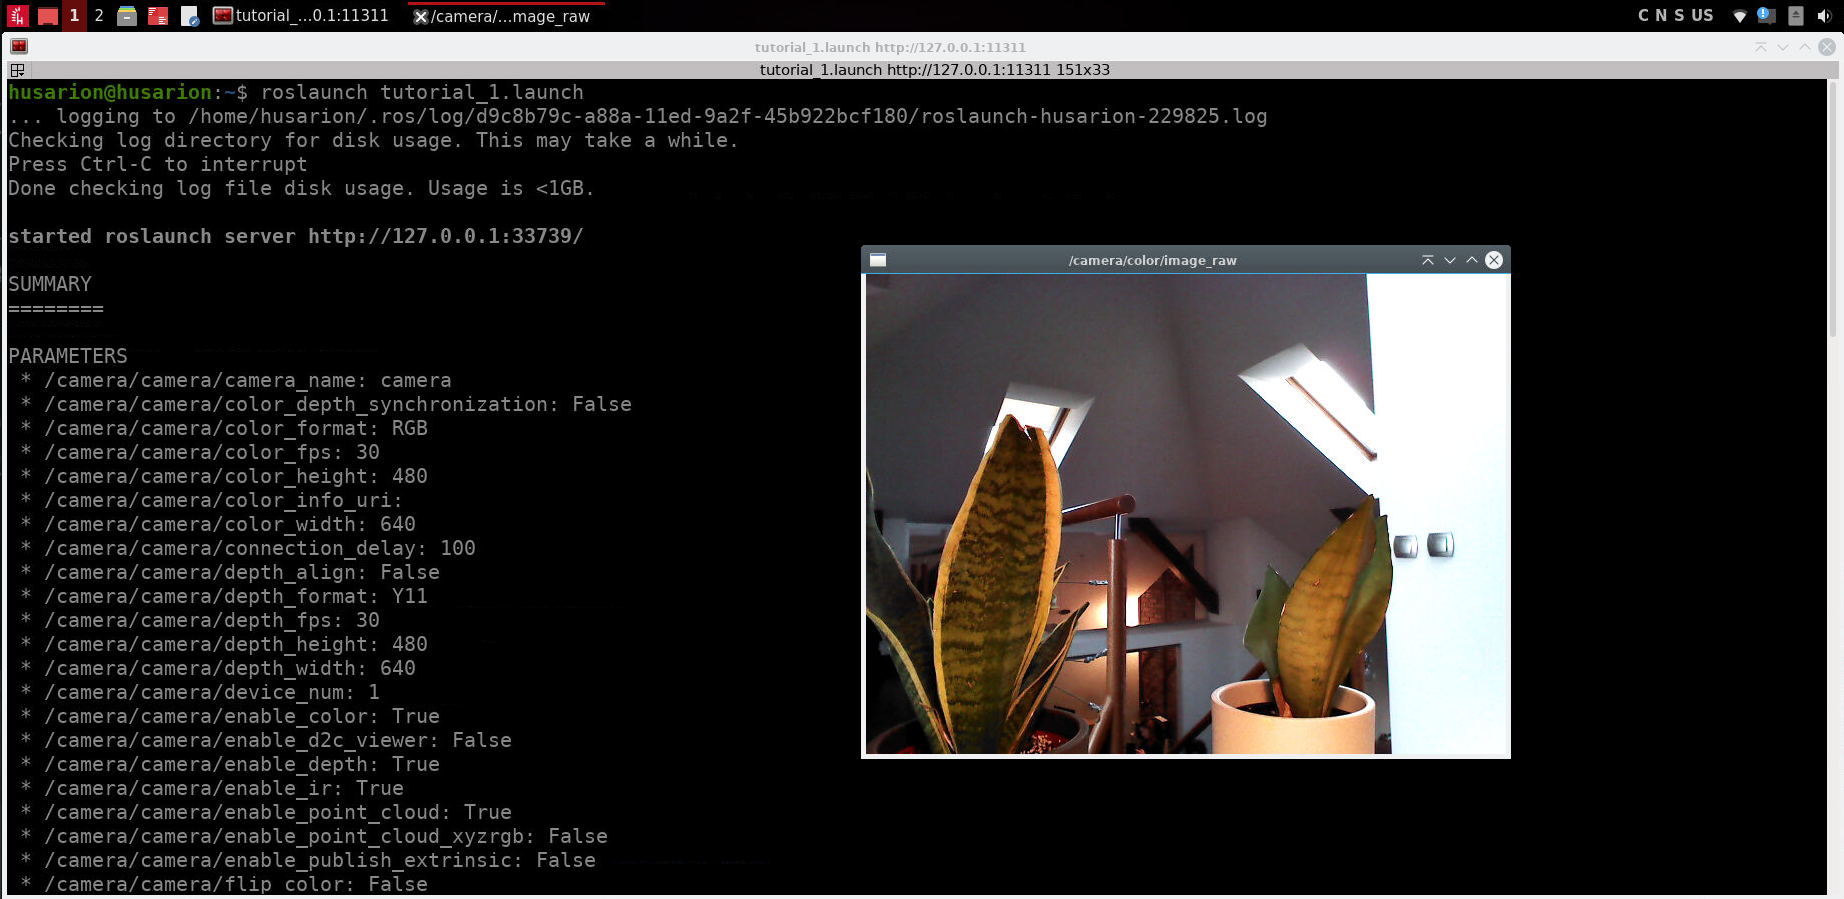
roslaunch tutorial_1.launch
roslaunch tutorial_1.launch use_gazebo:=true
You should get output like this:
Question 1
Which command automatically executes the roscore?
a) rosrun
b) roslaunch
c) rosrun & roslaunch automaticli execute roscore
d) none, you should always run roscore before starting another node.
Details
Answer
b)Examining system with rqt_graph
rqt_graph is graphical tool for visualization of data flow across different nodes in the system.. Thanks to this application, you can quickly visualize information about relationships between nodes - what topics are sent between them - and also receive the most important information about the topics such as: message type, message name and publication frequency.
Using the application looks as follows:
rqt_graph
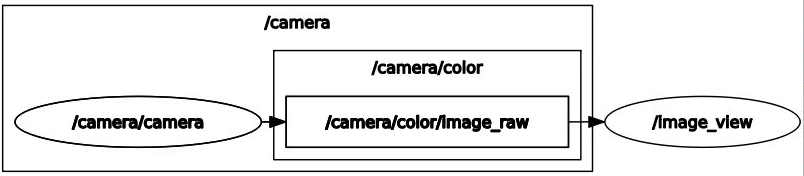
There will be no response in the terminal, but new window will appear. In upper left corner change "Nodes only" option to "Nodes/Topics (active)". You will see:
The simulated environment consists of additional nodes necessary for correct communication between Gazebo and ROS.
Interpretation of the graph is as follows:
- ovals represent nodes,
- rectangles represent topics
- big rectangles containing other elements represent namespace (shared part of the name),
- arrows pointing from node to topic represent publication to this topic
- arrows pointing from topic to node represent subscription to this topic
Summary
After completing this tutorial you should know what are the basic components and tools of ROS and what roscore command does.
You should know how to start nodes in two ways: using rosrun and roslaunch command, and how to set parameters and remap topic names in both scenarios.
You should also be able to check what nodes are running in the system and what topics are available, using the rosnode and rostopic tools.
You are also familiar with rqt_graph tool, and you know how to read information from it about the relationship between individual nodes.
by Łukasz Mitka & Jan Brzyk & Rafał Górecki, Husarion
Need help with this article or experiencing issues with software or hardware? 🤔
- Feel free to share your thoughts and questions on our Community Forum. 💬
- To contact service support, please use our dedicated Issue Form. 📝
- Alternatively, you can also contact our support team directly at: support@husarion.com. 📧