Robot Network
Chapter description
ROS allows you to run nodes on a single robot and on dozens of robots as well, as long as your devices are in the same network. You will learn here how to configure ROS to work on multiple computers. You will use this configuration to set up a system consisting of a robot and computer or two computers for Gazebo simulation version. In this tutorial you will need a computer and a robot with the same equipment as in the previous tutorials. In case you are working on Gazebo simulator, it is possible to set up a system to work on multiple computers. To do so, you need to have two computers with ROS.
You can run this tutorial on:
Repository containing the final effect after doing all the ROS Tutorials you can find here
Connecting ROS in LAN
To run ROS on multiple machines you need to connect them to the same LAN network at first. Only one device can run ROS Master. For example if you are connecting a robot and laptop, run roscore only on one of those two devices.
Let's assume we are connecting robot and laptop devices, with the following IP addresses:
- robot:
192.168.1.1(ROS Master withroscorerunning) - laptop:
192.168.1.2(ROS Slave)
You can check the address of your device with hostname -I command and verify connection using ping <SECOND_DEVICE_IP> .
Master configuration
On the robot device open the .bashrc file, then add following lines:
# Type your ROS Master IP
alias ROS_LAN='MASTER_IP=192.168.1.1
  export ROS_MASTER_URI=http://$MASTER_IP:11311
  export ROS_HOSTNAME=$MASTER_IP
  export ROS_IP=$MASTER_IP
  unset ROS_IPV6
  echo ROS_LAN master config ready!'
Slave configuration
On the laptop device open the .bashrc file, then add following lines:
# Type your ROS Master IP and Slave IP
alias ROS_LAN='MASTER_IP=192.168.1.1
  SLAVE_IP=192.168.1.2
  export ROS_MASTER_URI=http://$MASTER_IP:11311
  export ROS_HOSTNAME=$SLAVE_IP
  export ROS_IP=$SLAVE_IP
  unset ROS_IPV6
  echo ROS_LAN slave config ready!'
You have just created an alias that will be used to configure your LAN. Note that you must execute the ROS_LAN command on each device and in each newly opened terminal.
Task 1
Open new terminal type ROS_LAN run roscore on the appropriate machine (for above configuration robot is set as ROS Master) and check on your other machine if the devices are sending information to each other. Use the rosnode command to see if any nodes are visible.
-
If you make changes in the
.bashrcfile, always source it with. ~/.bashrcor open a new terminal to see changes. -
Remember that
roscoremust be running on the device with Master configuration. -
If there is an error when starting
roscoreon ROSbot, it is most likely caused by running ROS Master in the docker. To do this, you should stop running containers with the command:
docker kill $(docker ps -q)
Connecting ROS via Internet
As mentioned in the previous section you can run ROS nodes even on dozens of devices as long as they are in the same LAN network. This means that you can connect the ROS between the laptop and the robot when they are connected to the same Wi-Fi router. However, the above example will not work if the robot is connected to the Internet, e.g. via the LTE module.
You can solve the issue by using a VPN service. Standard VPNs, however, are designed for a different purpose than mobile robotics and introduce some disadvantages to your system, such as:
- Maintenance of a VPN server
- Dealing with a high latency (all traffic needs to go thought a VPN server)
- Long reconfiguration time (a.k.a. switching a Wi-Fi hotspot by your robot)
- Lack of "ROS awareness"
Fortunately there is a VPN service designed with ROS in mind - Husarnet VPN Client. Husarnet is an open source peer-to-peer VPN - that means you can connect your robots directly over the Internet, with no central VPN server for data exchange. All traffic is encrypted using ephemeral keys, and it works with ROS out of the box. Just install Husarnet Client on your laptop and robot, connect them to the same Husarnet network, by using an online dashboard and enjoy low-latency connection between your devices. :)
Husarnet is easy
- 1. Create Account
- 2. Confirm e-mail
- 3. Create a Network
- 4. Copy a Join Code
- 5. Connect Devices
Create a free account at https://app.husarnet.com
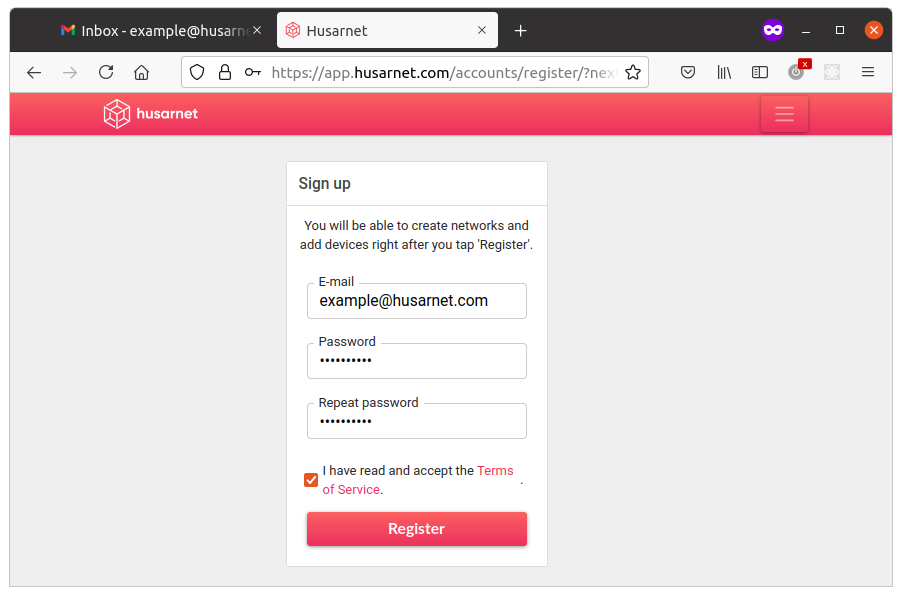
After you click "Register" you will be redirected to your account where your will see:
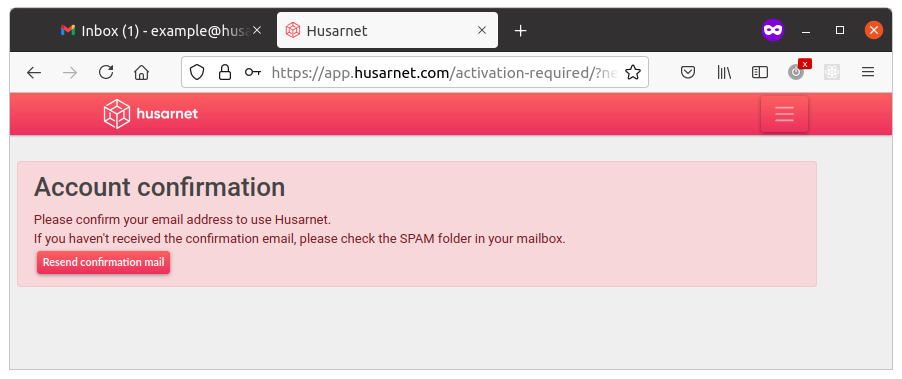
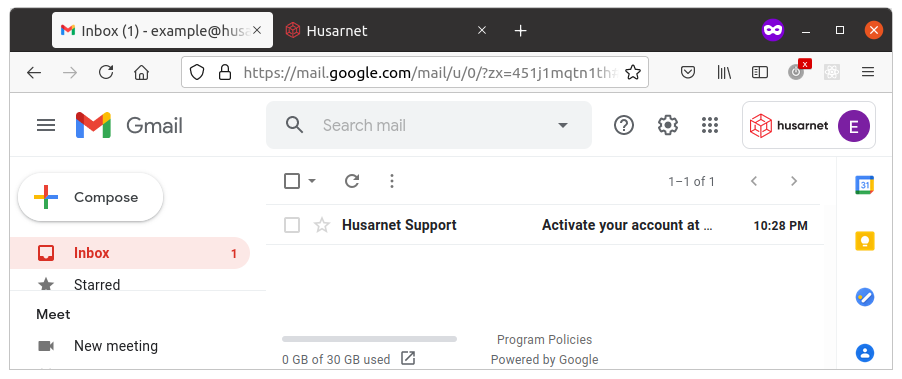
Please click the confirmation link in the e-mail you should have just received:
After you click the confirmation e-mail you will see your account with no networks:
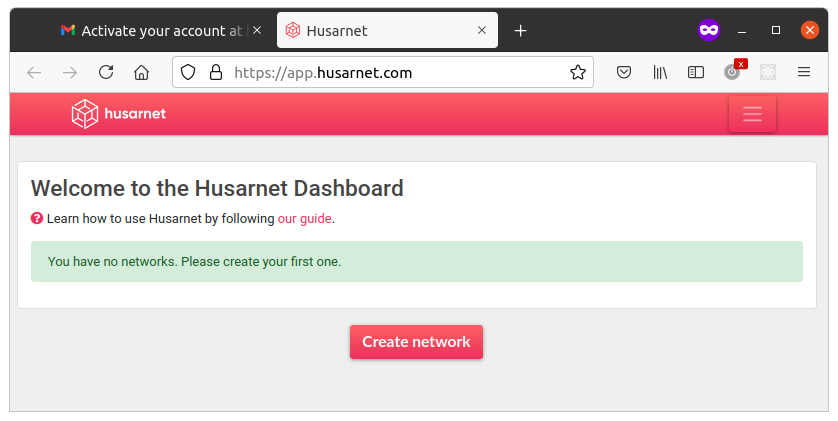
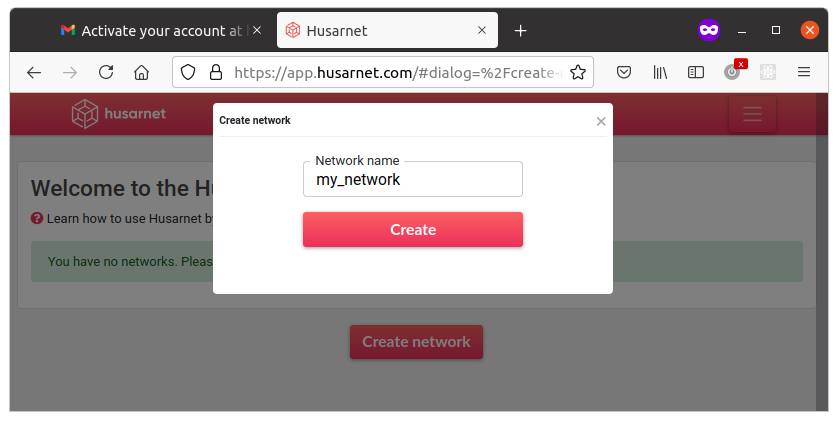
Click a [Create network] button and name your first network, eg. my_network:
After you create a new network you will see:
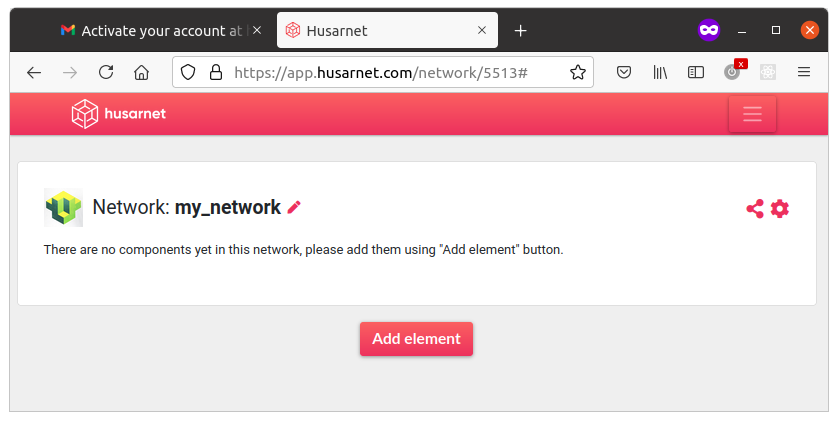
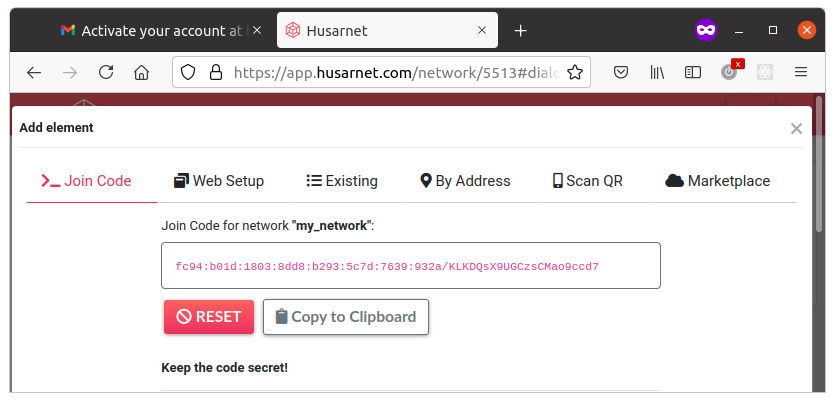
Click [Add element] button and you will see a window with your Join Code:
Finally, install the Husarnet Client on your devices and add them to your Husarnet network, by simply executing in the Linux terminal 3 commands:
## 1. Install Husarnet
curl https://install.husarnet.com/install.sh | sudo bash

## 2. Join the VPN network (in place of <your-join-code> place what you got in step 4/5)
sudo husarnet join <your-join-code> my-robot
Do the same on you laptop. Remember to change device hostname (sudo husarnet join <your-join-code> my-laptop) and that's all. Now we can reach all the devices like they were connected to the same Wi-Fi hotspot, even if they sit in different continents.
At this point you should have your robot and laptop connected to the same Husarnet network with the following Husarnet Hostnames (that can be used instead of Husarnet IPv6 address)
- robot:
my-robot(runningroscore- ROS Master) - laptop:
my-laptop
The steps to configure ROS are as follows:
Husarnet configuration
Select master
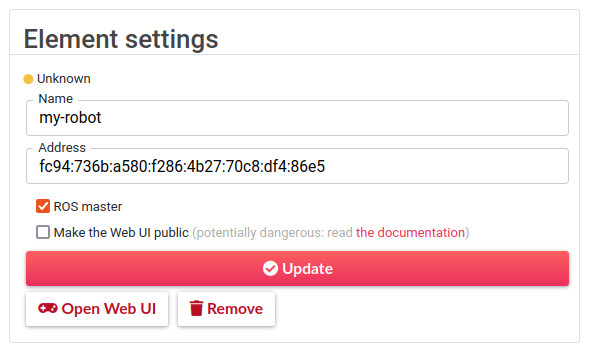
At first place go to app.husarnet and in the dashboard make sure to select the ROS master checkbox in the setting of my-robot device. It will allow you to reach my-robot device by using both my-robot and master hostname (the second one is used in our configuration)
Open the .bashrc file, and make the following configuration:
Master configuration
On the robot device open the .bashrc file, then add following lines:
alias ROS_HUSARNET='export ROS_MASTER_URI=http://master:11311
  export ROS_IPV6=on
  export ROS_HOSTNAME=master
  unset ROS_IP
  echo ROS_HUSARNET master config ready!'
Slave configuration
On the laptop device open the .bashrc file, then add following lines:
alias ROS_HUSARNET='export ROS_MASTER_URI=http://master:11311
  export ROS_HOSTNAME=my-laptop
  export ROS_IPv6=on
  echo ROS_HUSARNET slave config ready!'
my-laptop is the name we used when adding devices to Husarnet. In case of failure, you can see the available names using the cat /etc/hosts command
You have just created an alias that will be used to configure your Husarnet connection. Note that you must execute the ROS_HUSARNET command on each device and in each newly opened terminal. As you can see, thanks to the use of Husarnet, the ROS configuration operating over the Internet is almost as simple as the LAN configuration. An additional advantage of Husarion is the lack of need to know the IP addresses of the devices, only the easy-to-remember device name.
Task 2
Again run roscore on the appropriate machine that was selected as a ROS master in Husarnet dashboard and check on your other machine if the devices are sending information to each other. Use the rosnode command to see if any nodes are visible.
You can even quickly post a message from the terminal using the familiar rostopic command. For example, on one computer you can type:
rostopic pub -r 1 /msg std_msgs/String "data: 'Husarnet is awesome! :D'"
and use rostopic echo to listen for incoming topics.
More about Husarnet VPN
Husarnet is open source and free to use up to 5 devices. It works not only with ROS, but also with ROS 2, and here you can find a nice article showing how to integrate it with your ROS 2 system:
OK, at this point you should have your laptop and robot connected via LAN or Internet. Let's run some additional demo nodes to see how the connection works in practice.
Real-time video stream
In the first demo, the camera on one of the platforms will be launched. Thanks to the network connection, we can access any topic between devices. In this example, we will show you how to display the image from the camera on the second device.
- Robot & Laptop
- Two laptops
Laptop part
Select configuration and run rqt_image_view to see a real-time video from the robot (you need to select the topic name after executing the below command).
ROS_HUSARNET # or ROS_LAN
rqt_image_view
Outsourcing robot computing power
In this section, we will program a robot and a computer to outsource the robot's computing power. The node that we are going to assign to the robot is responsible for image processing. Basically, the robot publishes the stream from the camera, and object recognition is done on the laptop (using the find_object_2d node). This approach allows to increase computing power, especially when it is necessary to use computer graphics.
In this section we will also use the image transport node. The image transport node provides the ability to compress and decompress the image. This approach will allow you to speed up data transfer between devices through data reduction. Below are step-by-step instructions for the previous exercise performing calculations on two connected devices.
-
Configure the network.
-
Create new
image_recognition_rosbot.launchfile on ROSbot device. This file will run the camera withimage_transportwhich compresses the image.~/ros_ws/src/tutorial_pkg/launch/image_recognition_rosbot.launch<launch><arg name="use_gazebo" default="false" /><arg name="teach" default="false"/><!-- Gazebo --><group if="$(arg use_gazebo)"><param name="use_sim_time" value="true" /><include file="$(find rosbot_bringup)/launch/rosbot_tutorial.launch"><arg if="$(arg teach)" name="world" value="image_teaching"/><arg unless="$(arg teach)" name="world" value="image_recognition"/></include></group><!-- ROSbot --><group unless="$(arg use_gazebo)"><include file="$(find astra_camera)/launch/astra.launch"/></group><!-- Compress images --><node pkg="image_transport" type="republish" name="rgb_compress" args=" raw in:=/camera/color/image_raw compressed out:=/rgb_compressed"/></launch> -
Create second launch
image_recognition_laptop.launchfile on your computer. This file will run:image_transporton your host, which will be used to decompress the image,find_2d_objectnode known from the previous chapter, which will perform calculations on our computerThanks to this, the most time-consuming calculations should be accelerated.
~/ros_ws/src/tutorial_pkg/launch/image_recognition_laptop.launch<launch><arg name="use_gazebo" default="false" /><arg name="teach" default="false"/><!-- Decompress images --><node pkg="image_transport" type="republish" name="rgb_decompress" args=" compressed in:=/rgb_compressed raw out:=/rgb_decompressed" ><param name="compressed/mode" value="color"/></node><!-- Teleoperation - keyboard control --><node name="teleop_twist_keyboard" pkg="teleop_twist_keyboard" type="teleop_twist_keyboard.py" output="screen"/><!-- Object detection --><node pkg="find_object_2d" type="find_object_2d" name="find_object_2d"><remap from="image" to="/rgb_decompressed"/><param name="gui" value="$(arg teach)"/><param unless="$(arg teach)" name="objects_path" value="$(find tutorial_pkg)/img_data/"/></node></launch>
- ROSbot
- Gazebo simulator
-
Start launch file on your ROSbot.
husarion@husarion:~$docker compose up -d rosbot ros-masterroslaunch tutorial_pkg image_recognition_rosbot.launch -
Start launch file on your ROSbot.
husarion@husarion:~$roslaunch tutorial_pkg image_recognition_laptop.launch
-
Start launch file on your first device.
user@laptop:~$roslaunch tutorial_pkg image_recognition_rosbot.launch use_gazebo:=true -
Start launch file on your second device.
user@laptop:~$roslaunch tutorial_pkg image_recognition_laptop.launch use_gazebo:=true
Execute both launch files, open rqt_graph to see how the system is working now.
Task 3
Try to run img_follow code and check experimentally whether the smoothness of the robot's operation has been improved.
Hint
- Create workspace.
- Copy source file and edit CMakeList.txt. Remember to change
#define OBJECT_TO_FOLLOWaccording to your object id. - Build with
catkin_makecommand. - Run with
rosrun tutorial_pkg follow_img teach:=falseor add this line toimage_recognition_laptop.launch.
<node pkg="tutorial_pkg" type="img_follow" name="img_follow" output="screen">
  <arg name="teach" value="false"/>
</node>
Question 1
To connect multiple devices communicating with each other in the ROS application ROS Master must be:
a) running on every device
b) running only on so-called 'master' device
c) ROS master will automatically boot on the correct device provided you have a properly configured .bashrc file
d) it is not possible to connect multiple devices together in ROS
Details
Answer
b)Summary
That's all, you don't have to worry about anything more than properly configuration of .bashrc rest stays the same. Every time when you have 2 or more devices the pattern is the same. ROS takes care of all data exchange. That is really simple, isn't it? After completing this tutorial, you should be able to configure your devices to communicate with multiple devices. You should also know how to send and read information remotely, allowing you to control a robot. You've also seen the image_transport node for image compression.
by Łukasz Mitka, Rafał Górecki, Adam Krawczyk & Dominik Nowak, Husarion
Need help with this article or experiencing issues with software or hardware? 🤔
- Feel free to share your thoughts and questions on our Community Forum. 💬
- To contact service support, please use our dedicated Issue Form. 📝
- Alternatively, you can also contact our support team directly at: support@husarion.com. 📧