ROSbot 3 / 3 PRO - quick start
ROSbot 3 / ROSbot 3 PRO is an indoor mobile robot platform built for research and education. It's powered by a Raspberry Pi 5, with a 1.5mm alloy chassis. The ROSbot 3 features a SLAMTEC C1 LIDAR and Luxonis OAK-D Lite camera, while the ROSbot 3 PRO is equipped with an enhanced SLAMTEC S2 LIDAR and OAK-D Pro camera for improved perception and SLAM.
The open-source ROS 2 drivers are pre-installed and configured, so the robot works out of the box. You can drive it through a web interface or a gamepad without writing any code. Four DC motors, each with independent quadrature encoders, give ROSbot 3 precise motion control for navigating complex indoor environments.
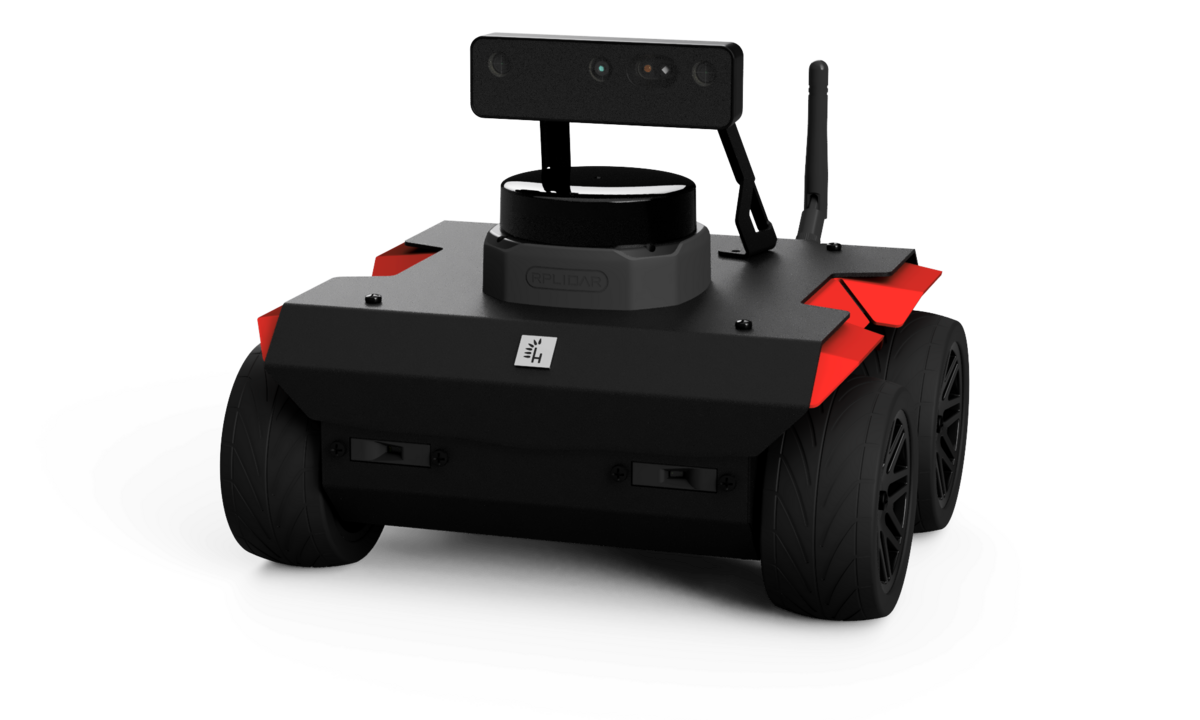
This guide takes you from box to driving around in about 15-20 minutes:
- Unbox & power up: batteries, antenna, and you're ready to go.
- Access the robot: HDMI, Ethernet, or Wi-Fi, whichever's easiest for you.
- Get it on your Wi-Fi: a one-time wizard.
- Drive it: from your phone, a gamepad, or the terminal.
This guide describes Husarion OS, the image shipped on ROSbot 3 / 3 PRO units. ROSbot 3 and ROSbot XL now run from the same unified image and driver snap (rosbot); the robot variant is picked once, during production. It reflects image 2026.09.30; check what you're running from the banner shown right after you log in (the Version: line), or run:
echo $IMAGE_NAME
Most of this guide applies regardless of version; a few steps that changed recently are marked ⚠️ since 2026.09.30. To pick up the latest image, see OS reinstallation.
Preparation
Unboxing
What's in the box:
- carrying case
- ROSbot 3 with 3D camera and LiDAR already assembled
- Wi-Fi 2.4GHz / 5GHz antenna
- 3x 18650 Li-Ion rechargeable batteries
- a universal charger with power adapter
- charging cable
- microSD card with the OS system image
- USB to Ethernet adapter
Additionally, to launch the robot for the first time, you will need:
- a screwdriver
- USB-HDMI cable, mouse and keyboard OR Ethernet cable
Connect Batteries and Antenna
Your ROSbot is assembled, but to get it ready to work, you need to provide a power supply and attach the antenna.
To mount the batteries:
- turn ROSbot upside down
- unscrew the battery cover mounted with two screws
- remove the battery cover
- place the batteries accordingly to the symbols, keeping the black strip under the batteries
- place the battery cover back in position and mount it with screws.
To charge the batteries, follow this guide.
To attach the antenna, simply screw it to the SMA antenna connector on the rear panel of ROSbot.
Access the Robot
For first-time setup, we recommend the HDMI tab: plug in a display, mouse, and keyboard. Once ROSbot is on your LAN, Ethernet/Wi-Fi (LAN) is the easiest way back in. Whichever way you connect, the login is husarion / husarion.
- HDMI
- Ethernet (static IP)
- Ethernet/Wi-Fi (LAN)
- Husarnet VPN
ROSbot is basically a computer running Ubuntu, so let's open it like a standard PC.
- Plug in a display with HDMI, mouse and keyboard into the USB port on the rear panel of the ROSbot.
- Turn on the robot and wait until it boots.
No network yet? Plug straight into a laptop and reach ROSbot at a fixed address; the ROSbot set includes a USB-Ethernet adapter for this.
-
Turn on the robot and wait until it boots.
-
Plug in the Ethernet adapter (included in a set) to a USB port on the rear panel of the ROSbot.
-
Plug one end of the Ethernet cable into your computer and another one to the adapter.
-
Connect over SSH:
user@mylaptop:/home/user$ssh husarion@192.168.77.2
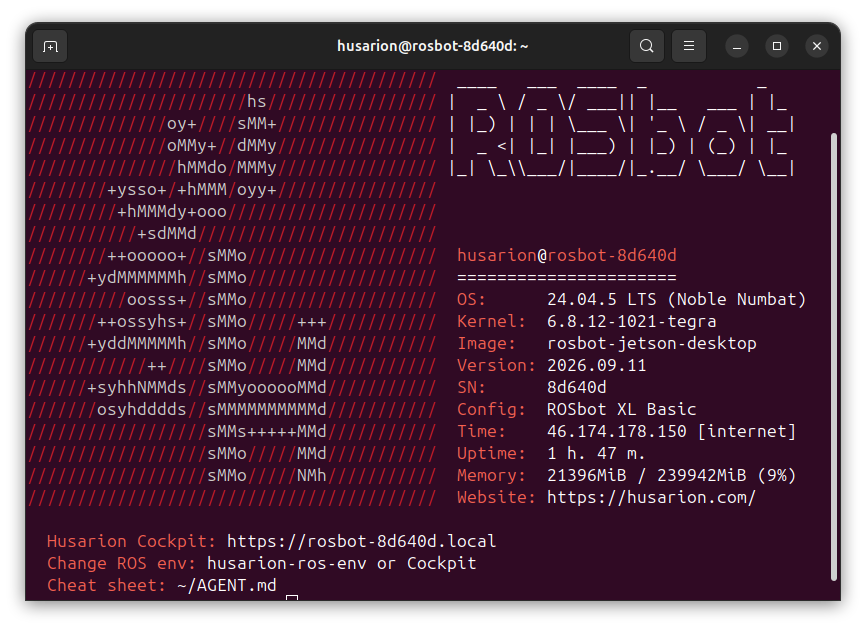
Once ROSbot is on your network (over Wi-Fi, see Wi-Fi Setup below, or with its Ethernet port plugged into your router or switch), reach it by SSH using its IPv4 address or its mDNS hostname:
ssh husarion@<ROSBOT_IP>
# or
ssh husarion@rosbot-<SERIAL_NUMBER>.local
.local?.local (mDNS) works out of the box on macOS and Linux, and on Windows once Bonjour/mDNS support is installed. If it doesn't resolve on your network (e.g. a guest Wi-Fi that isolates clients), use the IP address instead. Check your router's DHCP client list, or the address shown when you first connected to Wi-Fi.
Need to reach the robot from outside your LAN? Set up Husarnet VPN: see the Husarnet VPN tab above, or the full VPN Access guide.
If LAN access is not enough, you can reach the ROSbot over the Internet using Husarnet VPN. It's already installed on the robot, so you only need to join ROSbot and your own computer to the same network.
Get a Join Code for your Husarnet network (see Find the Join Code), then join the robot to it:
sudo husarnet join <JOIN_CODE> rosbot
Install Husarnet on your own computer and join it to the same network:
curl -s https://install.husarnet.com/install.sh | sudo bash
sudo husarnet join <JOIN_CODE> mylaptop
From then on, ssh husarion@rosbot works from anywhere. Full walkthrough: VPN Access.
Wi-Fi Setup
It's worth connecting ROSbot to Wi-Fi at this point. Once it's online, you can leave the cable behind, and the rest of this guide (Cockpit, driving over the network, autonomous navigation) just works.
Right after logging in, you'll see a prompt asking to connect to Wi-Fi. Follow it:
- Confirm you want to connect (choose Yes).
- Wait a few seconds while it scans for nearby networks.
- Pick your network from the list and enter the password if asked.
- Once connected, the wizard shows the robot's IP address:
Operating the Robot
Start Driver
By default the robot driver is automatically launched during system boot. However, you can manually enable/disable the rosbot service.
sudo rosbot.start
# sudo rosbot.stop # to disable
Robot Control
The robot is controlled by sending a cmd_vel topic with information about the desired speed. This can be done in many ways, including:
- WebUI
- Teleop
- Gamepad
- Autonomous (Nav2)
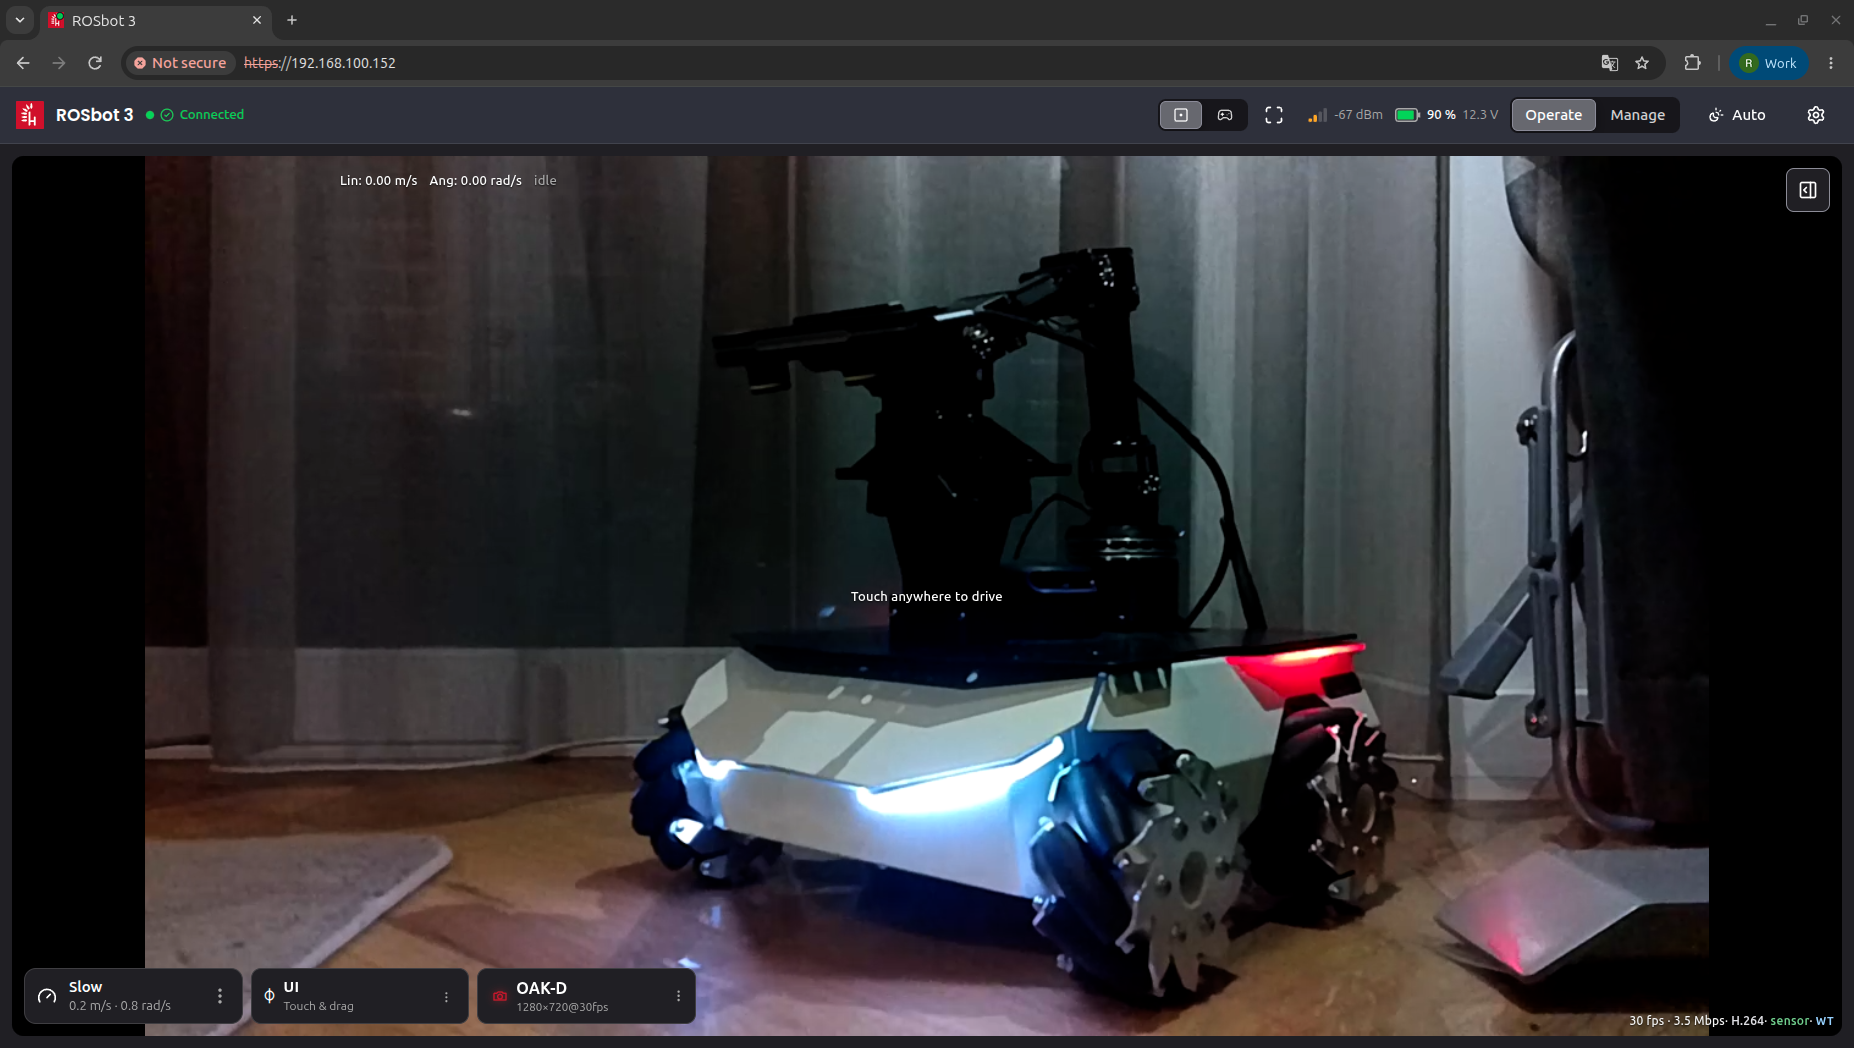
The web-based user interface is Husarion Cockpit, ready to use out-of-the-box. Open the following URL in your web browser:
http://<ROSBOT_IP> or http://rosbot-<SERIAL_NUMBER>.local
Start with http://. It opens straight away, with no browser warnings.
The same Cockpit also works over https:// (for example https://rosbot-<SERIAL_NUMBER>.local). Over https, your computer's graphics hardware can decode the camera video, so the robot sends a much lighter video stream and uses less of your Wi-Fi. The downside is that the robot signs its own security certificate, so your browser shows a security warning that you have to accept to continue. The warning comes back from time to time, usually after a few hours.
Which one to use:
- http: everyday use, the quickest way in.
- https: when the camera picture is choppy or the Wi-Fi is weak or busy, or when Cockpit shows a link to https instead of the camera picture (some camera modes only work over https).
If logging in over https suddenly stops working, switch back to the http address.
Log in with the default credentials husarion / husarion.
Manual ROSbot driving with teleop_twist_keyboard
ros2 run teleop_twist_keyboard teleop_twist_keyboard --ros-args -p stamped:=true
After running the command, you will see the usage instruction:
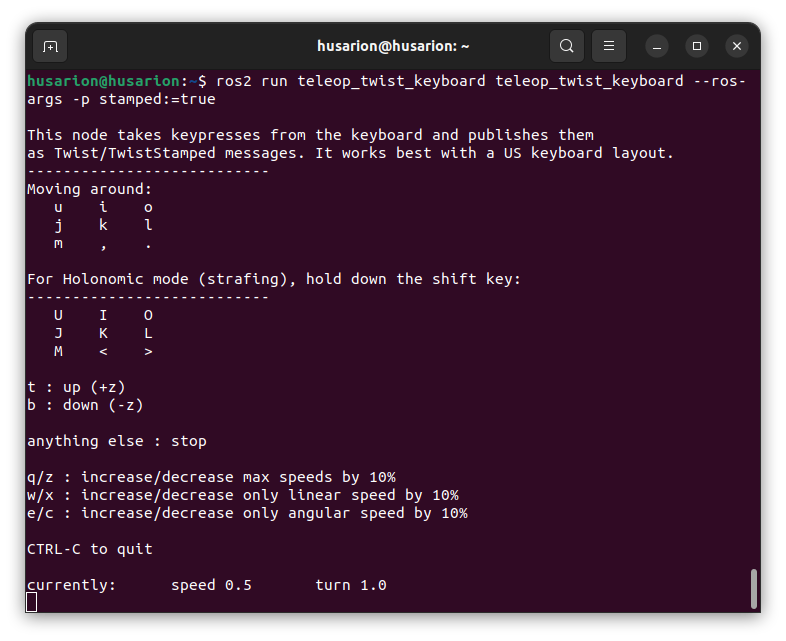
You can launch the teleop node even simpler, directly from the rosbot snap:
rosbot.teleop
You can control ROSbot without coding by using a Logitech F710 gamepad (not included in the standard set).
To get started:
- Connect the USB dongle to a USB-A port on the ROSbot’s rear panel.
- Set the mode switch on the gamepad to X.
- Hold down the LB button (dead man switch) and use the control sticks to drive the robot.
Autonomous mapping and navigation (Nav2 + SLAM Toolbox) are built into the rosbot snap, with no separate install:
sudo rosbot.navigation-start
sudo rosbot.navigation-goal 2.0 0.5 # if the path is possible, the robot will drive 2m forward and 0.5m to the left
# sudo rosbot.navigation-stop # to disable
Robot Management
Husarion Cockpit's Manage tab is the primary way to change the robot's ROS 2 configuration (domain ID, namespace, RMW implementation, DDS/Zenoh profiles) from the same address as above.
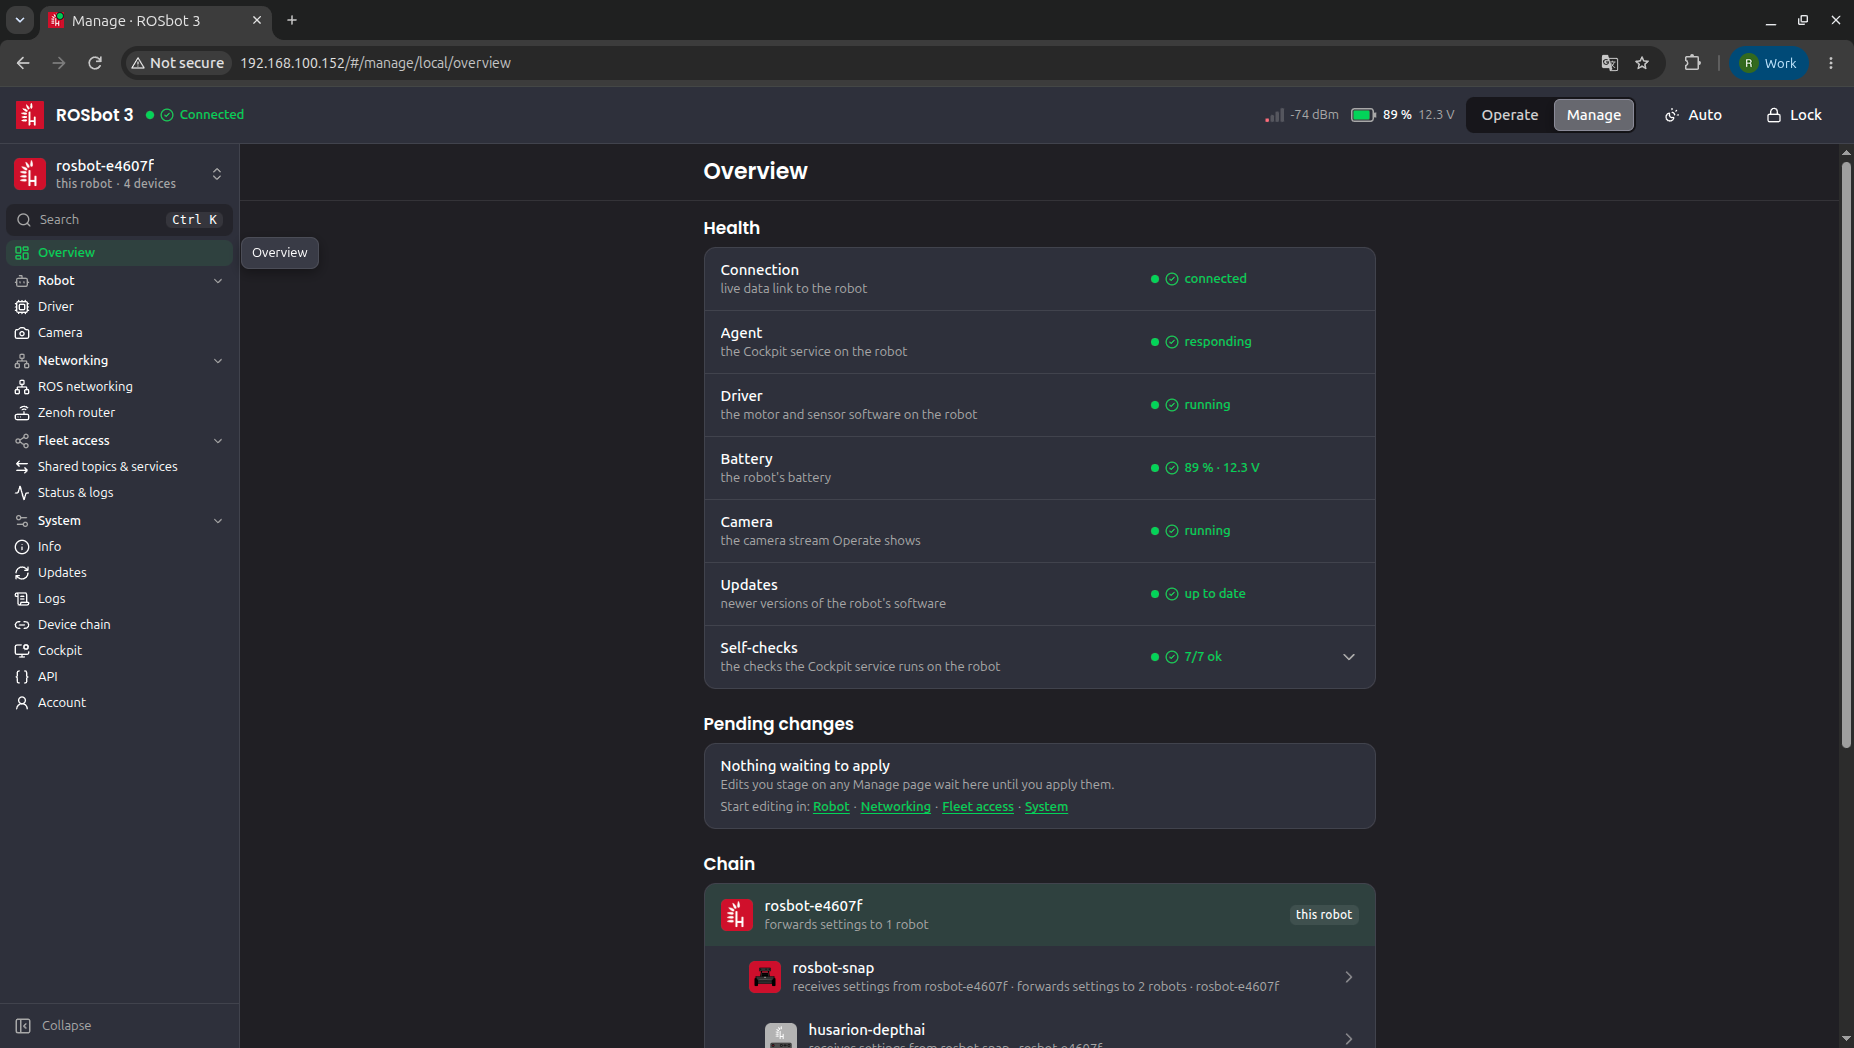
ROS 2 Interface
The ROS 2 driver is already launched on the system. You can find the available ROS 2 topics with:
ros2 topic list
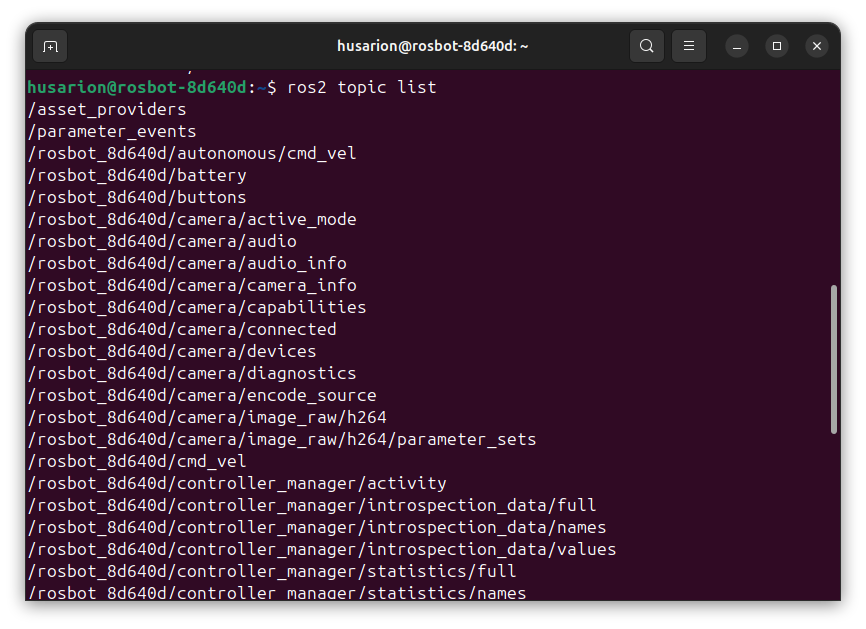
By default, all topics live under a per-unit namespace /rosbot_<SERIAL_NUMBER>/... rather than flat at the root; this keeps multiple robots on the same network from colliding. Change it from Robot Management above.
For more info about topics, check the ROS 2 API. Want to modify the driver itself? The source is on GitHub: rosbot_ros.
Helpful Resources
ROS 2 Tutorials
Our ROS 2 tutorials were initially created for ROSbot 2 that had Orbbec Astra camera instead of Luxonis OAK-D like in ROSbot 3. ROS 2 camera topics will have different names
ROS 2 (Robot Operating System 2) provides libraries and tools to help software developers create robotic applications. We've put together a series of ROS 2 Tutorials dedicated for this platform that serve as a practical introduction to ROS 2. You can run them on any of our ROSbots, either on a physical robot or in the simulation environment. These step-by-step guides are tailored to accommodate both beginners embarking on their ROS 2 journey and experienced users looking to deepen their understanding of robot navigation.
Snap Cheatsheet
ROSbot operates on Ubuntu 24.04 with ROS 2 Jazzy preinstalled. Three snaps come preinstalled: rosbot (the driver), husarion-depthai (camera), and husarion-rplidar (LiDAR); browse them on the Snapcraft Store. Husarion Cockpit is not a snap: it's a Docker Compose bundle at /opt/husarion-rosbot/, managed with docker compose rather than snap.
Stopping a sensor's snap frees up the CPU and USB bandwidth it was using, which helps if you don't need that sensor right now:
sudo husarion-depthai.stop
sudo husarion-rplidar.stop
# ...and to bring them back:
sudo husarion-depthai.start
sudo husarion-rplidar.start
The driver itself works the same way (sudo rosbot.start / sudo rosbot.stop, see Start Driver above).