ROSDS Virtual robot controlled from your local PC
NOTE: You can run the following project only in a virtual environment do it, by clicking on the ROSDS button

About
In this ROSject we will show you how to control a virtual robot operating in the ROS Development Studio environment from a level of your laptop running ROS.

To control a robot the Route Admin Planner provided by Husarion is used. The Route Admin Panel is a web user interface for managing routes of ROS based mobile robots.
It allows to:
- Define destination points
- Save robot position as destination point
- Send destination point to move_base
- Upload custom map
- Set a sequence of destination points
The Route Admin Panel is built as a Node.js application. On one side it is interfacing with ROS topics, while on another side it presents a frontend for managing robot destinations.
In this project you will find a simulation of ROSbot 2.0 controlled by Route Admin Panel. With it you will be able to control virtual robot (not only ROSbot). If you can make it work in this ROSject, you will definitely be able to do it in the real robot.
Establish the connection from your PC side
You need to have connection from ROS Development Studio to your computer for doing it follow instructions
On your computer open new terminal and paste following commands:
git clone https://bitbucket.org/theconstructcore/rosds_real_robot_connection.git
cd rosds_real_robot_connection
sudo ./realrobot_setup.sh
sudo reboot
Once your computer finished rebooting open new terminal and type:
whoami - It will give you the device user name. Remember this result we will use it later.
Open web browser tab for setting up connection.
Type in the URL: localhost:3000
Now you have to click on Turn ON. This will generate the Robot URL that you need to make the connection in ROSDS.

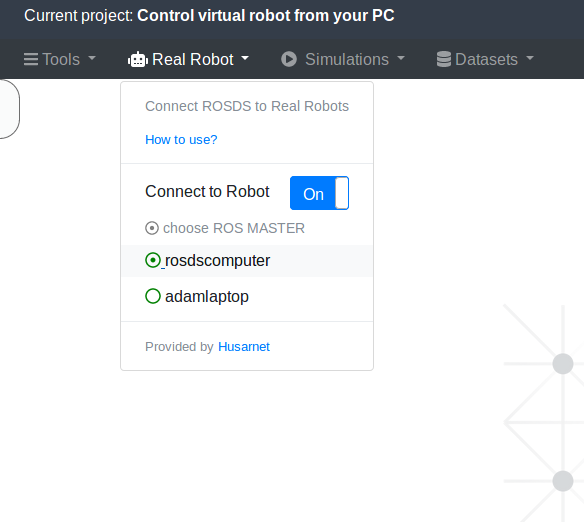
Establish the connection from ROSDS side
Open ROSject if you don't have, do it using button on the top of the site.
You have to click the RealRobot tab -> Connect to Robot -> ON, and after a few minutes, you will be greeted with the configuration window
Once window pop up place in the corresponding form the PC URL (generated in previous step) and the Robot Name (computer name).

Test that everything is working
On your computer open terminal and test connection using ping6 command:
ping6 rosdscomputer
If it's working you can launch simulation.
Launch simulation
In the RealRobot tab assign rosmaster to rosdscomputer.
To start simulation, go to "Simulations" menu, then choose Choose launch file... -> rosbot_launch -> route_admin_planner.launch .

After simulation starts properly open new tap in web browser and paste following url:
http://rosdscomputer:8000/
You should see webui to add new goal click Add target chose point on map, name point and click >>. To make robot follow route add more points and click set route

NOTE: If you can't see any map add target close to robot to move it a little.
Other devices
You can run this to control real robot, to do, so follow this tutorial:
by Adam Krawczyk, Husarion
Need help with this article or experiencing issues with software or hardware? 🤔
- Feel free to share your thoughts and questions on our Community Forum. 💬
- To contact service support, please use our dedicated Issue Form. 📝
- Alternatively, you can also contact our support team directly at: support@husarion.com. 📧