RICOH - Theta Z1
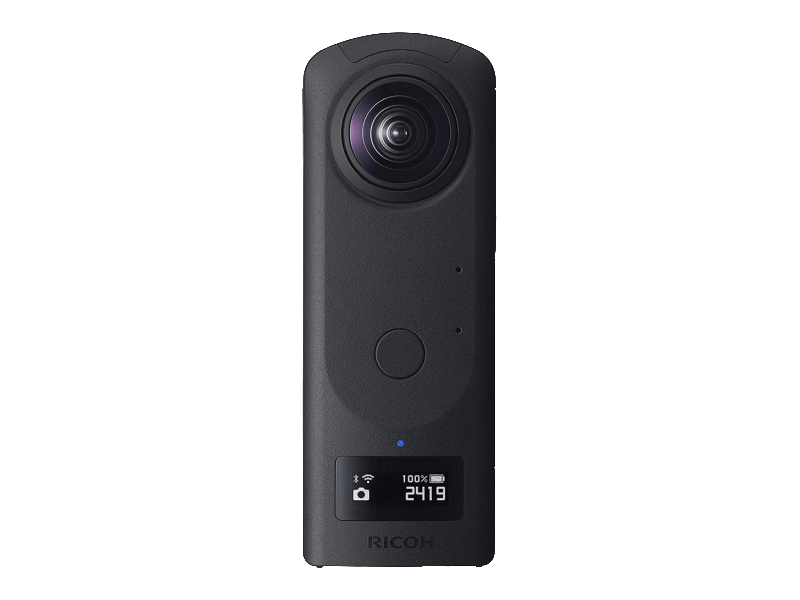
Theta Z1 51 GB by RICOH is the highest quality 360° camera. This device allows you to capture natural-looking 360° images because it captures them at a resolution of 6720 x 3360 and combines them with extreme accuracy. The camera is great at reducing noise, even at night and in dimly lit rooms. The device also reduces ghosting, flare and edge tint. The aperture mechanism increases the available resolution and reduces the amount of light when needed.
This article is based on an official official tutorial by RICOH.
Getting started
To run the device, you must meet certain requirements listed below:
Software
- v4l2loopback (installation below)
- libuvc-theta (installation below)
Hardware
- Connectivity: USB 3.0
v4l2loopback
- First download, build and install v4l2loopback. It will allow you to create virtual loopback camera interfaces.
mkdir -p ~/ros_ws/src/thera_z1
cd ~/ros_ws/src/thera_z1/
git clone https://github.com/umlaeute/v4l2loopback.git
cd v4l2loopback/
make && sudo make install
sudo depmod -a
- After successful installation run:
ls /dev | grep video
- You should see your video interfaces.
If you don't have any other cameras installed the output should be empty. To start loopback interface and find it's ID run:
sudo modprobe v4l2loopback
ls /dev | grep video
New /dev/video device should appear. It's your loopback interface you will later assign to your THETA Z1.
libuvc-theta
- Install required packages:
sudo apt-get install libgstreamer1.0-0 \
     gstreamer1.0-plugins-base \
     gstreamer1.0-plugins-good \
     gstreamer1.0-plugins-bad \
     gstreamer1.0-plugins-ugly \
     gstreamer1.0-libav \
     gstreamer1.0-doc \
     gstreamer1.0-tools \
     gstreamer1.0-x \
     gstreamer1.0-alsa \
     gstreamer1.0-gl \
     gstreamer1.0-gtk3 \
     gstreamer1.0-qt5 \
     gstreamer1.0-pulseaudio \
     libgstreamer-plugins-base1.0-dev \
     libjpeg-dev
- Build and install libuvc-theta:
cd ~/ros_ws/src/thera_z1
git clone https://github.com/ricohapi/libuvc-theta.git
cd libuvc-theta
mkdir build
cd build
cmake ..
make
sudo make install
- Now you have to download THETA Z1 specific dependencies and configure them to match your platform.
cd ~/ros_ws/src/thera_z1
git clone https://github.com/ricohapi/libuvc-theta-sample.git
cd libuvc-theta-sample/gst
- Replace 190 line In file
gst_viewer.c:
// Replace this line
"v4l2sink device=/dev/video1 sync=false";
// With this one
"v4l2sink device=/dev/video0 quos=false sync=false";
If your device has more than one camera you have to replace /dev/video0 with matching interface number. You can check it by running:
ls /dev | grep video
Most likely loopback interface will be the last one.
- After you make changes in file you can now build the code by running:
make
Configuration of gst_viewer.c the file shown in this tutorial is for x86_64 bit architecture. Other architectures require different changes. For more information follow this page.
Demo
In this demonstration, we'll guide you through utilizing the RICOH Z1 camera in ROS and walk you through the process of running the OpenCV face detection algorithm. Demo based on face detection repository.
Demo tested on a computer with ROS Noetic distribution on Ubuntu 20.
Start guide
- Connect your camera via USB turn it on and select LIVE mode and run:
./gst_viewer
Every time you connect the camera you have to set it to LIVE mode, start loopback interface and assign camera to loopback interface.
Starting and assigning loopback can be done with those commands:
sudo modprobe v4l2loopback
cd ~/ros_ws/src/thera_z1/libuvc-theta-sample/gst
./gst_loopback
Now you will be able to access your THETA Z1 with any software.
- Use cv_camera and with ROS.
Download and build cv_camera
cd ~/ros_ws/src/
git clone https://github.com/OTL/cv_camera.git
cd ..
catkin_make --only-pkg-with-deps cv_camera
- Run ROS.
a) Run roscore.
roscore
b) capture image.
# device_id is /dev/video number
rosparam set cv_camera/device_id 0
rosrun cv_camera cv_camera_node
c) Preview from camera (window might be too wide to fit in on your screen so probably you will see only part of camera's field of view).
rosrun image_view image_view image:=/cv_camera/image_raw
- Run face detector.
cd ~/ros_ws/src
git clone https://github.com/adarsh1021/facedetection.git
cd facedetection
python3 detect_face_video.py
If this script won't run change line 7 to match /dev/video interface number.
ROS API
The full API of the robot can be found in the official documentation of the device.
Summary
The Theta Z1 360° camera designed for capturing immersive panoramic content. Thanks to the ability to monitor the environment in 360°, the use of one camera allows you to monitor the entire environment, which, depending on the project, can simplify and reduce project costs.
Need help with this article or experiencing issues with software or hardware? 🤔
- Feel free to share your thoughts and questions on our Community Forum. 💬
- To contact service support, please use our dedicated Issue Form. 📝
- Alternatively, you can also contact our support team directly at: support@husarion.com. 📧