Network Configuration
By default, the robots come with RUTX 18.3 firmware pre-installed and configured. Some steps may differ if a newer firmware version is used. If you encounter any issues, refer to the manufacturer's manual.
Network Setup
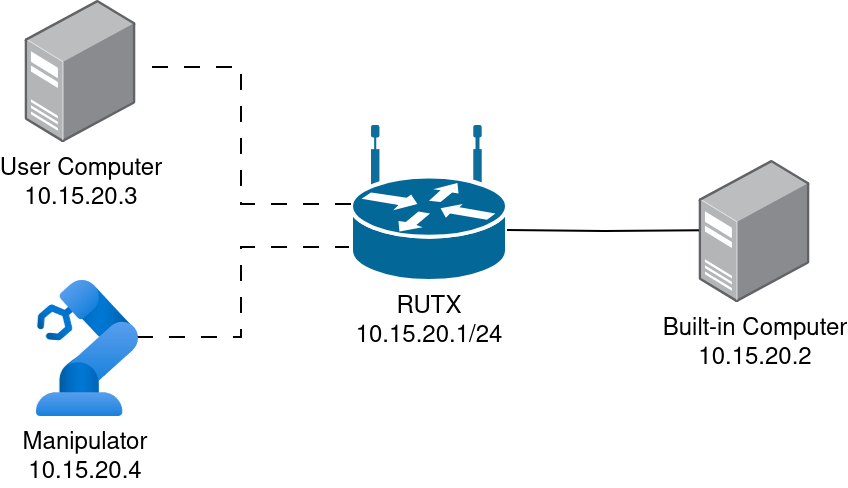
By default the network mask is 255.255.255.0 and the devices' IPs begin with 10.15.20.XX. The default static IPs are:
- RUTX11
10.15.20.1- an internal router with an access point and a DHCP server, - Built-in Computer
10.15.20.2- a SBC with Husarion UGV's driver, - Additional: User Computer
10.15.20.3- look at Computer (PC), - Additional: a manipulator
10.15.20.4- look at Manipulators (MAN).
If your devices have a different address set, you will find instructions below in the Static IP Setup section.
Access to Router WebUI
The robot can be configured through the router’s WebUI. To access it, follow these steps:
- Connect to Wi-Fi
- The SSID uses the format
<robot-name>_<serial-number>for the 2.4 GHz band and<robot-name>_5G_<serial-number>for the 5 GHz band (e.g.,Panther_r2d2for 2.4 GHz,Panther_5G_r2d2for 5 GHz). - The default password is
husarion.
- Access the WebUI
- Open a web browser and go to http://10.15.20.1.
- Log in using the following credentials:
- Username:
admin - Password:
Husarion1!(orHusarion1for older robots)
- Username:
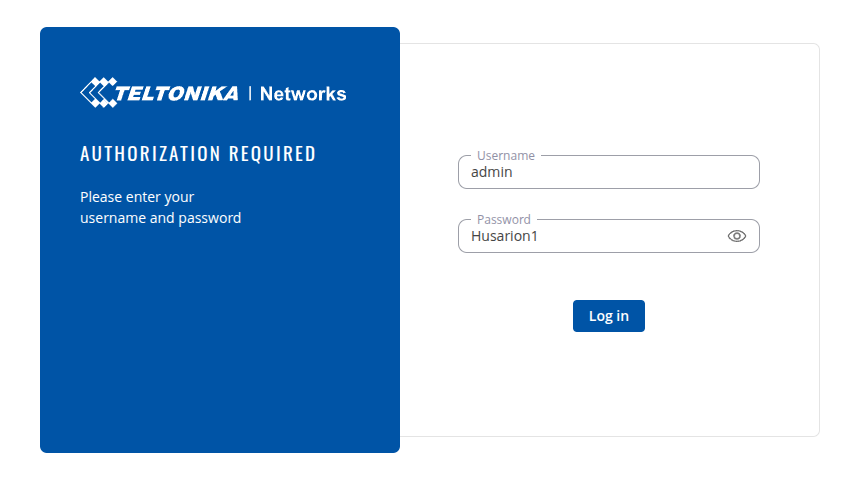
For safety reasons it is strongly advised to change the default password!
Internet Connection
There are two ways to provide an Internet connection for both the Built-in Computer and the User Computer. You can connect the RUTX11 to an existing Wi-Fi network with Internet access, or you can use a SIM card with LTE connectivity.
Wi-Fi Access Point
The robot's router allows it to be configured as a Wi-Fi client. This configuration allows the router to connect to an external network and share internet access with all devices on the local area network (LAN). To connect to a Wi-Fi network:
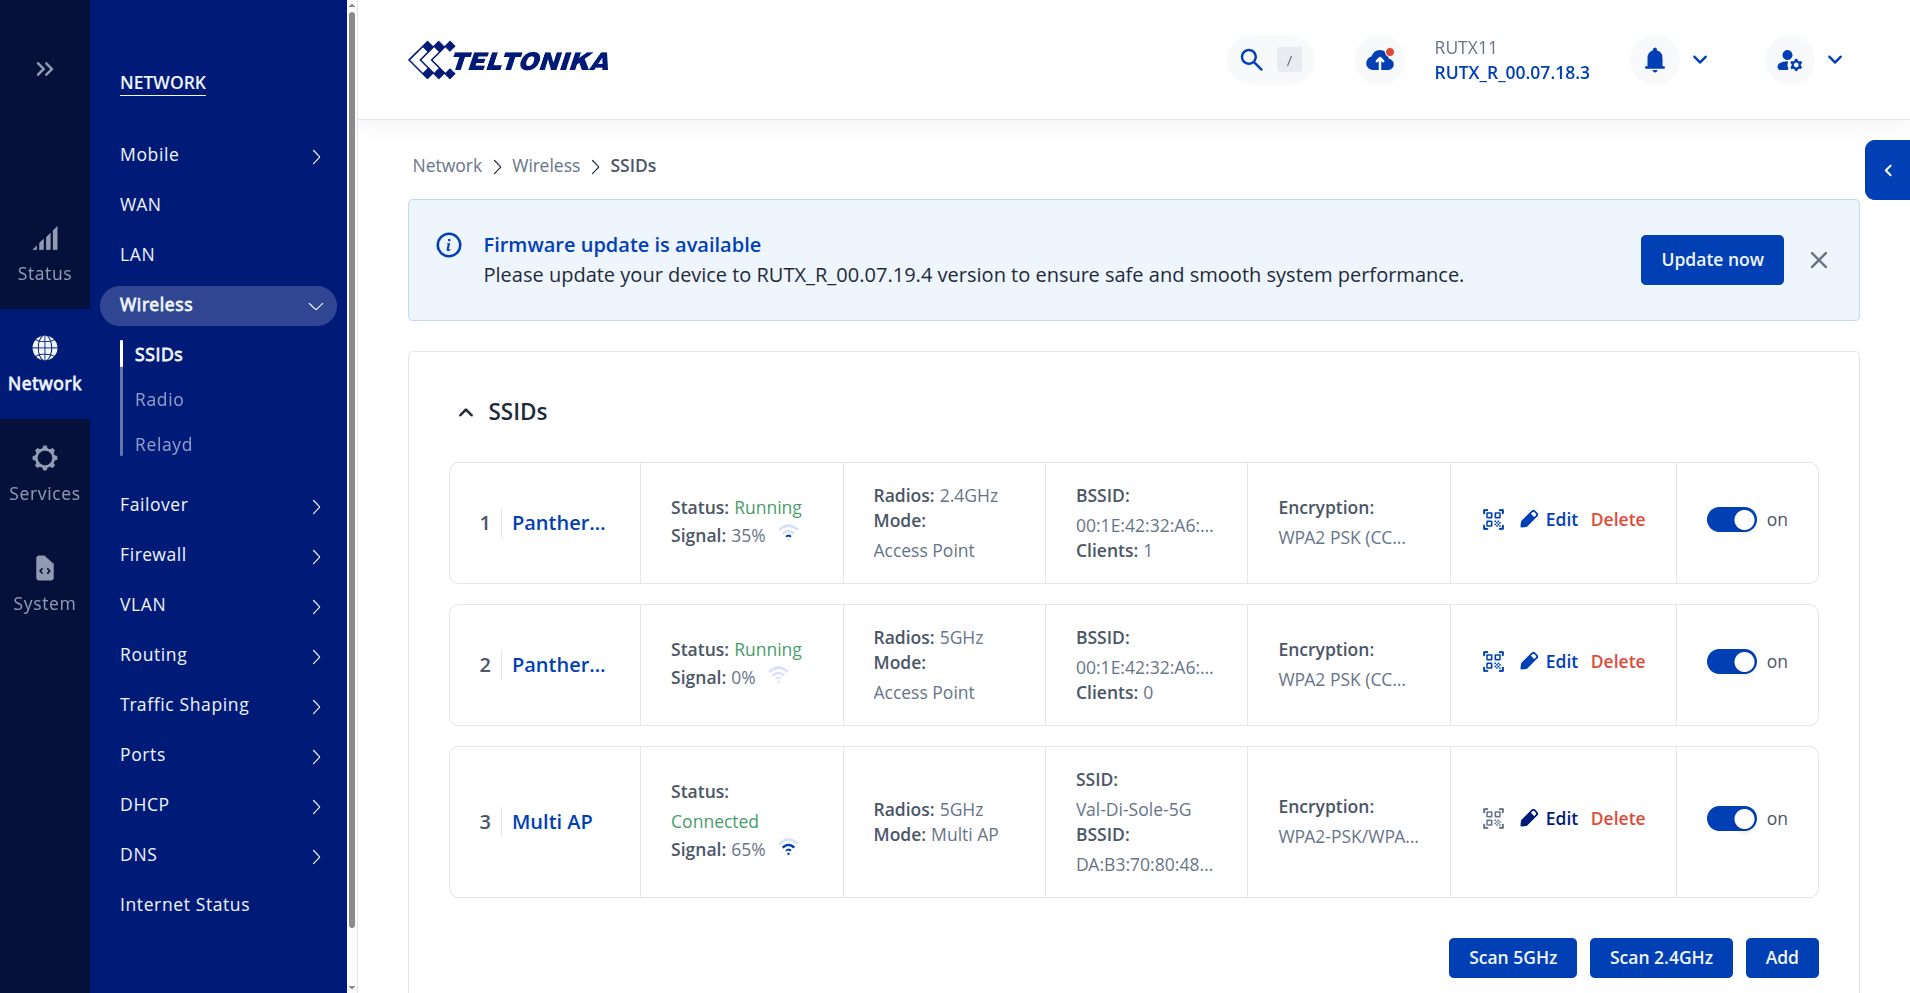
- Access to Router WebUI
- Navigate to Network > Wireless > SSIDs.
- Edit Multi AP.
- Inside the Access Points section, add and complete the details about your Wi-Fi network.
- Save & Apply the configuration. After a while the status should change to Connected.
You can add multiple Wi-Fi networks. By default, router scans for available networks and connects to the first one provided in the configuration file. In case of a low signal level or loss of signal, the next one on the list will chosen. This behavior can be modified by the user.
Due to the limitation of the Wi-Fi chipset, it is not possible to scan for available networks, while providing AP on a 5GHz interface. In such scenariu it's advised to use 2.4GHz for WAN uplink.
SIM LTE
You can provide Internet connectivity using a cellular (LTE) connection. The router supports failover between two SIM cards and allows prioritizing a WLAN connection over the cellular network.
Requirements
- SIM card
- ANT02
Configuration
- Open the top cover to access the router.
See: Access user compartment - Insert the SIM card into the router.
See: Teltonika Hardware Installation. - Configuring SIM slots
By default, both SIM slots are enabled, use automatic APN configuration, and act as a fallback when the WLAN connection is unavailable. To modify settings such as the SIM PIN, custom APN, or CHAP/PAP authentication, use the router’s WebUI. For detailed instructions, refer to the RUTX11 Mobile Configuration Guide
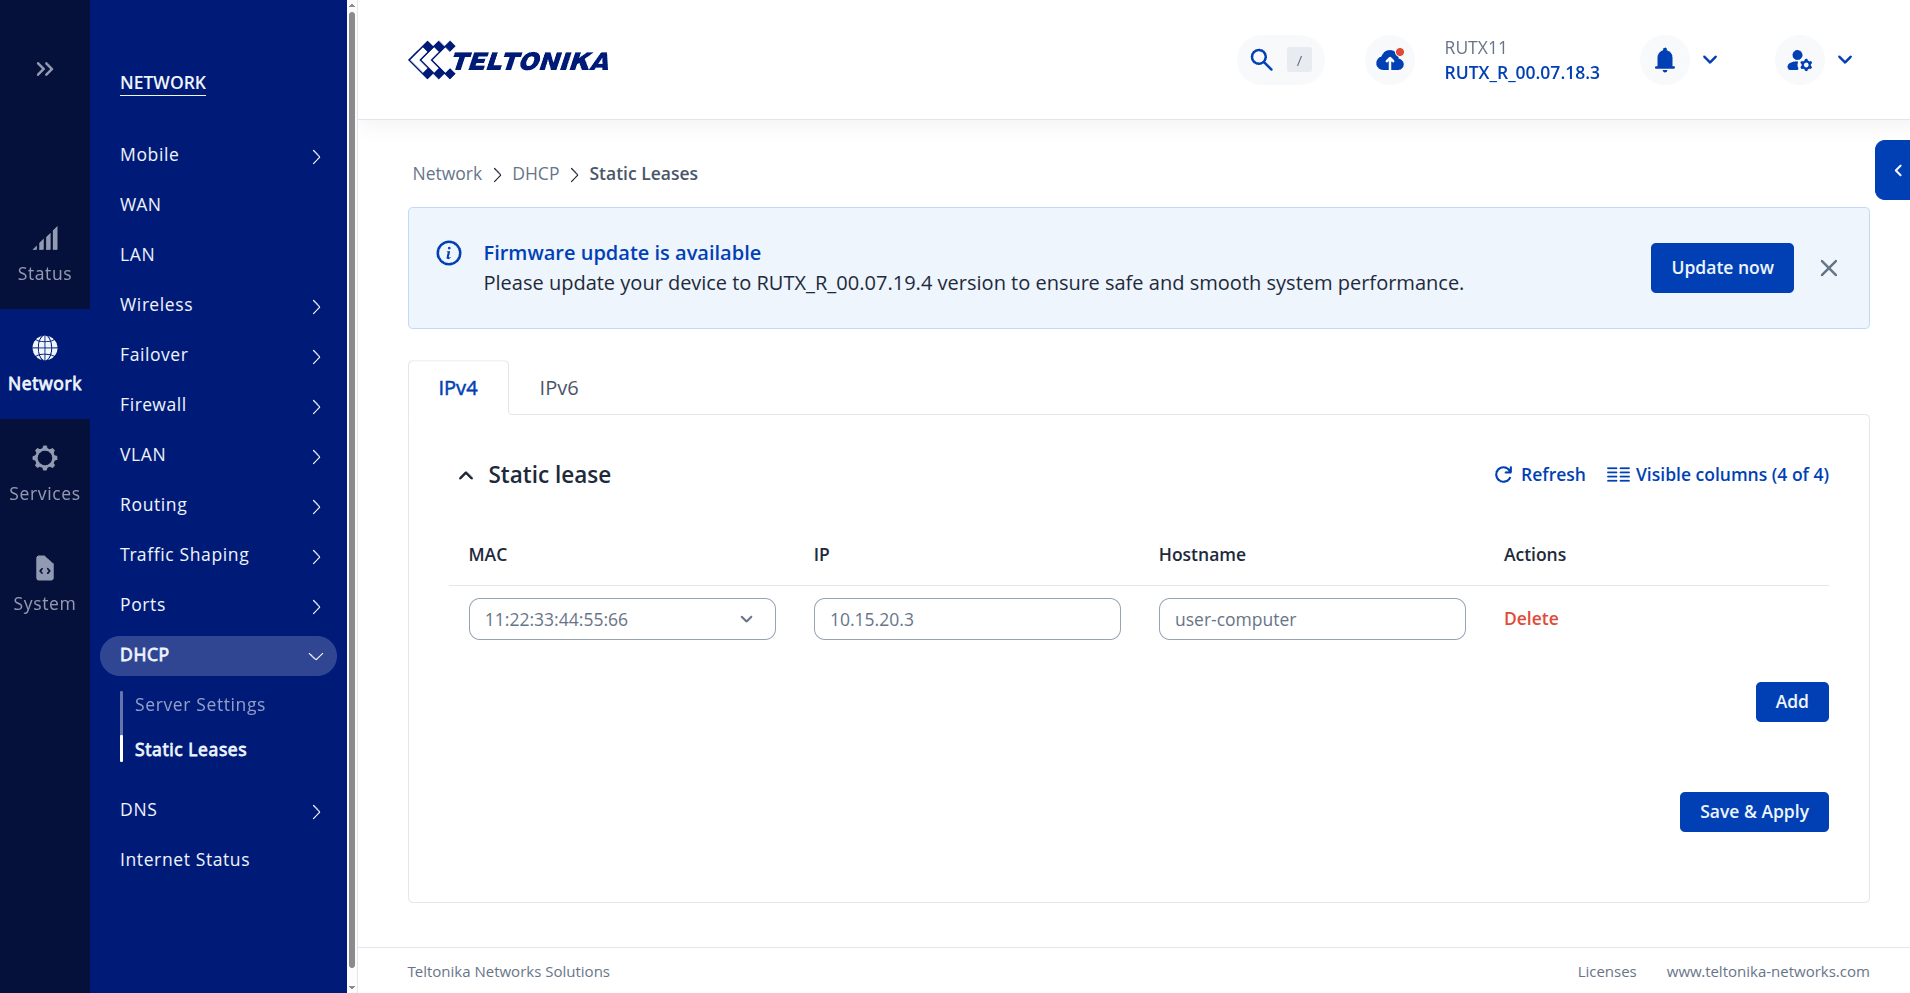
Static IP Setup
Router Static IP Configuration
- Access to Router WebUI
- Navigate to Network > DHCP > Static Leases
- Add static lease for
IPv4. - Select device MAC address (connected device should be available), specify static IP address in the range between
10.15.20.3to10.15.20.254(e.g.10.15.20.3for User Computer). - Save & Apply the configuration. After a while, the device should receive the specified static IP address.
Device Static IP Configuration
Ifyou prefer, you can set a static IP address directly on your device (e.g., User Computer) instead of changing the settings on your router. Make sure to set:
- IP address in the range between
10.15.20.3to10.15.20.254 - Subnet mask:
255.255.255.0 - Default gateway:
10.15.20.1
Others
Remote Access
You can access your robot from anywhere in the world using the Husarnet VPN. Detailed instructions are available here.
Router Factory Reset
In case of a misconfiguration, it is possible to perform a factory reset on the router. However, the default manufacturer settings differ from our configuration, so we do not recommend it. If a reset is necessary, you should at least set:
- Wi-Fi
- Country code
- Subnet mask and address pool