Wheel Swap
Overview
Panther v1.0 to v1.2 platform can be configured with option WH03 (read more about available Panther options), which enables quick swap between off-road and mecanum wheels. Follow the instructions below to learn how to do it.
Regular Off-road Wheels
Aggressive off-road tire tread provides excellent grip both on asphalt and in muddy terrain. The control of the platform is based on a differential drive, the robot has 2DoF of freedom on the surface. Pneumatic tires provide a gentle cushioning of the platform on uneven terrain and eliminate vibrations.
Mecanum Omnidirectional Wheels
Thanks to the freely rotating rollers around the wheels, the robot can move sideways, forward and backward, and spin, all with minimal power consumption. The control of the robot is done by combining the rotational motion of all wheels, allowing the platform to move in 3DoF on the surface. Wheels work best on level surfaces.
Not following the steps below may cause mechanical damage to the Panther, which will not be covered by warranty.
- Panther v1.2
- Panther v1.0 - v1.06
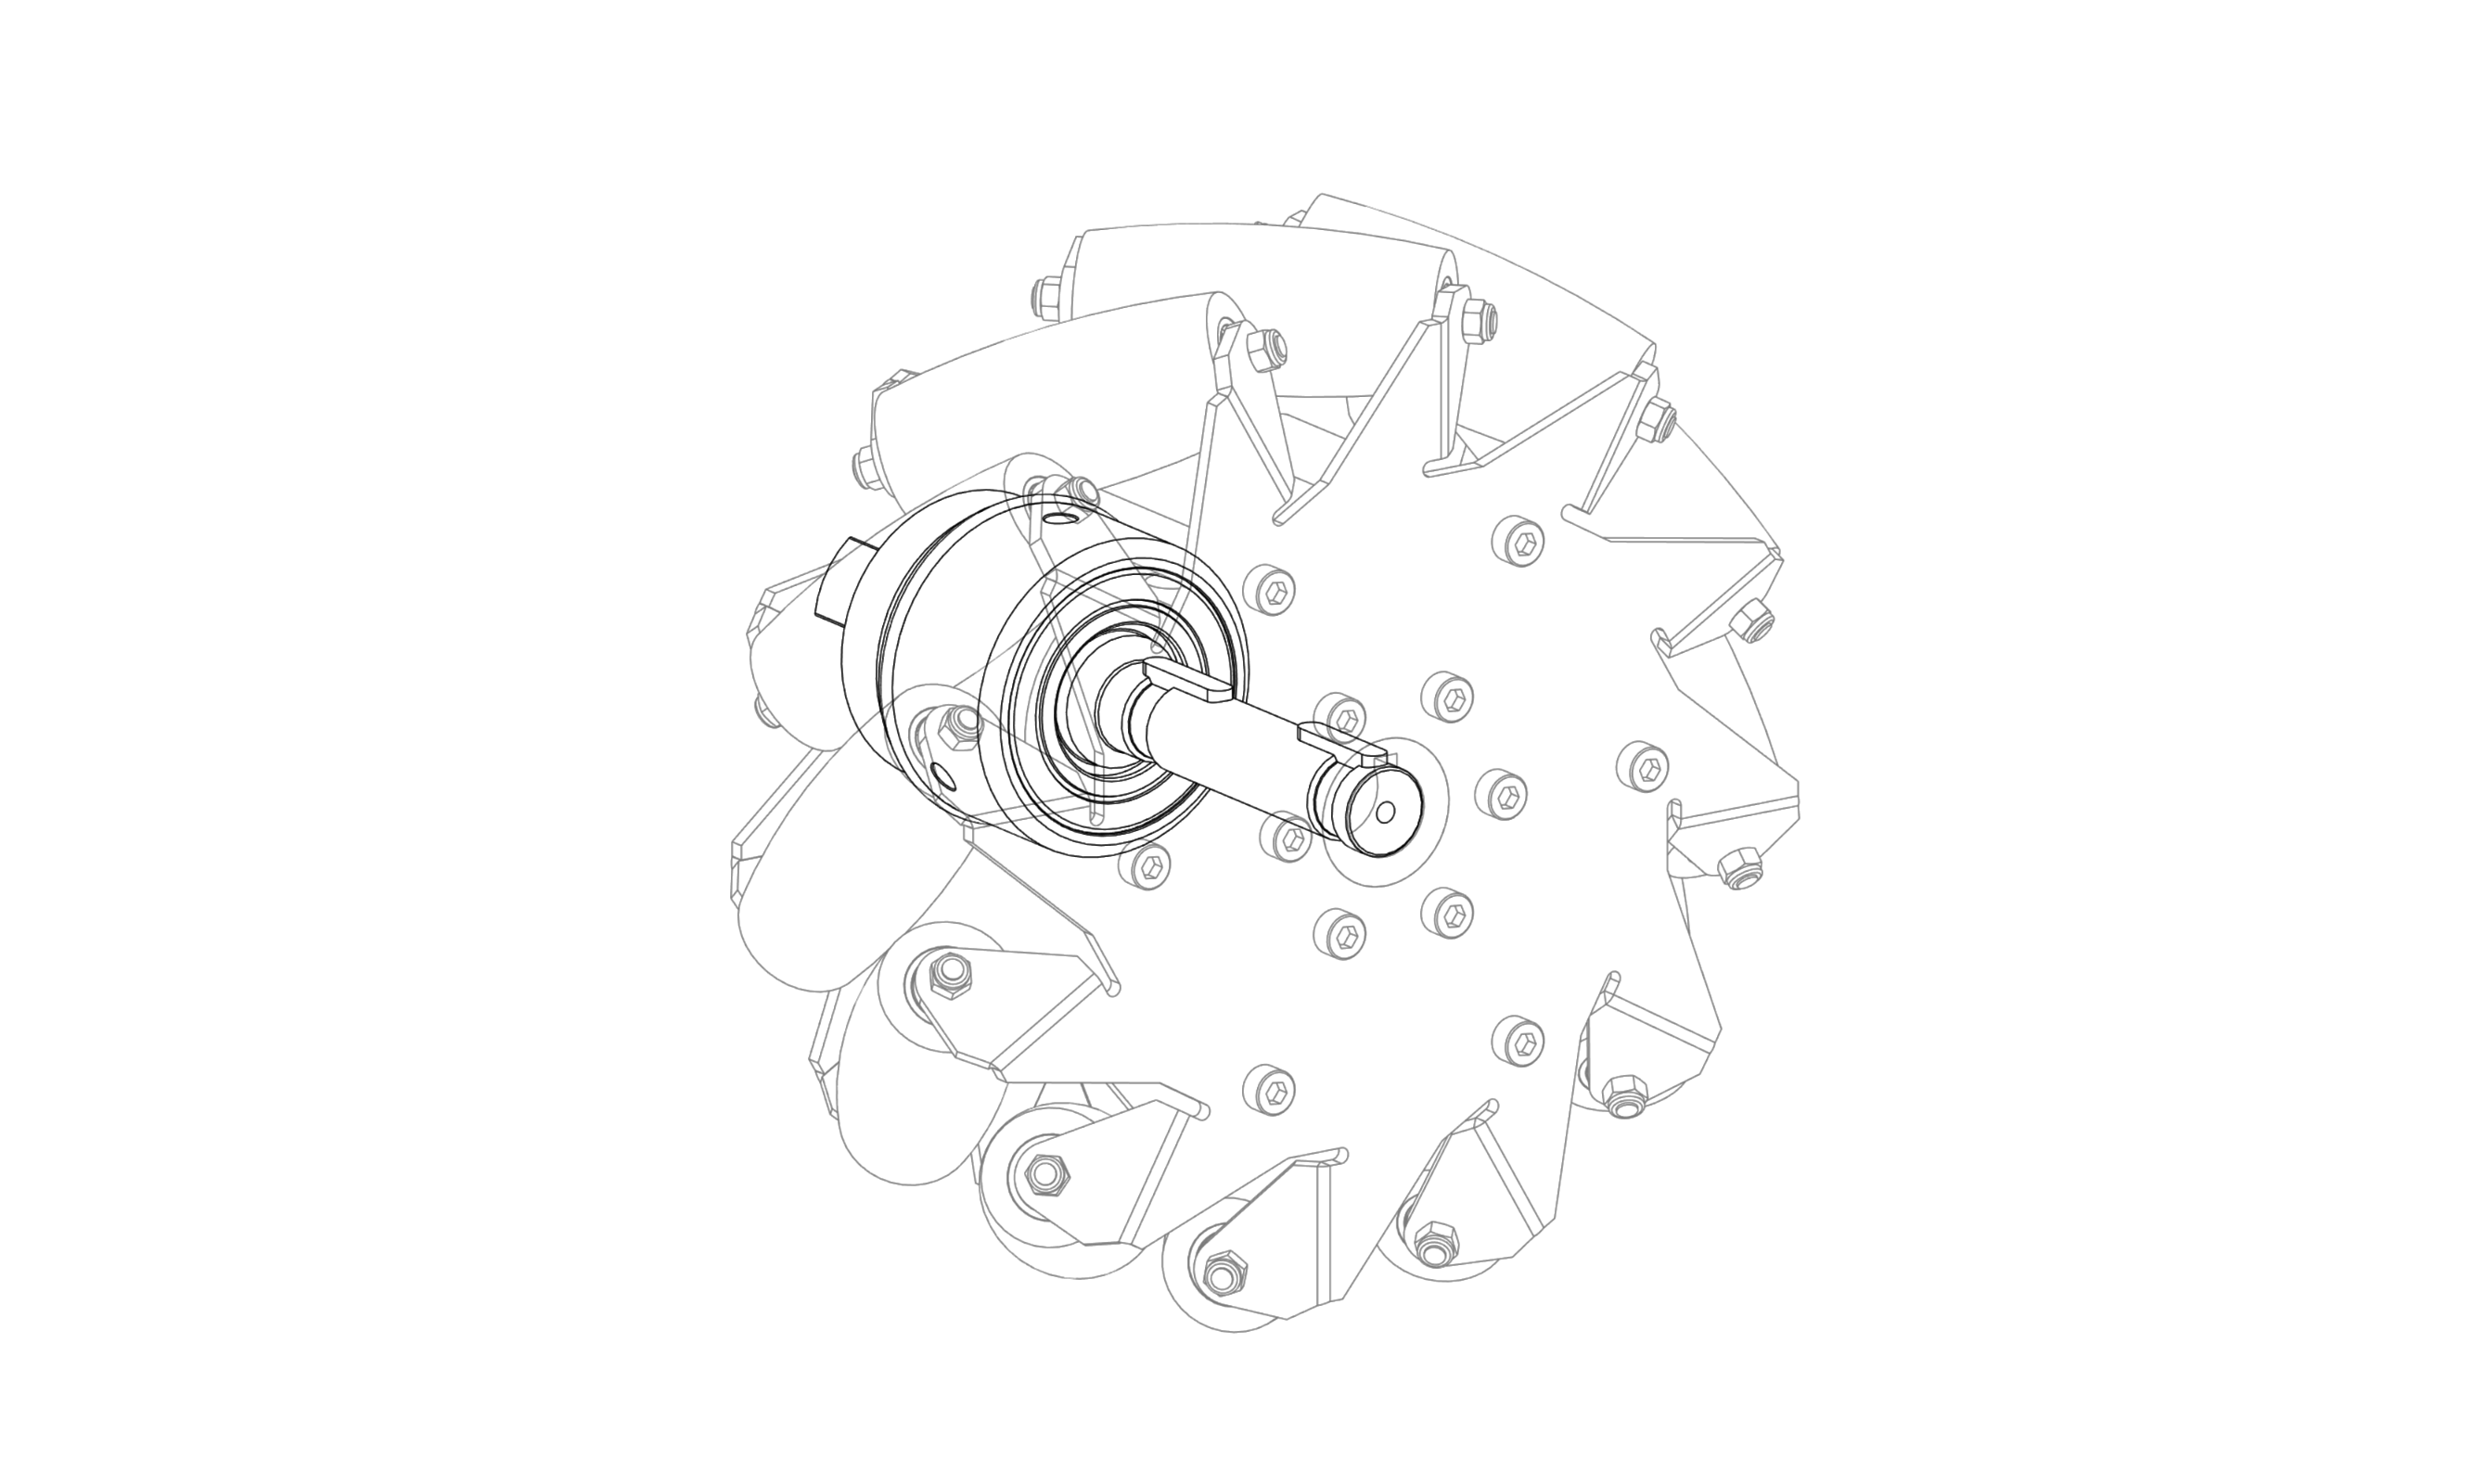
In the latest version of Panther, a system of interchangeable wheels has been developed to ensure more efficient handling of the robot. The wheel unit, which consists of a stationary hub with a drive shaft and the actual wheel, is mounted to the robot at the threaded connection of the hub and the Panther body. To change the type of wheels, simply remove the hub with one type of wheels from the base of the robot and replace it with a set with a different type.
Unmounting
In the case of changing the type of wheels, it is not required to disassemble this set into parts but to remove it entirely from the body of the platform. For this purpose, use a 60 mm diameter hook spanner and unscrew the hub. The hub has 3 holes with a diameter of 6 mm.
When turning the wrench, make sure any part of the wrench does not hit any of the bolts protruding from the side of the robot.
All hubs have a right-hand thread, so turn it counterclockwise to unscrew it. The diameter of the thread used is 55 mm, so approximately 100 Nm of torque should be used to loosen the connection.
It can be an inertial moment, just make sure that the key is properly seated in the hole, as its incorrect seating can significantly damage the key socket.
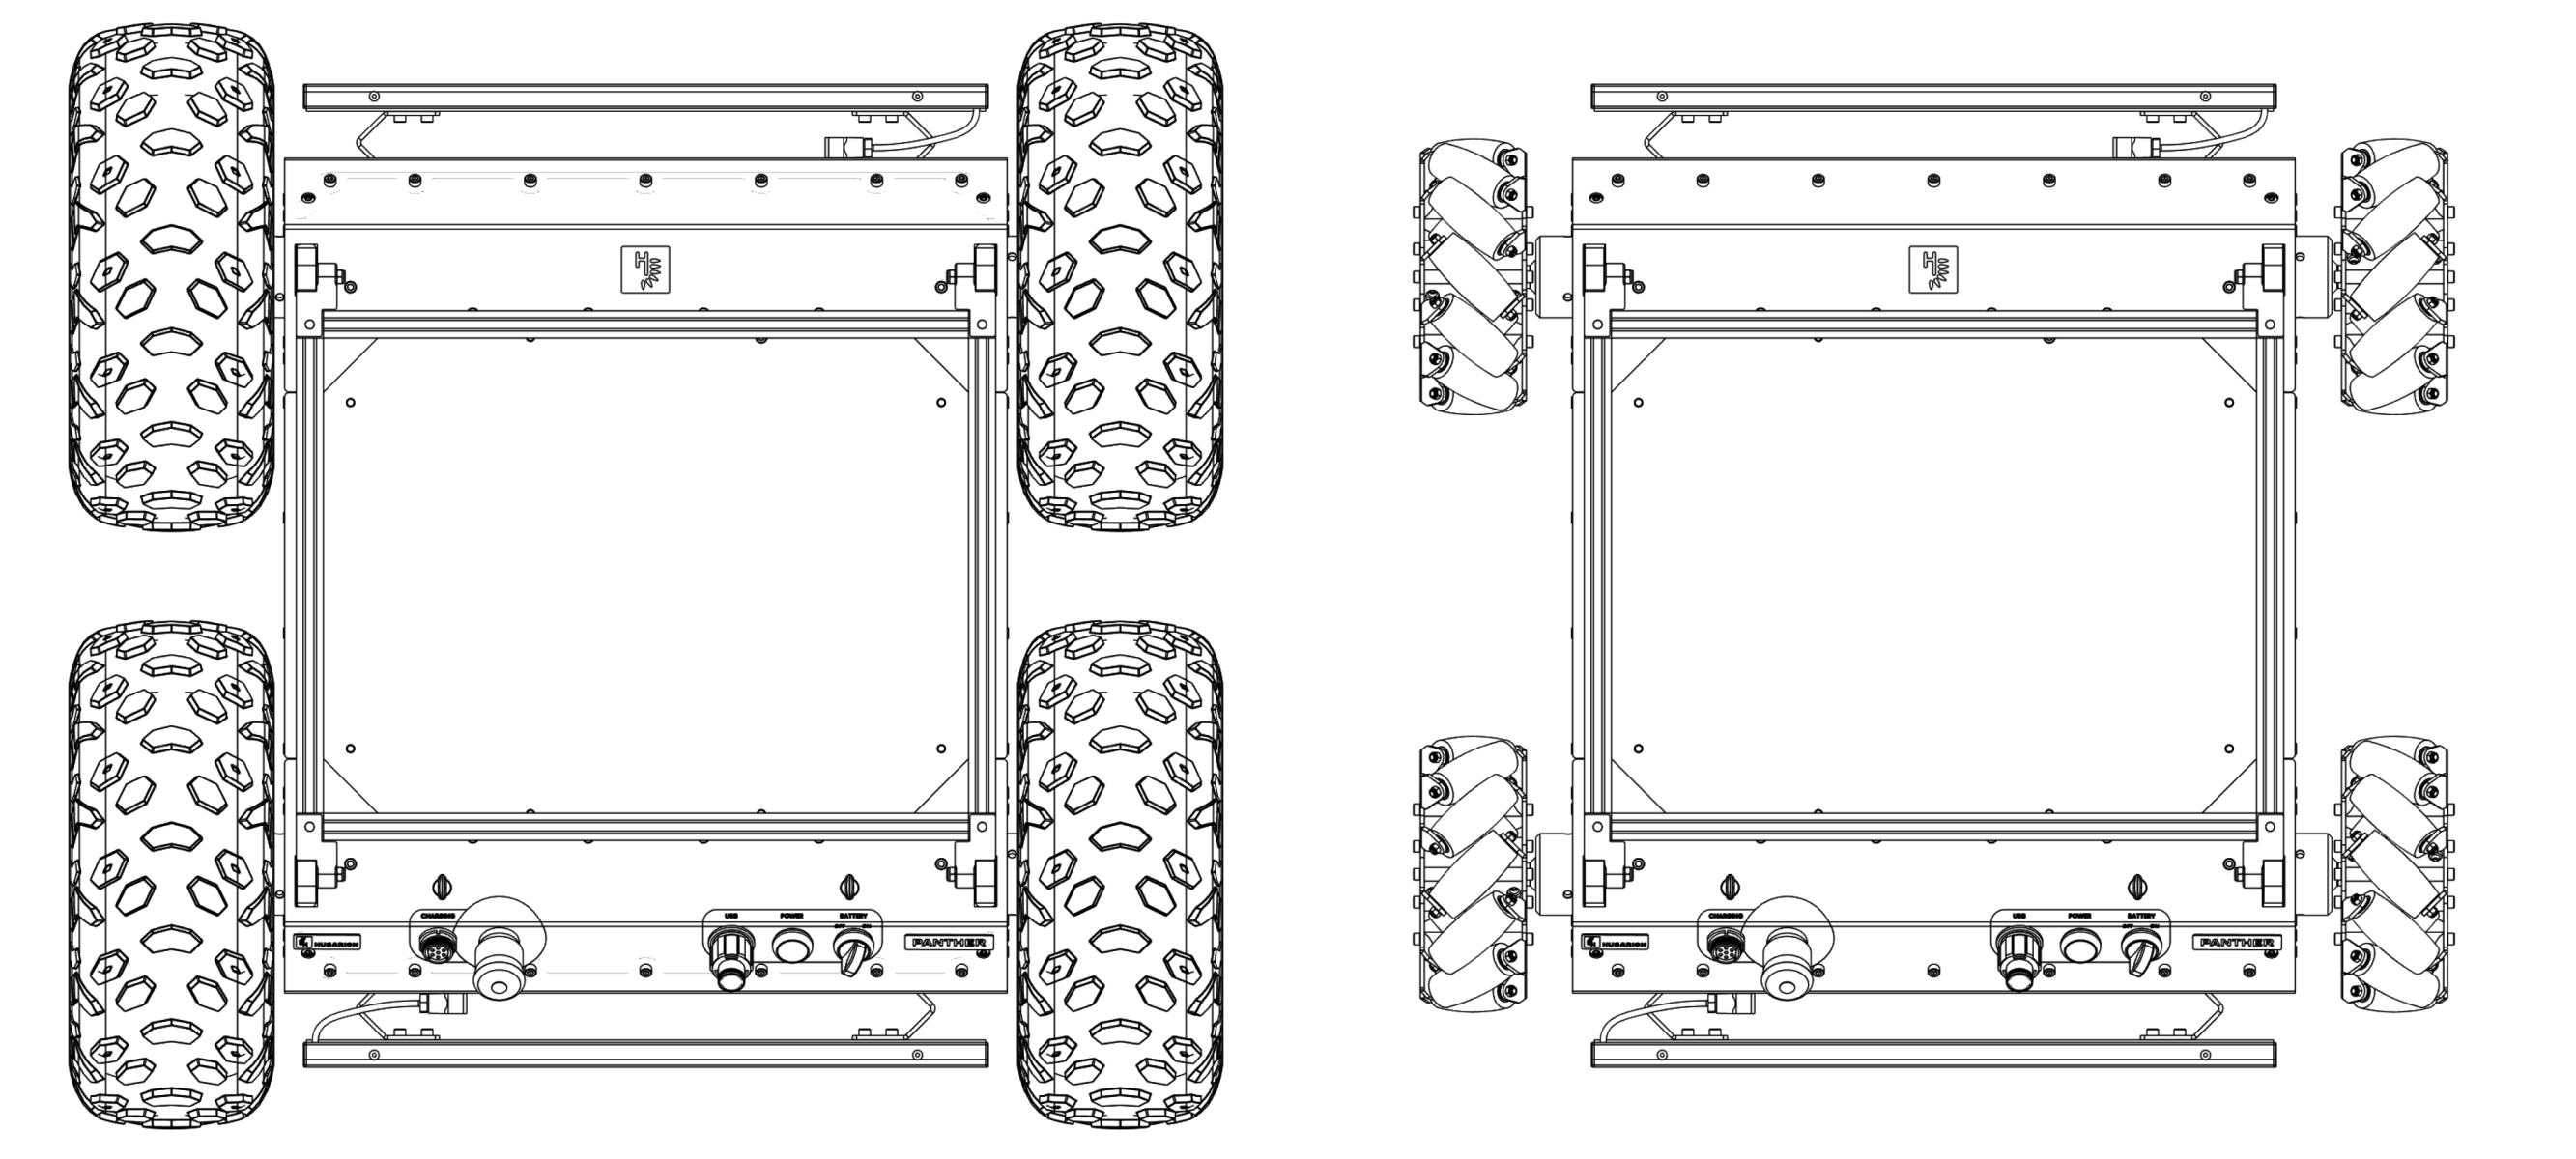
The images below show the platform with the wheels on and the highlighted hubs. Use tab labels to switch between views.
- WH01
- WH02
Regular off-road wheels
Mecanum omnidirectional wheels
Mounting
The shaft on the robot side is tipped with claws. When screwing the hub, the shaft must be properly positioned so that the claws fit in the slots. This can be done in the following steps:
- Apply grease to the O-ring to improve the tightness of the connection and the thread to prevent galling and seizing.
- Screw the hub until it stops, when the teeth of the shaft rest against the teeth of the gearbox shaft.
- Apply a constant tightening torque to the hub of approximately 2 Nm.
- Turn the shaft (actually a wheel) until the teeth of the wheel "fall" into the slots, which will result in a non-resistance play in the rotation of the wheel.
- Continue to tighten the hub with a slight torque. If the torque increases, it means that the fangs of the shaft have not hit the slots, and the operations from the previous points must be repeated.
- The hub will run out of thread after a few turns. It must be tightened with a torque of 80 - 100 Nm.
Wheels are distinguished on the right and left. They can be distinguished by the shape of the tread or the arrangement of the rollers. The picture below shows the correct attachment of the wheels on the robot in top views.
First Assembly of the Mecanum Wheels
- Loosen the set screws in the wheels (2x M4 + 2x M8).


- Make sure the shafts have prismatic keys inserted.
- Slide the mecanum wheels onto the hub shafts. Make sure that the shaft has entered the wheel so far that the end of the shaft is flush with the side surface of the wheel.

- Tighten the M8 screws to 15 Nm, then the M4 screws to 4 Nm.
Change from WH01 to WH02
Change from regular off-road wheels to mecanum omnidirectional wheels.
| Description | Illustration |
|---|---|
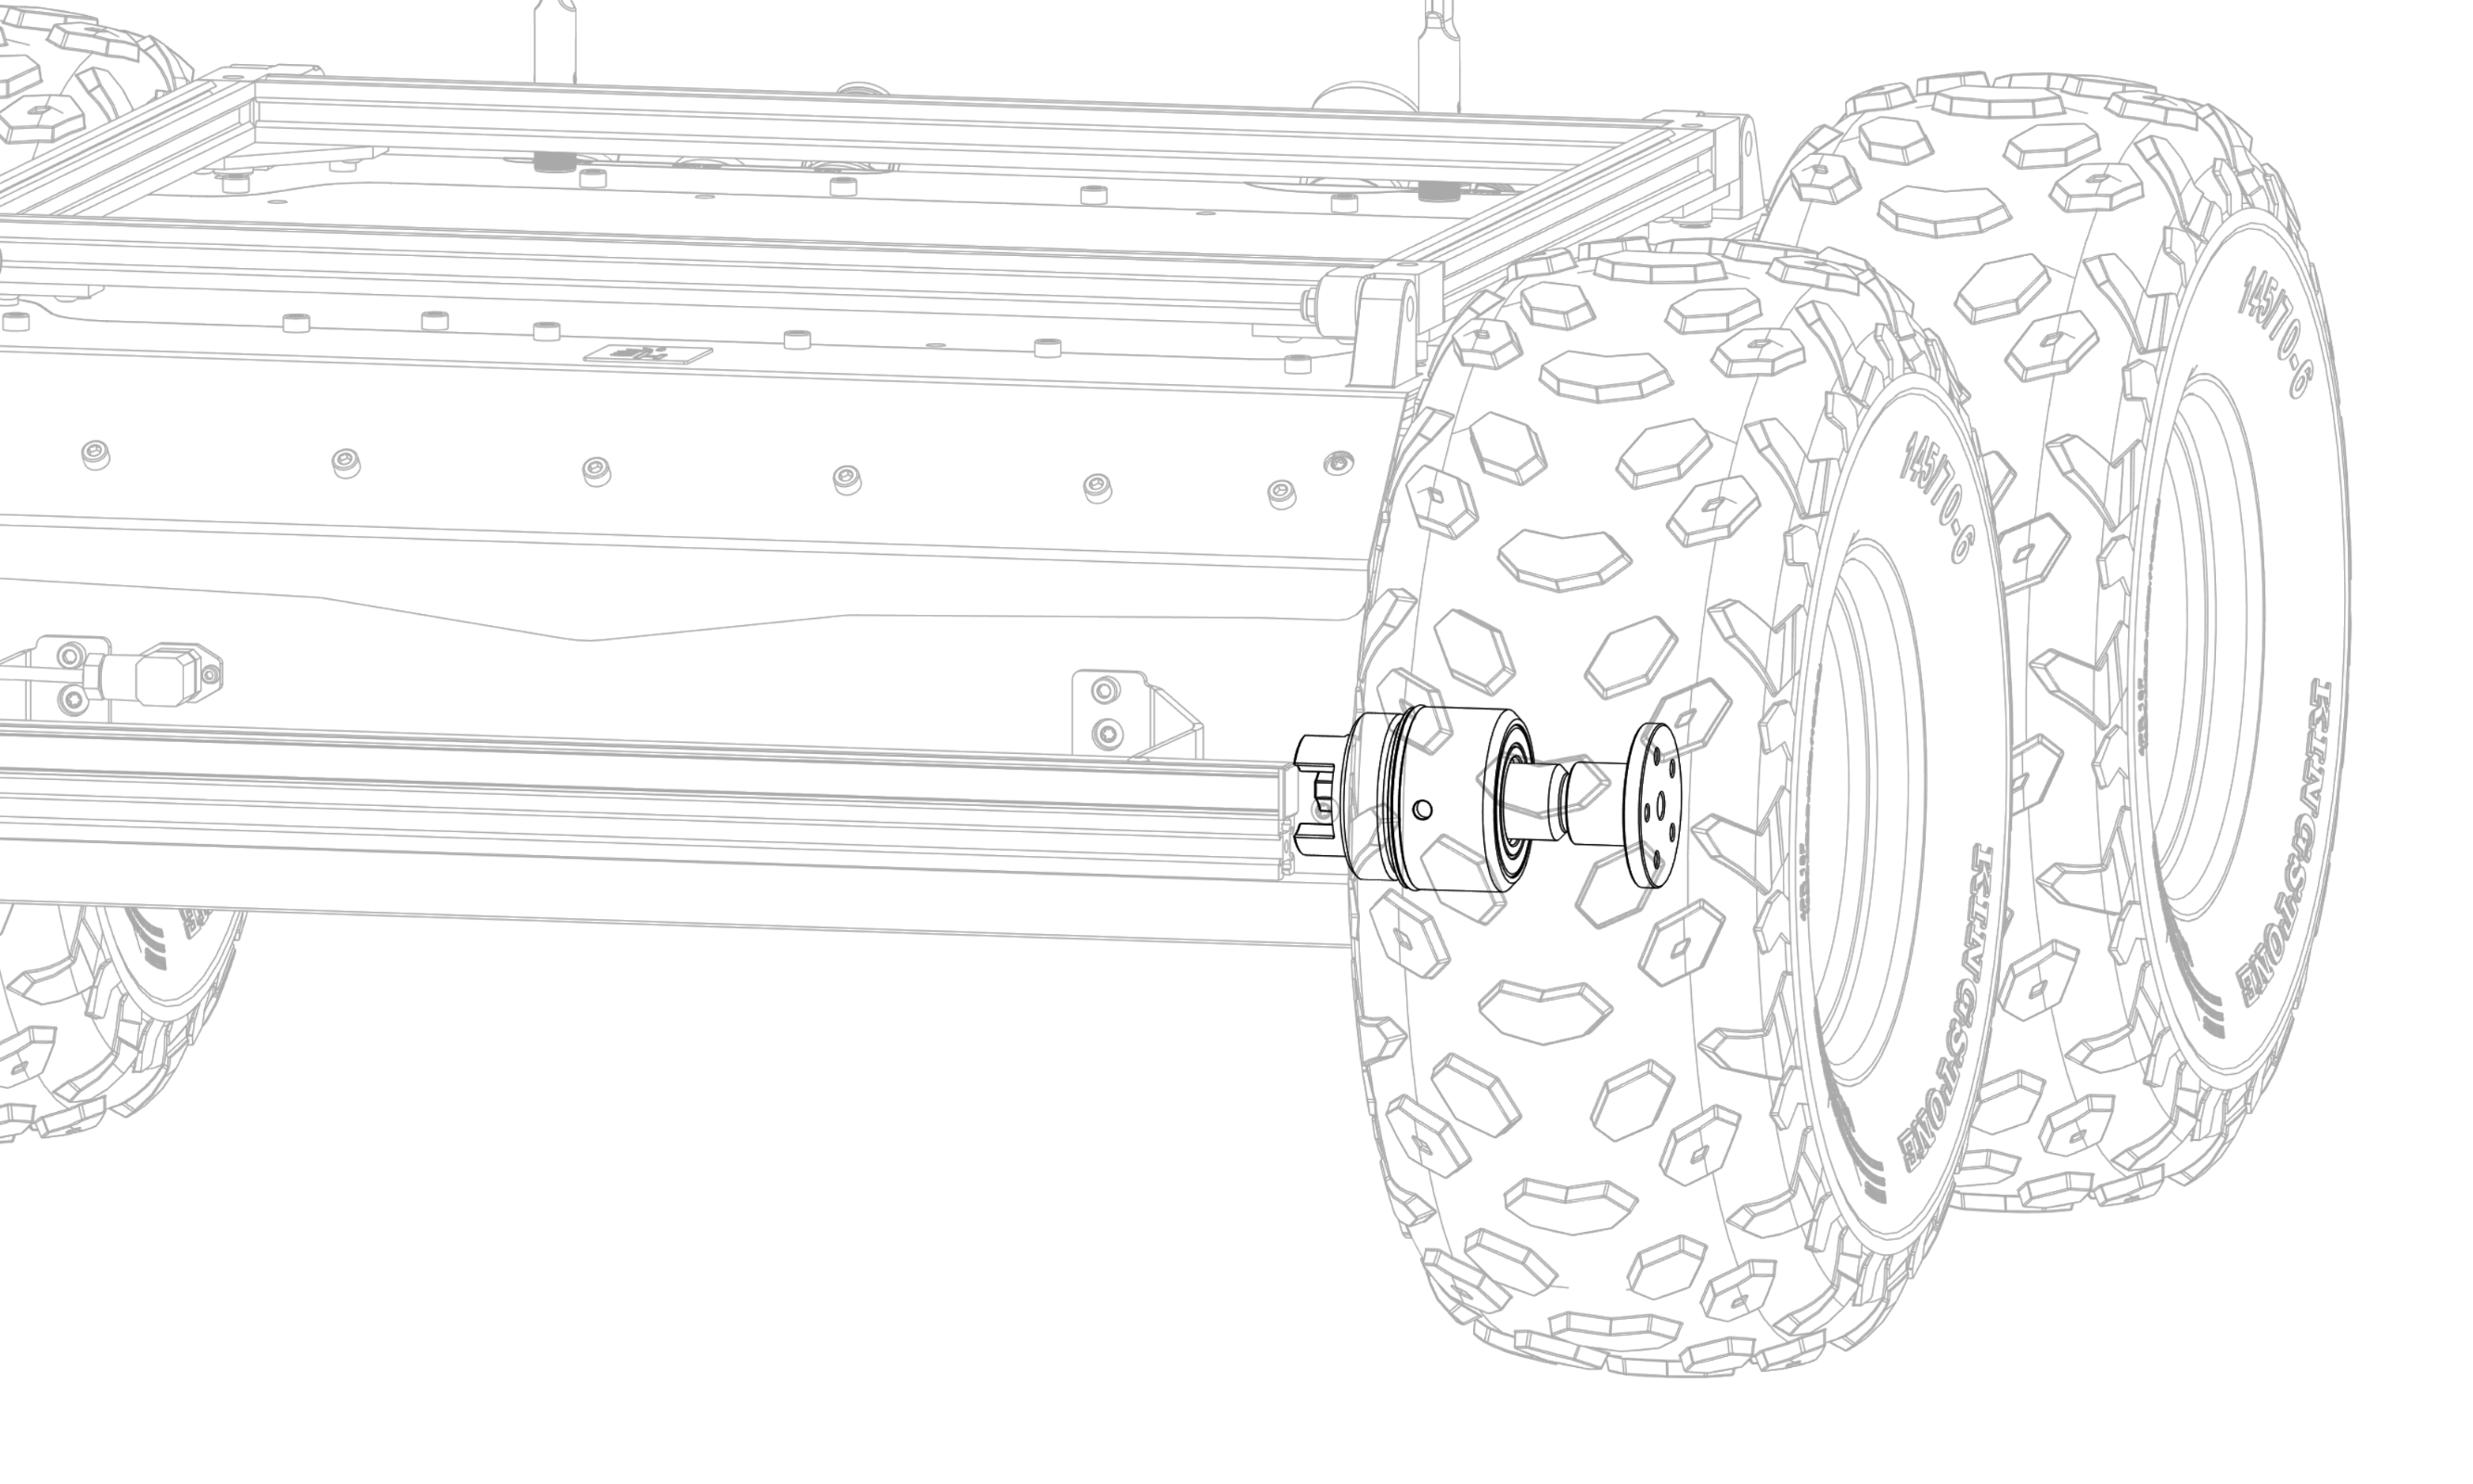
| 1. Remove 5x DIN 912 M6x12 bolts (5 mm Allen key) holding the wheel assembly. Slide wheel assembly of the shaft. |  |
| 2. Unscrew the M8 set screw and loosen 2x DIN 912 M6x20 bolts of the wheel hub. | 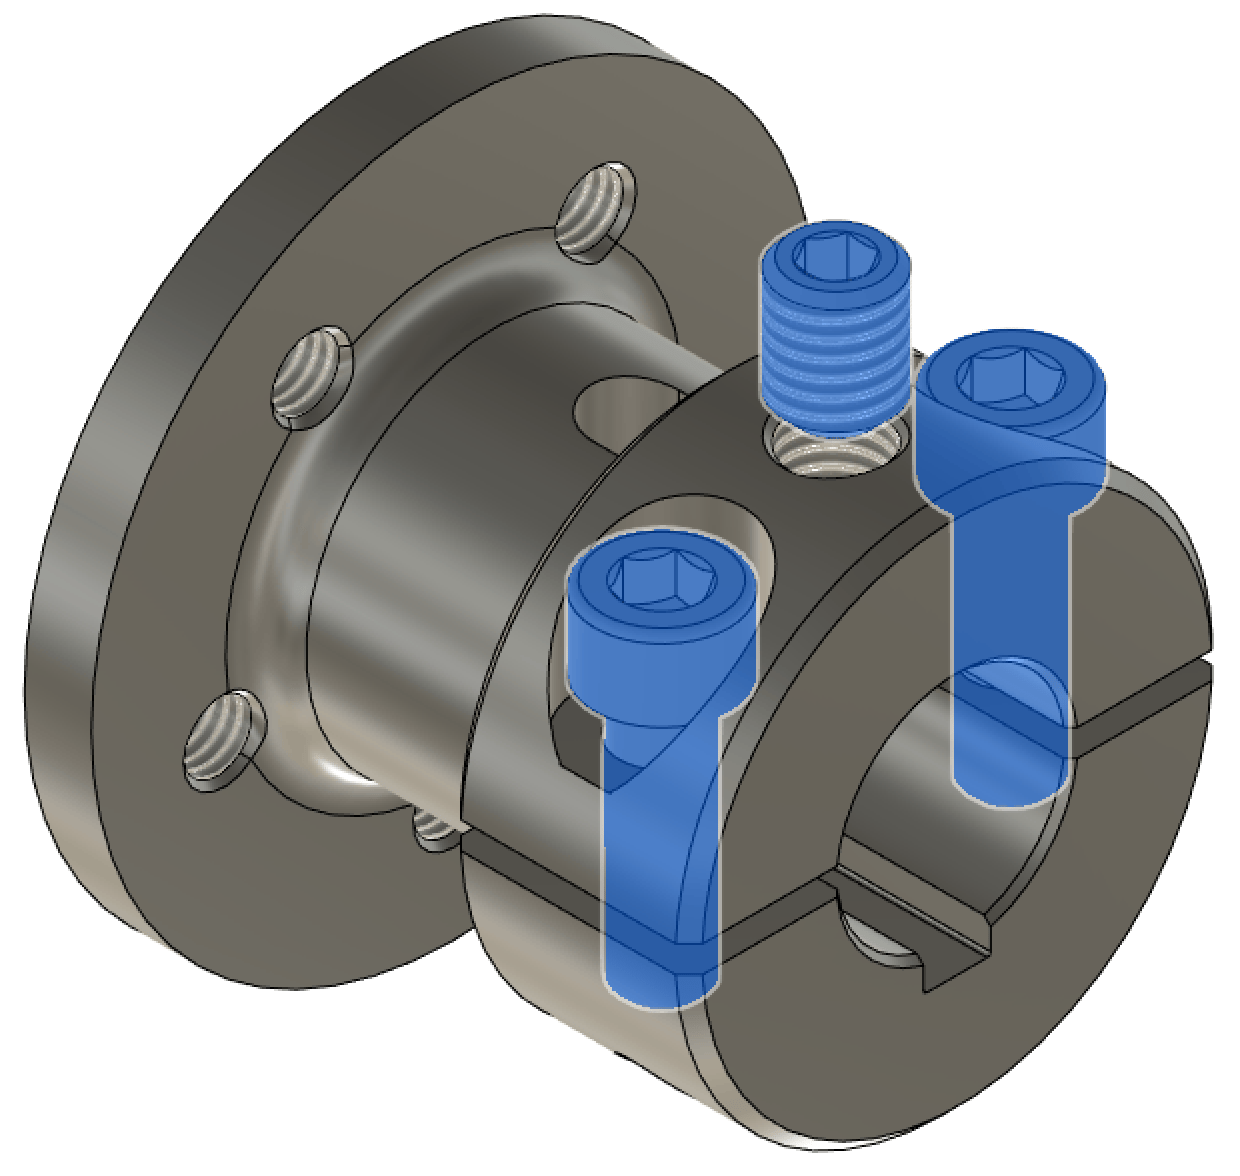 |
| 3. Slide the wheel hub off the shaft. | |
| 4. Install the outer 5x5x25 mm parallel key to the shaft. It might be necessary to lightly tap it into position with a hammer. |  |
| 5. Remove 2x M8 set screws (4 mm Allen key) and 2x M4 set screws (2 mm Allen key) from the mecanum wheel. They are located on the hub of the mecanum wheel. | 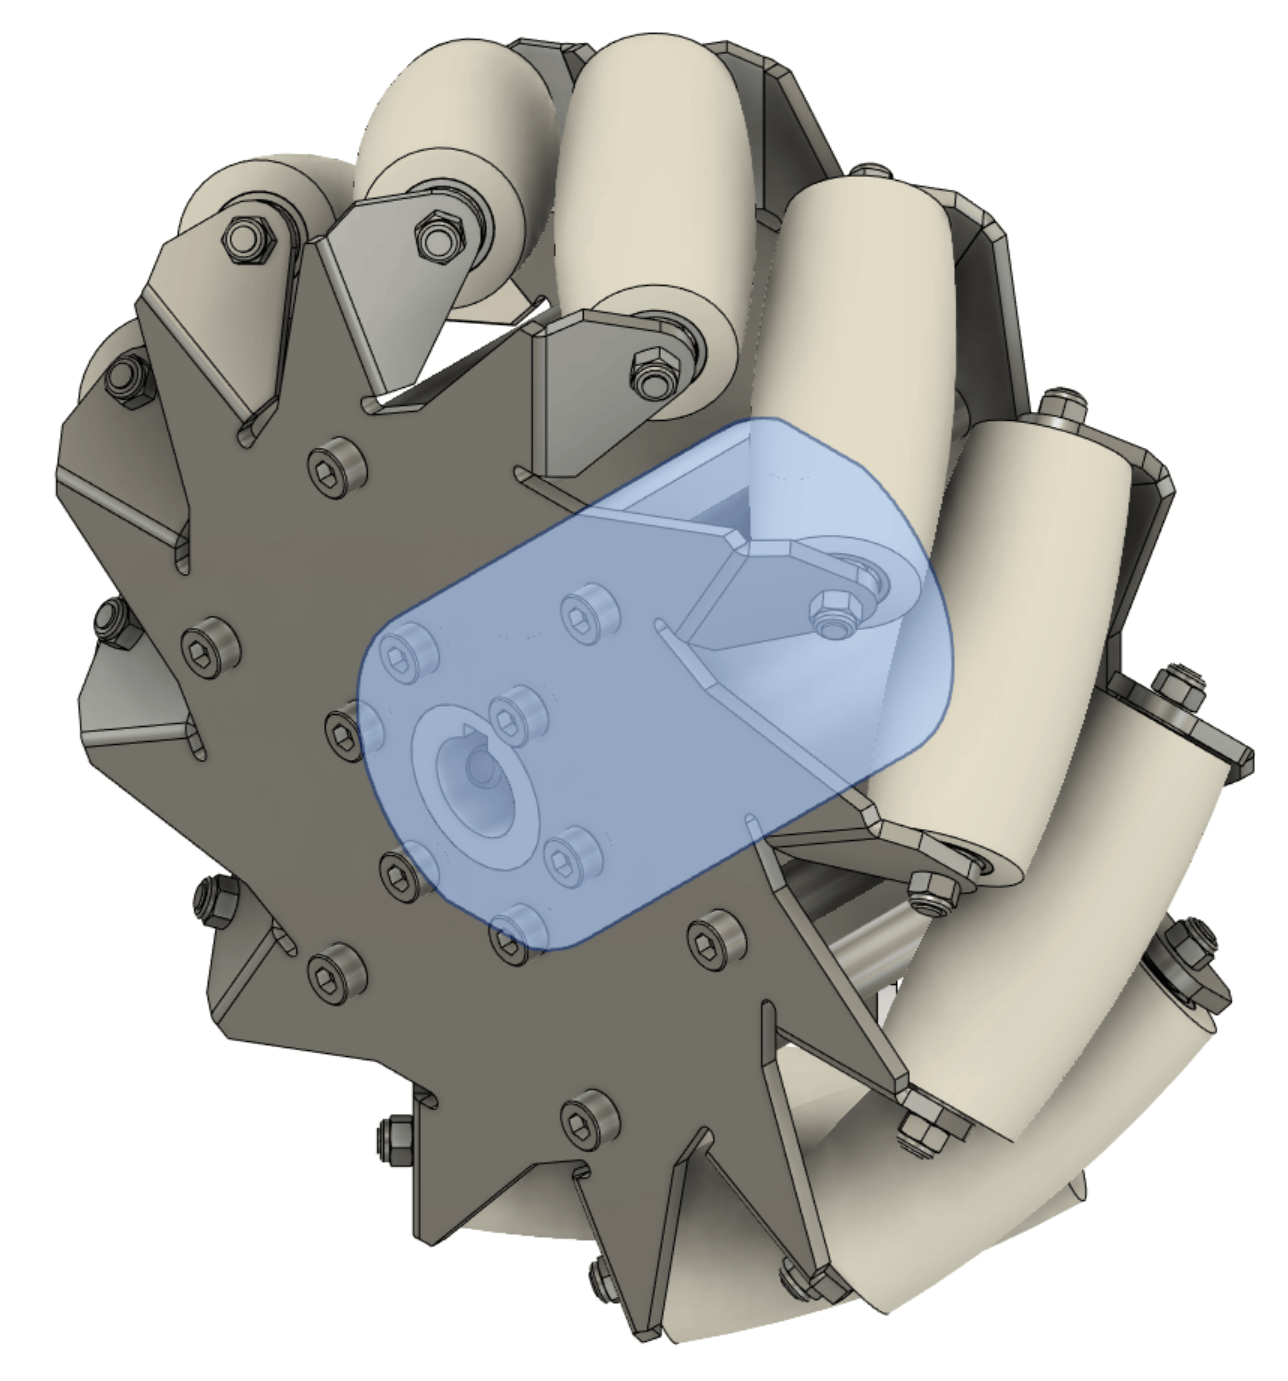 |
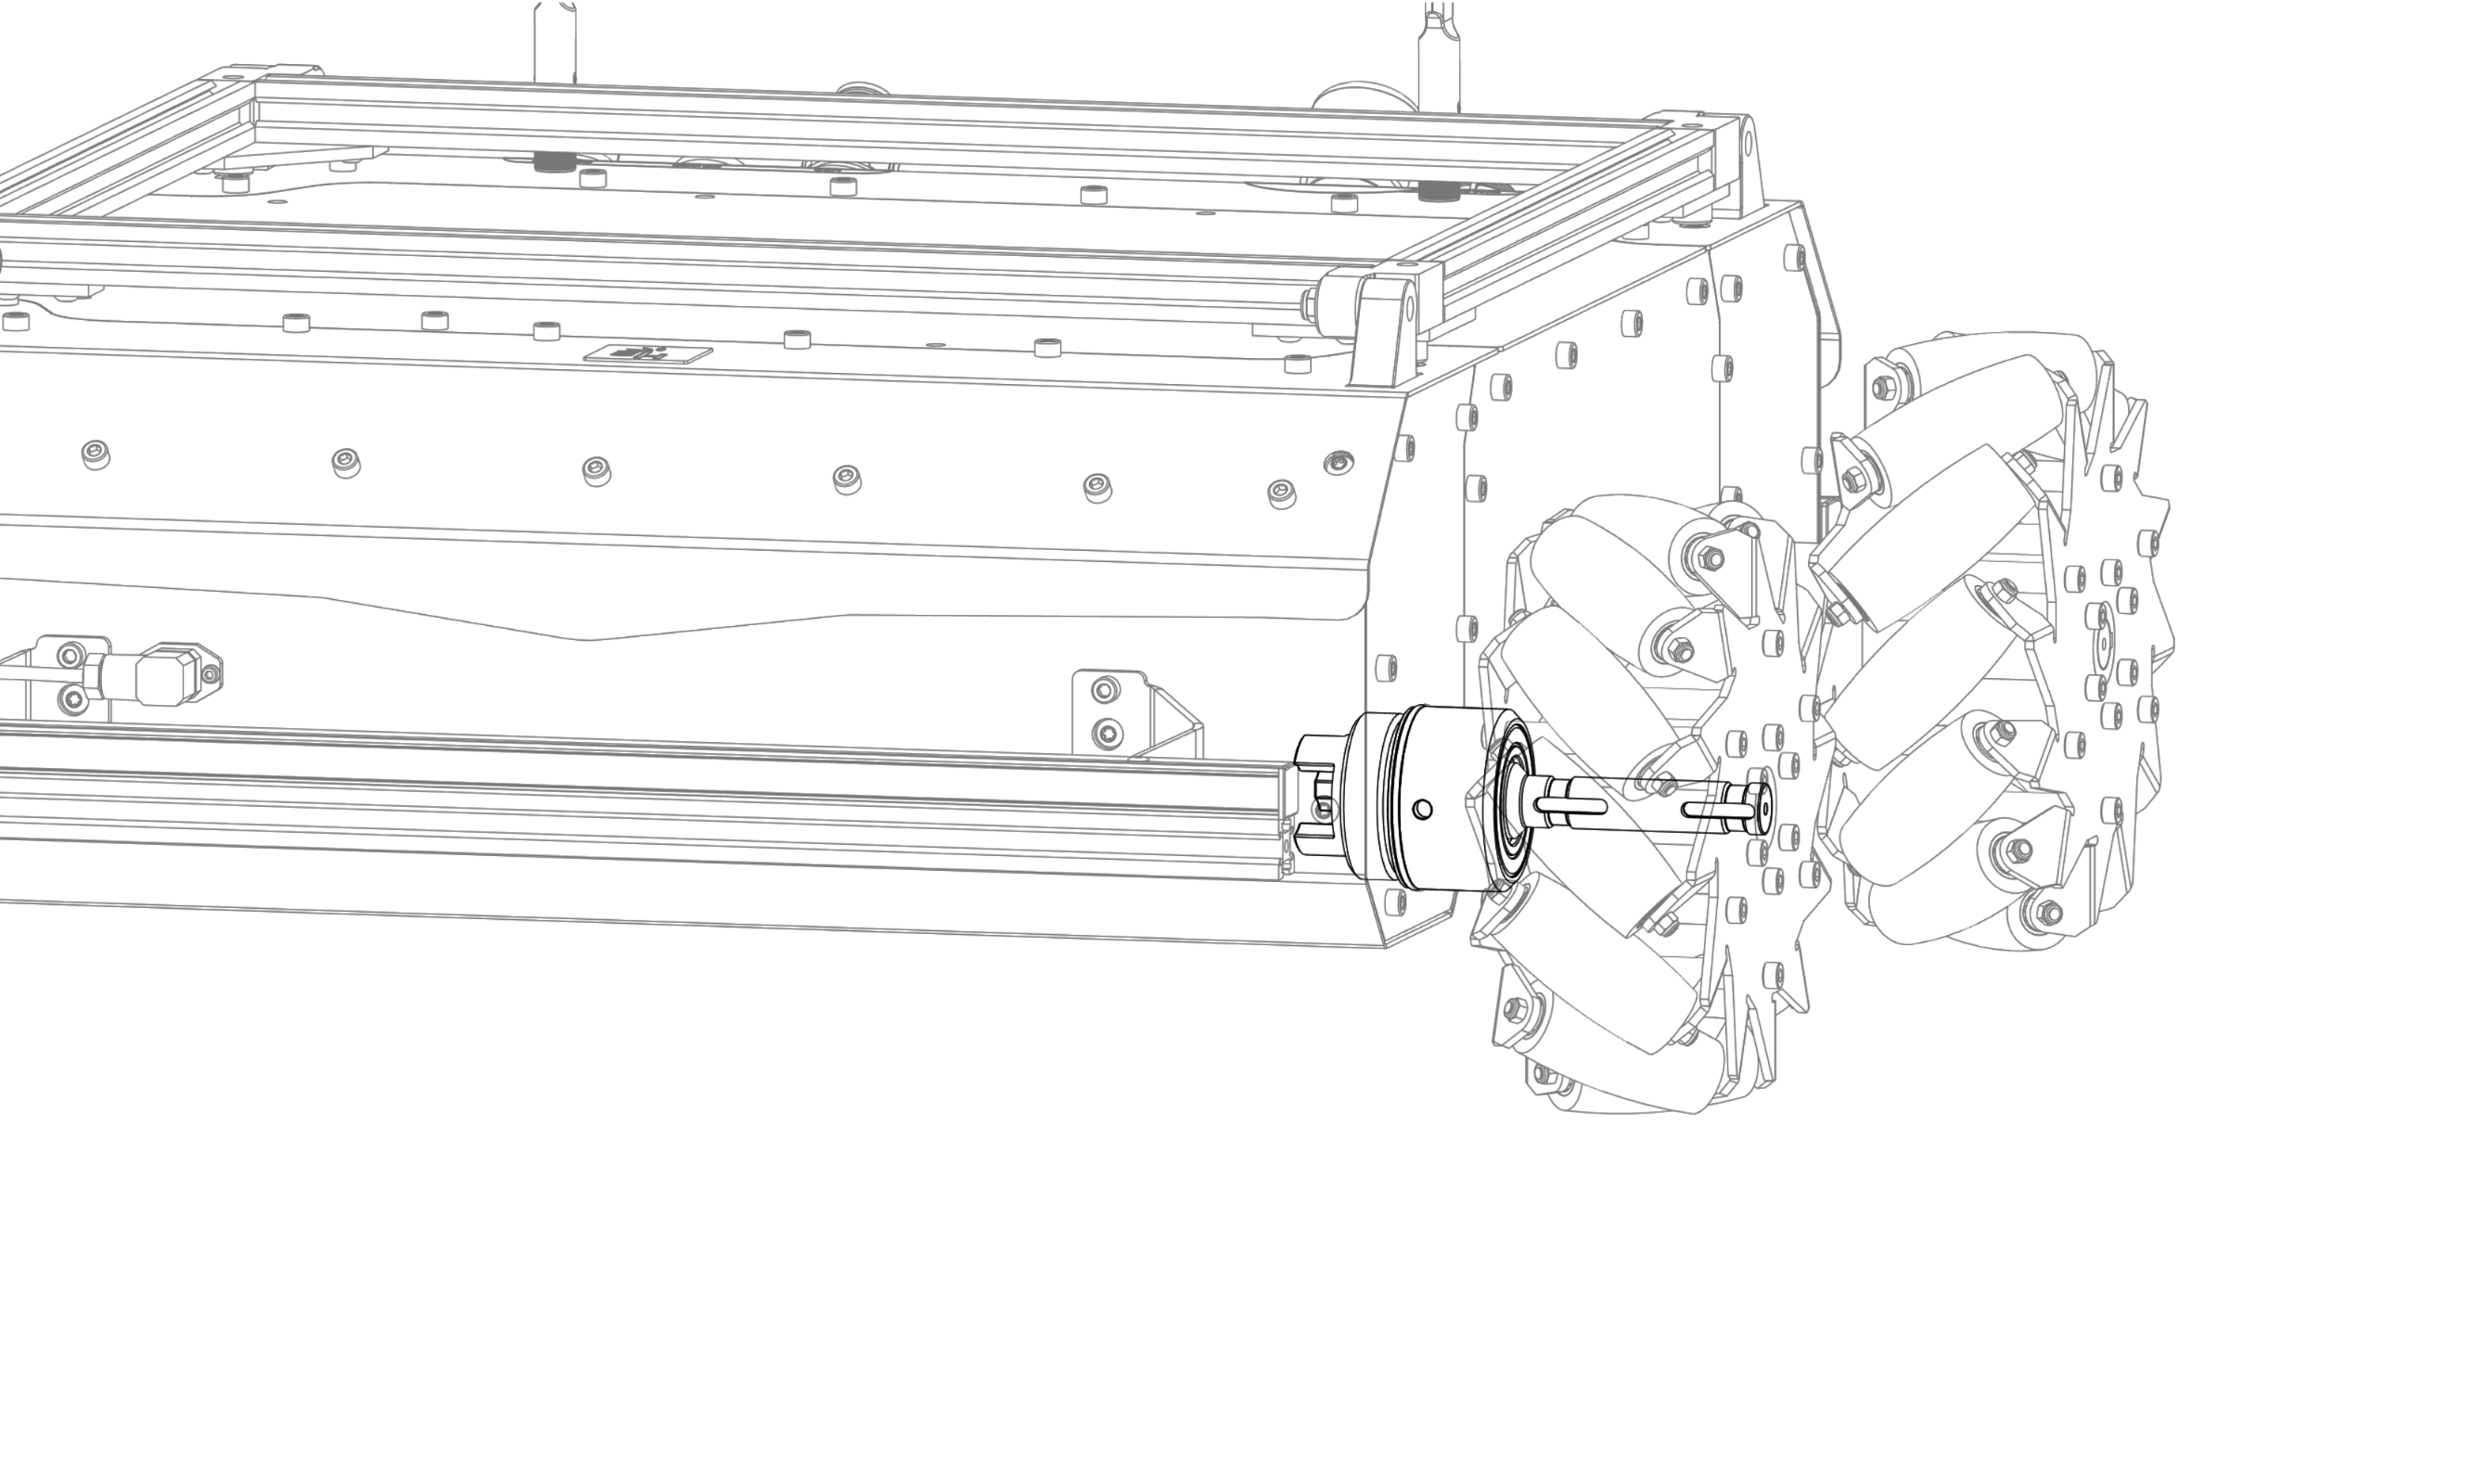
| 6. Slide the mecanum wheel onto the shaft. The exterior of the mecanum wheel should be flush with the end of the shaft. The correct orientation of each mecanum wheel is shown below. |  |
| 7. Install and tighten 2x M8 set screws with 5 Nm torque. A slight misalignment of the mecanum wheel will be eliminated. | |
| 8. Install and tighten 2x M4 set screws with 2 Nm of torque. | |
| 9. Repeat the above steps for all axles. |
Change from WH02 to WH01
Change from mecanum omnidirectional wheels to regular off-road wheels.
| Description | Illustration |
|---|---|
| 1. Unscrew 2x M8 set screws (4 mm Allen key) and 2x M4 set screws (2mm Allen key) from the mecanum wheel. They are located on the hub of the mecanum wheel. | |
| 2. Slide the mecanum wheel off the shaft. | |
| 3. Remove the outer 5x5x25 mm parallel key from the shaft. The use of pliers might be required. | 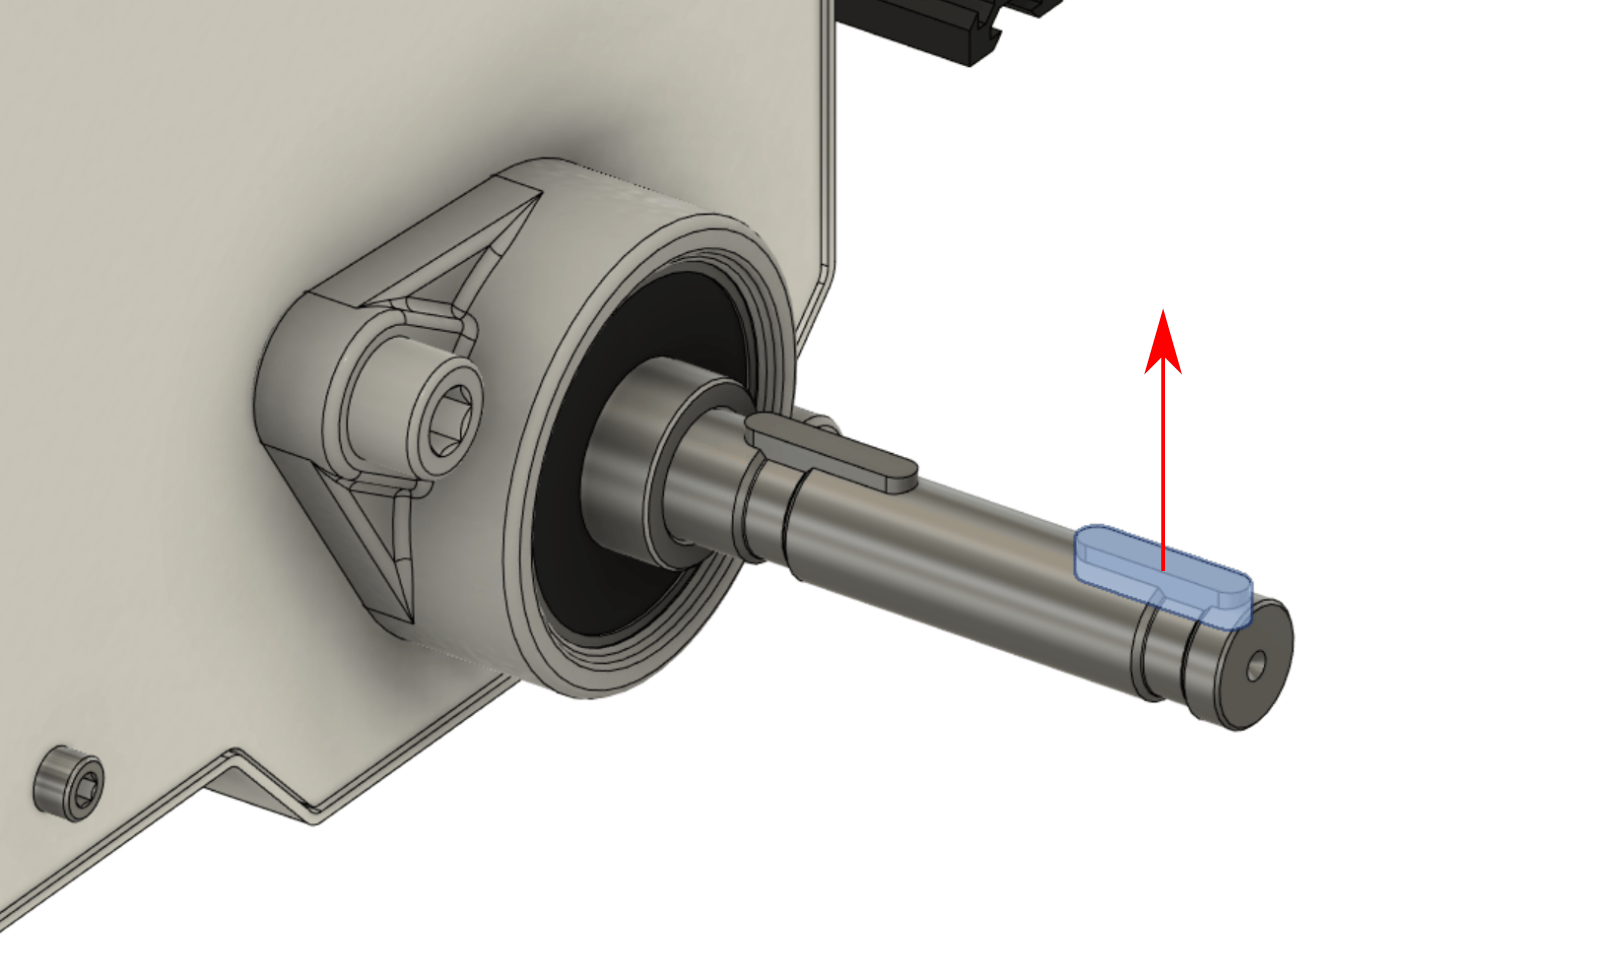 |
| 4. Take the wheel hub and loosen 2x DIN 912 M6x20 bolts (5 mm Allen key) and remove the M8 set screw. | |
| 5. Slide the wheel hub on the shaft, aligning it with the parallel key as far as it will go, as shown in the cross-section below. |  |
| 6. Hand tighten 2x DIN 912 M6x20 bolts, keeping the equal spacing between the clamp and main hub body on both sides. | |
| 7. Install and hand-tighten the M8 set screw. | |
| 8. Tighten 2x DIN 912 M6x20 using 8 Nm. | |
| 9. Tighten the M8 set screw using 5 Nm. | |
| 10. Slide the wheel assembly (with the tire valve facing outwards and wheel threads facing forward) and secure it with 5x DIN 912 M6x12 bolts. Torque it to 6 Nm. | |
| 11. Repeat the above steps for all axles. |
Software
After changing the wheels on the robot, you must let know the ROS drivers about it. By default, ROS drivers on the Built-in Computer run within a Docker container and assume WH01 are mounted. Follow the steps to make the required changes in the software:
-
Login via SSH into a Built-in Computer. Open the terminal and execute
ssh husarion@10.15.20.2with passwordhusarion. -
Edit the Docker Compose file with
nano compose.yaml. -
Add
wheel_typetohusarion_ugv_rosDocker Containercommandsection (replaceWH02withWH01depending on the wheels used):- ROS:
command: >roslaunch --wait panther_bringup bringup.launchexit_on_wrong_hw:=false wheel_type:=WH02- ROS 2:
command: >ros2 launch husarion_ugv_bringup bringup.launch.pyexit_on_wrong_hw:=false wheel_type:=WH02 -
Restart Docker Containers:
docker compose up -d --force-recreate