User Computer Setup Guide
The Husarion Panther UGV platform can be integrated with an optional User Computer. It enables running application specific software such as an autonomous navigation stack, perception pipelines, AI workloads, or any other user-defined applications.
This article provides general recommendations and guidelines for assembling and configuring any User Computer, especially in scenarios where:
- the robot was ordered without a pre-installed User Computer, or
- the provided Husarion OS is not used and a fully custom software environment is required.
Please note that when using a custom User Computer setup, the responsibility for system configuration, operating system setup, networking, and software integration lies with the user.
If you ordered the robot with the official x64 User Computer, it is already fully configured and ready to use.
The device comes with Husarion OS preinstalled, including a properly configured network setup and a preinstalled ROS 2 environment compatible with the robot platform. In this case, no additional system-level configuration is required to start developing and running ROS-based applications.
In that case you can ignore this article.
Requirements
User Computer should have:
- an Ethernet port to connect to the robot internal network,
- a power supply or an adapter cable compatible with the User Power Panel.
- sufficient compute resources (CPU/GPU/RAM) depending on the intended workload (e.g., SLAM, AI inference, multi-sensor processing),
- a supported operating system compatible with the intended middleware (e.g., ROS 2).
Mounting
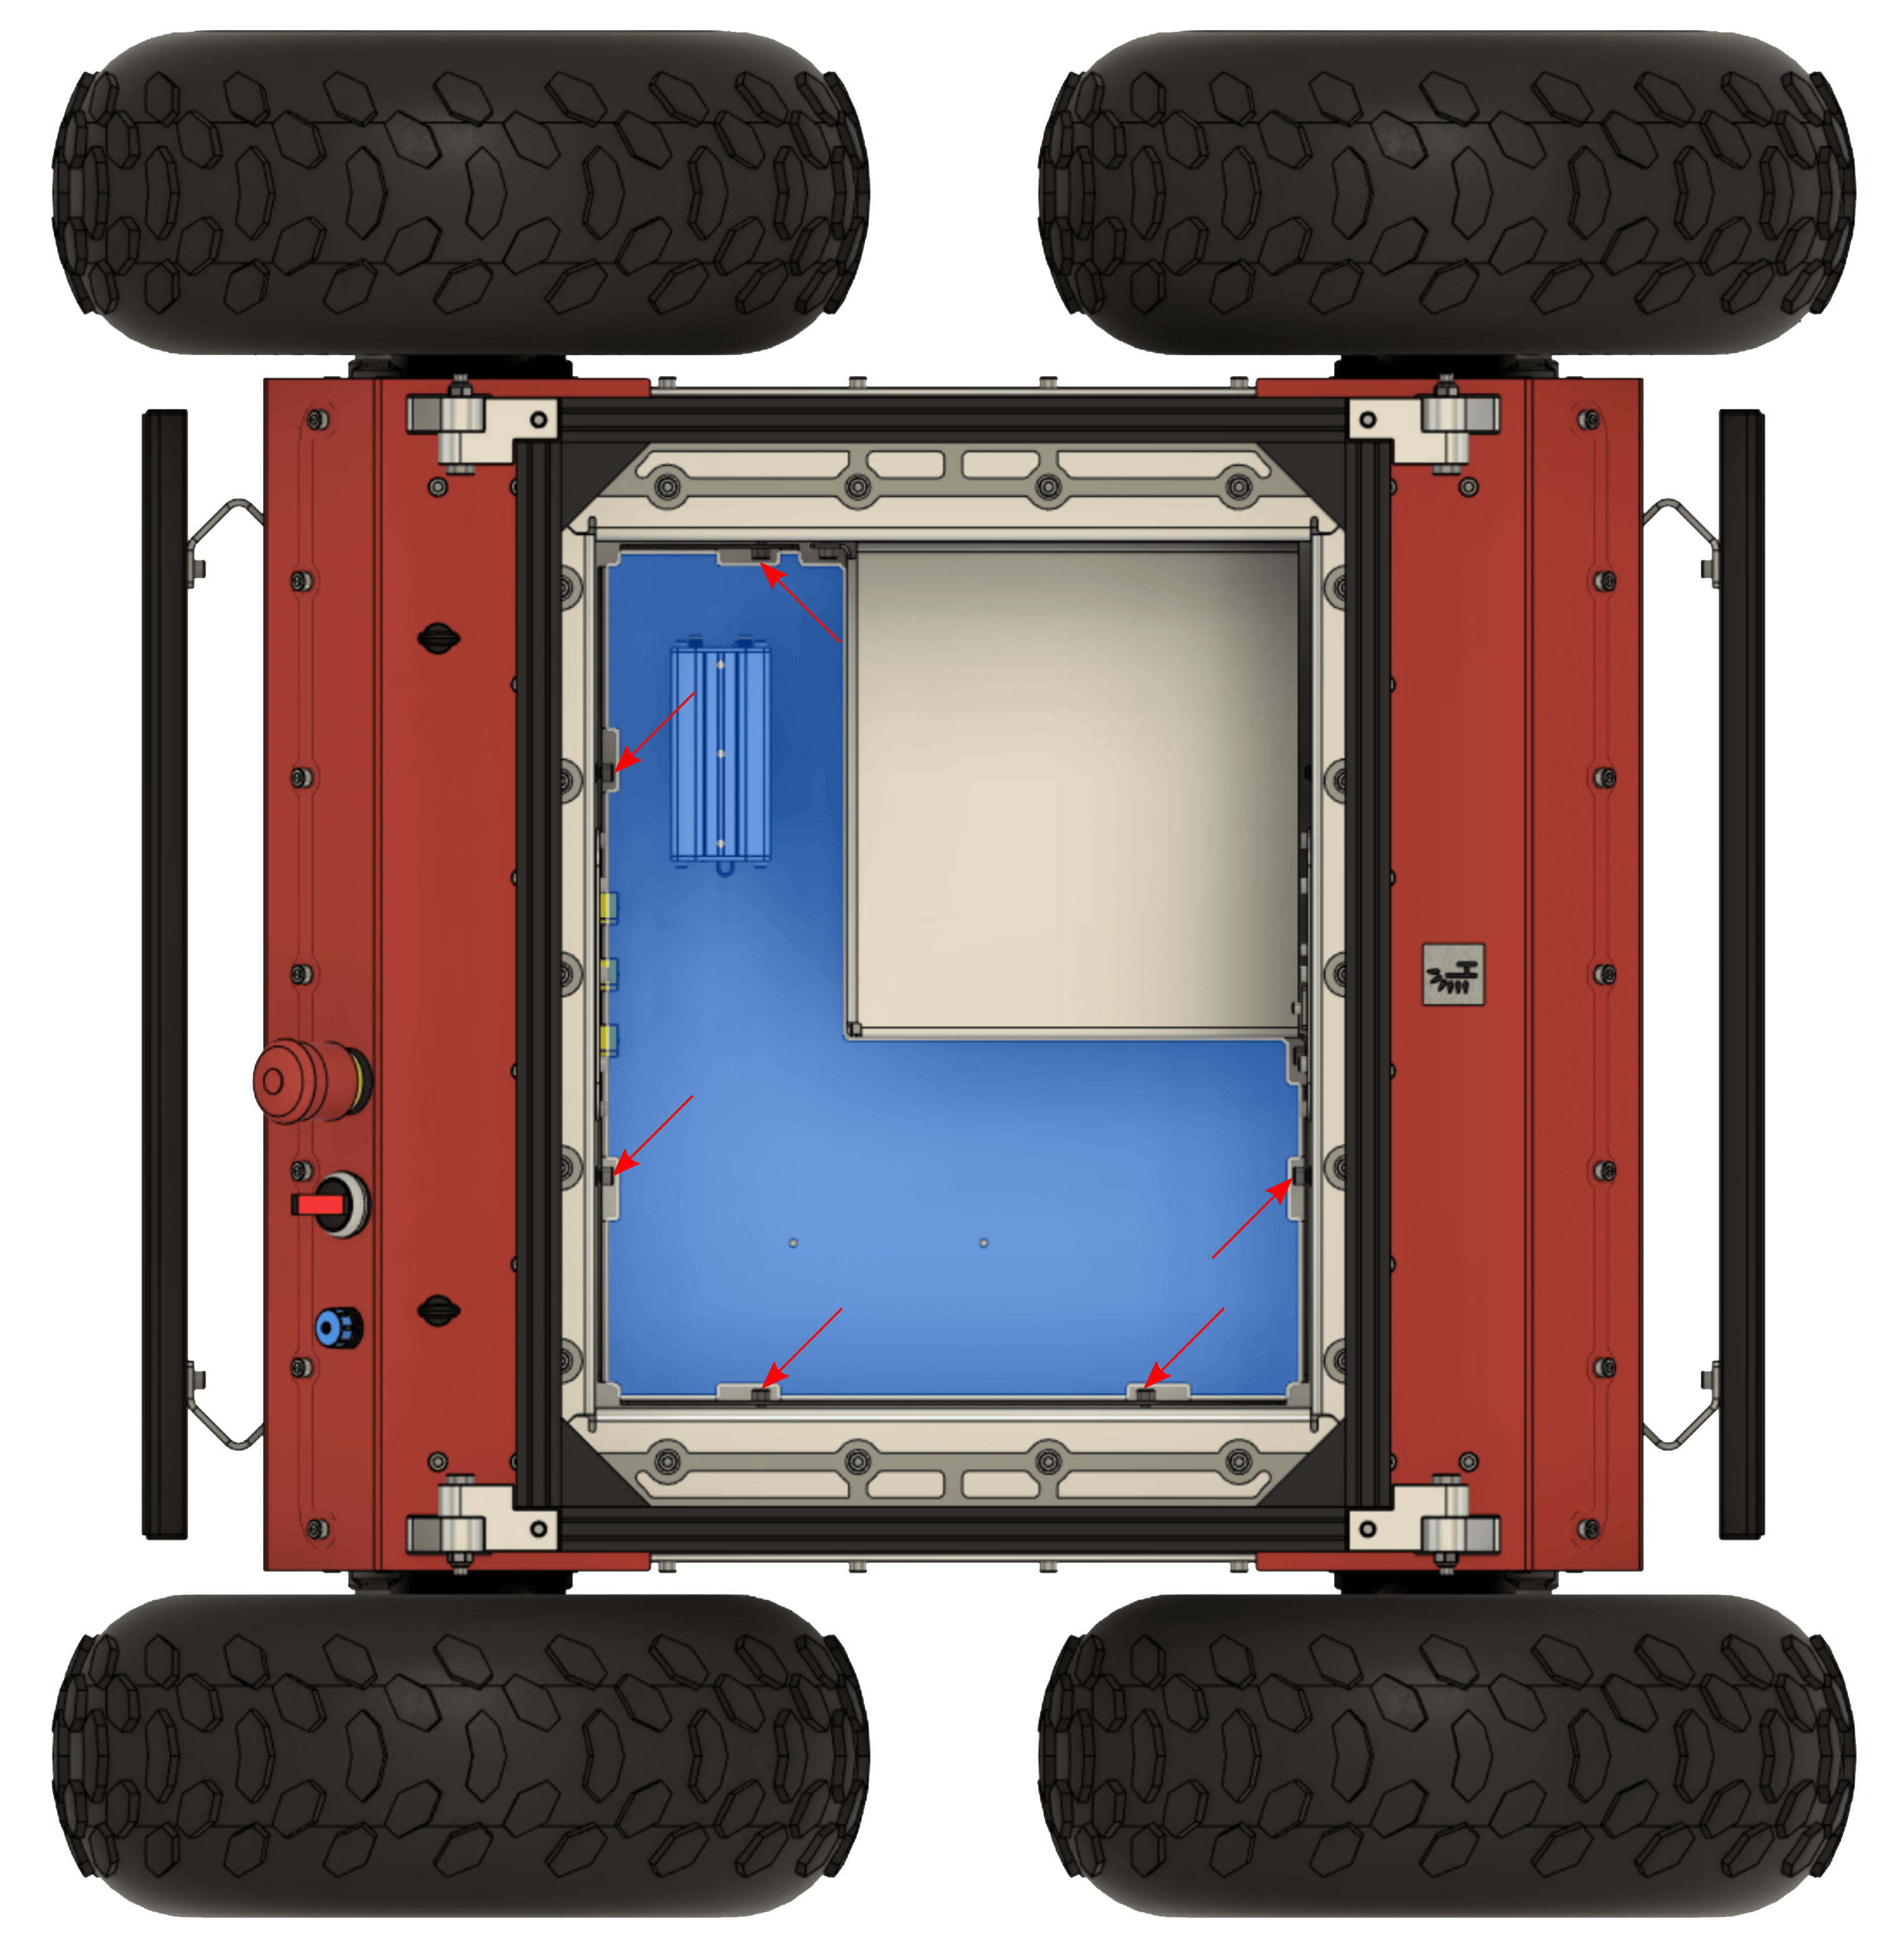
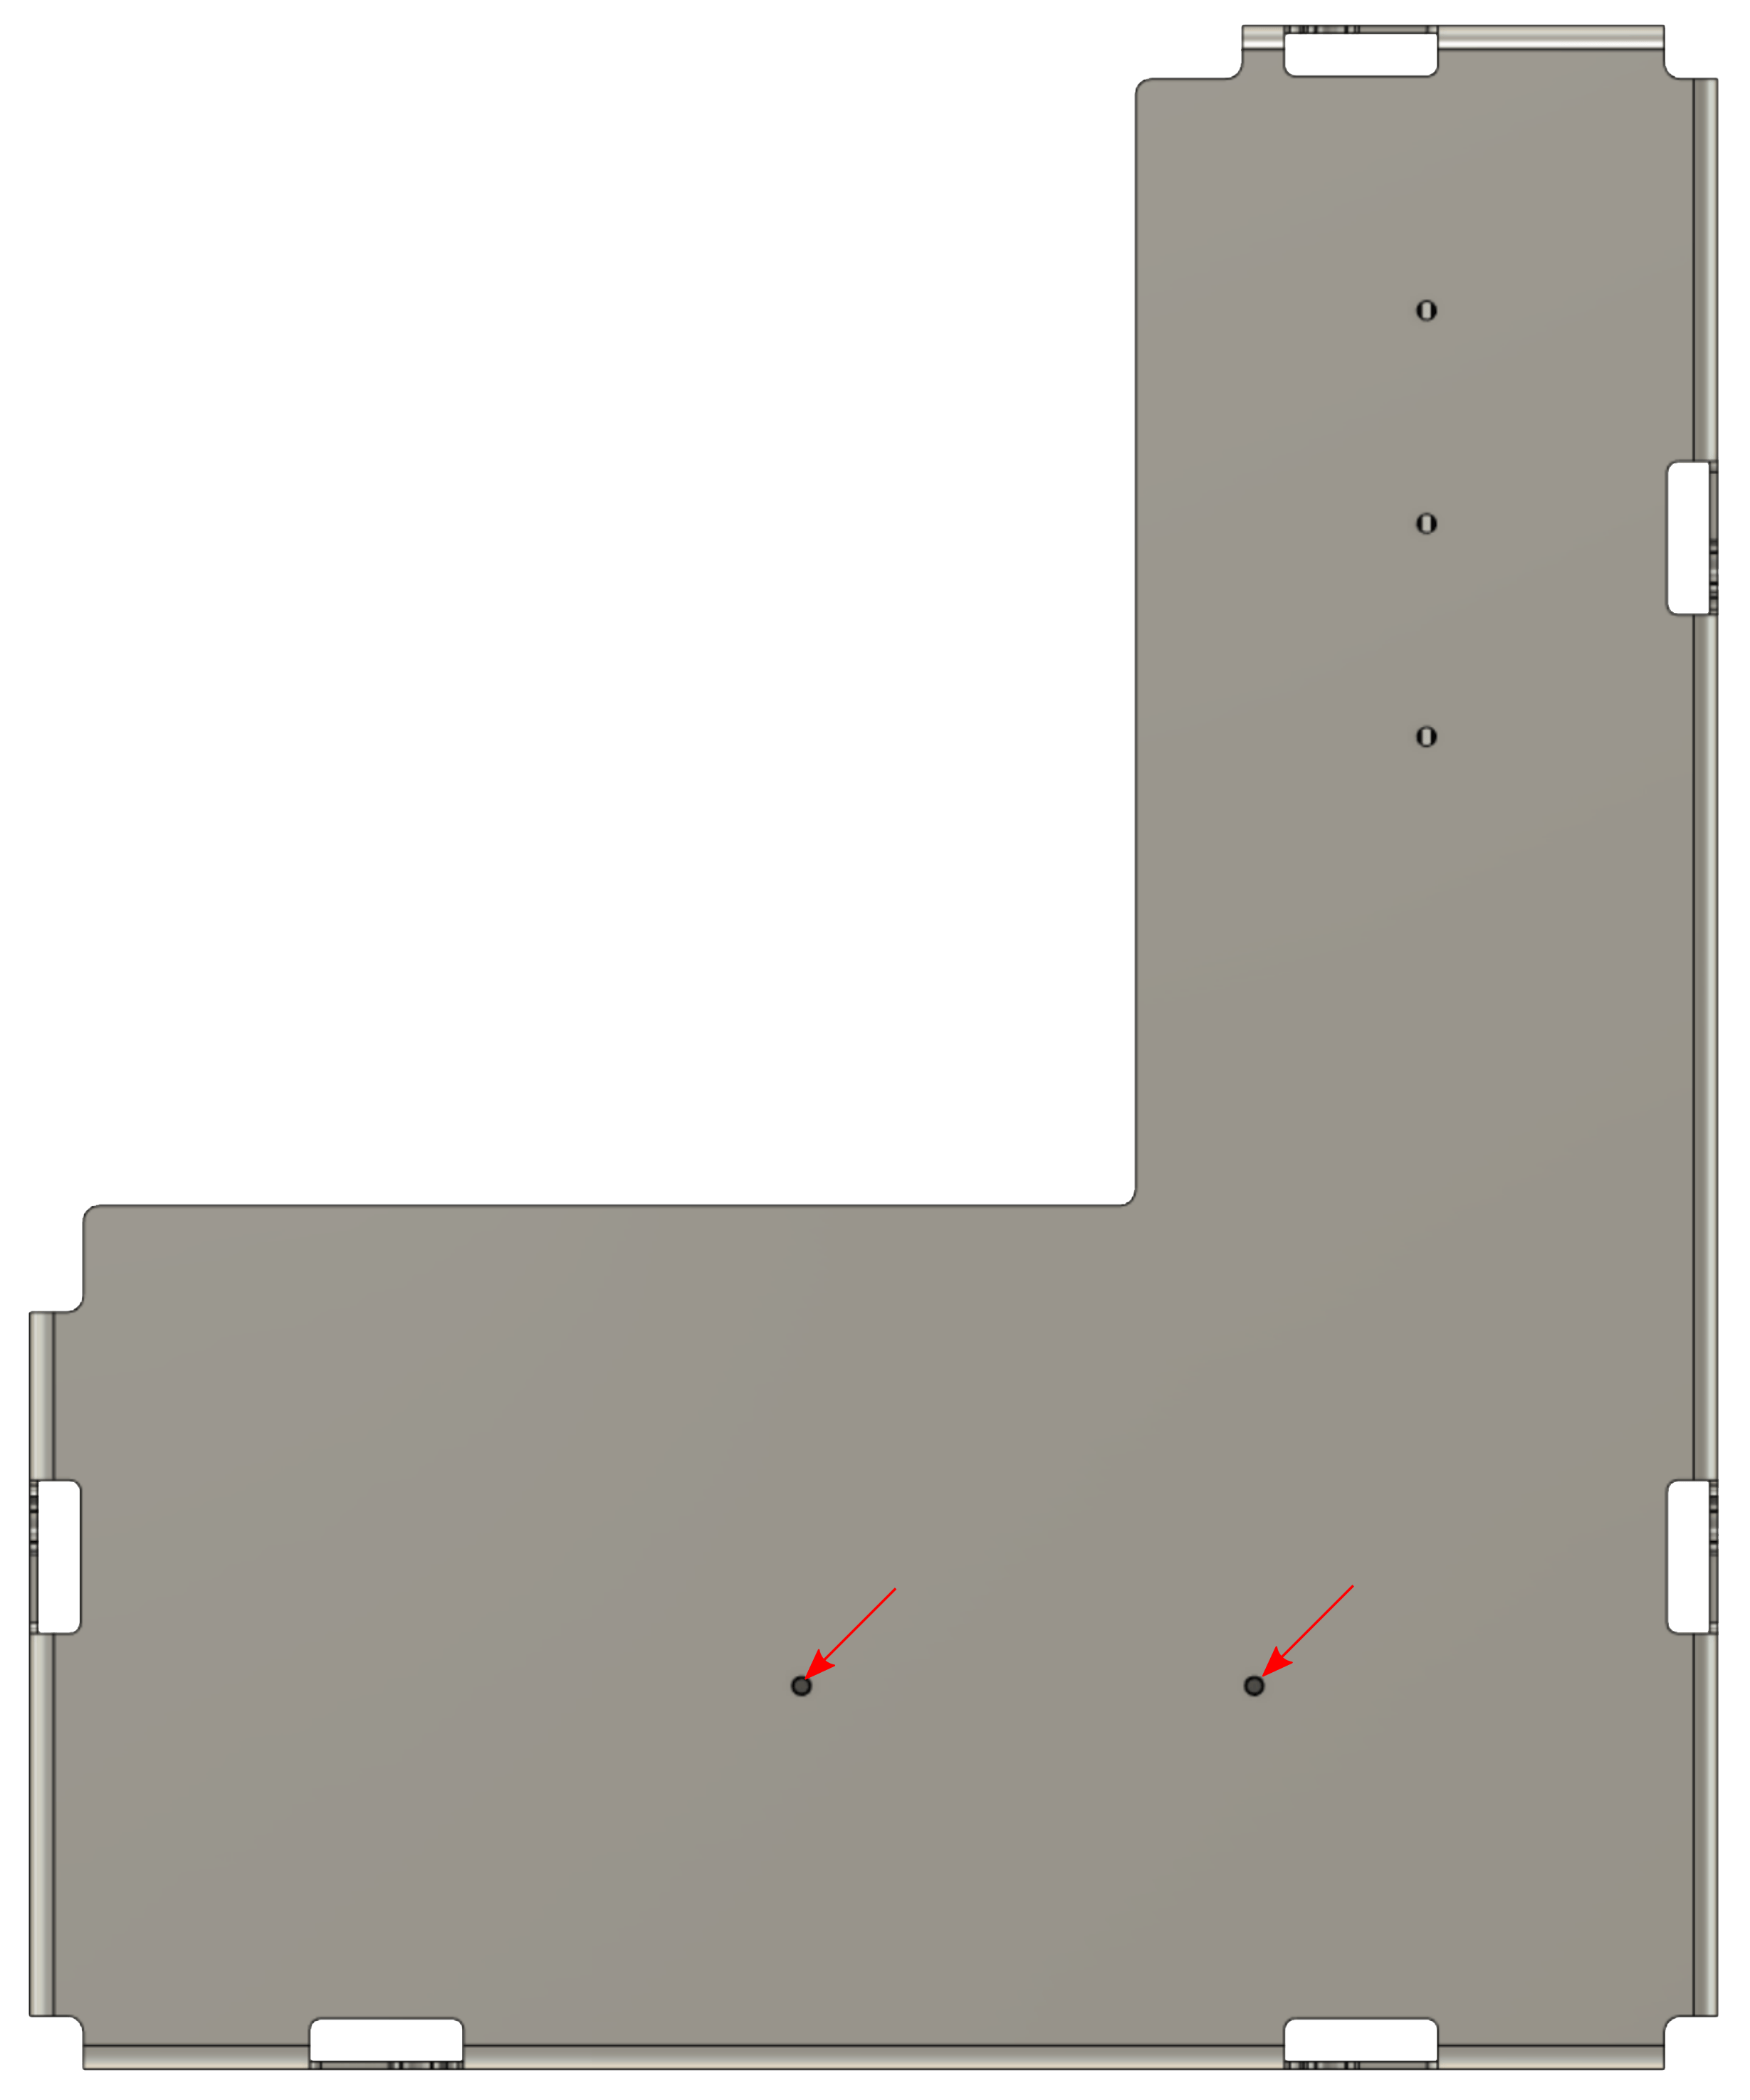
The User Computer can be mounted in a dedicated place on the Shelf inside Panther's User Compartment. The instructions below will guide you on how to mount and set it up within your robot.
-
Turn off Panther.
-
Open the Cover following the instruction to access the inside of the User Space.
-
To remove the User Shelf loosen 6 x DIN 912 M5x12 screws and disconnect cables connected between the router and Panther.
-
Mount the computer using supplied screws (M3x8) to User Shelf.
-
Place the User Shelf in Panther and tighten 6 x DIN 912 M5x12 screws.
-
Before set up make sure you have read User Power Panel documentation. Connect your Custom User Computer to the user power panel. You can use 5V, 12V or 19V.
-
Plug the supplied Ethernet cable into the User Computer and Teltonika RUTX11 router.
-
Close the Cover following instruction.
Software Configuration
Operating System
We recommend installing the Husarion OS image (an Ubuntu LTS–based image) on the user’s computer, where most packages and configurations are already set up. You can also use the official Ubuntu LTS images with ROS installed. Remember to select the distribution compatible with the running ROS driver on the Built-in Computer:
- ROS 2 Humble
- ROS 2 Jazzy
Husarion OS image is not available for the ZED BOX. In this case, please stay with the official Nvidia JetPack image. The configuration of this computer may require additional configuration on the customer's part. Check manufacturer's documentation for more details.
Applying DHCP Static Lease
To ensure that your User Computer always receives the same IP address from the RUTX11 router, you can set up a DHCP Static Lease. Check the Static IP Setup section for detailed instructions on how to do this.
Time synchronization
The Built-in Computer acts as an NTP server using Chrony. Configure your computer as a Chrony client to synchronize time.
-
Install Chrony:
husarion@10.15.20.3:~$sudo apt install chrony -
Configure Chrony to use the Built-in Computer as the time source:
husarion@10.15.20.3:~$sudo nano /etc/chrony/chrony.confAdd the following line:
server 10.15.20.2 iburst preferSave the file by pressing
Ctrl+S,Ctrl+X. -
Restart chrony:
husarion@10.15.20.3:~$sudo systemctl restart chrony.service -
Verify synchronization:
husarion@10.15.20.3:~$chronyc trackingThe
Reference IDfield should contain the IP address of the Built-in Computer (10.15.20.2) or haverpiin the name. Example output:husarion@10.15.20.3:~$Reference ID : 0A0F1402 (rpi.lan)
Stratum : 3
Ref time (UTC) : Tue Jun 18 09:03:48 2024
System time : 0.000016993 seconds fast of NTP time
Last offset : +0.000017369 seconds
RMS offset : 0.000017369 seconds
Frequency : 11.877 ppm slow
Residual freq : +0.359 ppm
Skew : 2.391 ppm
Root delay : 0.029849635 seconds
Root dispersion : 0.003227041 seconds
Update interval : 64.3 seconds
Leap status : Normal
Soft Shutdown
Following these steps will allow the Built-in Computer to request the shutdown procedure on the User Computer or any computer you install.
If you set up your User Computer with the default 10.15.20.3 IP address and username husarion select the Default configuration tab. In case the IP address or username differs from the defaults, select Custom configuration tab.
- Default configuration
- Custom configuration
The default configuration assumes the system was installed following the steps in User Computer system reinstallation.
-
From any device in Husarion UGV's network connect to the User Computer via SSH:
ssh husarion@10.15.20.3 -
Install husarion-shutdown snap:
husarion@10.15.20.3:~$sudo snap install husarion-shutdown
sudo husarion-shutdown.startBy default, the ROS driver on the Built-in Computer will try to shutdown the User Computer at
10.15.20.3IP address. That is why no other changes are required for it to work in the default configuration.
-
Connect to your User Computer. On your User Computer set a static ip to
10.15.20.XX, whereXXis the IP address in step Applying DHCP Static Lease, and a netmask to255.255.255.0. Check if your User Computer established correct connection with the RUX11 by:husarion@10.15.20.3:~$ping 10.15.20.1and with the Built-in computer:
husarion@10.15.20.3:~$ping 10.15.20.2 -
SSH into the User Computer where
XXis the IP address in step Applying DHCP Static Lease, andusernameis the name of the user you want to log in to:ssh username@10.15.20.XX -
Install husarion-shutdown snap and configure the IP address:
username@10.15.20.XX:~$sudo snap install husarion-shutdown
sudo snap set husarion-shutdown config.user-computer-ip="10.15.20.XX"
sudo husarion-shutdown.start -
Exit the terminal session with the User Computer by typing
exit. -
SSH into the Built-in Computer with:
ssh husarion@10.15.20.2 -
Edit the shutdown_hosts.yaml file on the Built-in Computer with the command:
husarion@10.15.20.2:~$nano ~/config/husarion_ugv_manager/config/shutdown_hosts.yaml -
Paste the following content into the file:
hosts:
  - ip: 10.15.20.XX
    port: 3003
timeout: 10.0 -
Save the file by pressing
Ctrl+s,Ctrl+x. -
Restart the driver:
husarion@10.15.20.2:~$docker compose up -d --force-recreate
After following those steps, when the Power Button is pressed sudo shutdown will be invoked on the User Computer. The Built-in Computer will wait for the User Computer until it gracefully shuts down before shutting down itself and powering off the robot.