Creating Nodes - Services
In this chapter, we continued the previous project about services, so make sure you understand all the topics from the previous chapter. Services are one-time requests that should perform a one-time action, and the result of that action is returned as a response. To be able to better understand the interactions between packages, we will use a node called image_saver, which will save the image in the computer's memory after receiving a request. In addition, you will also learn how to perform recurring actions using timers.
Prerequisites
This tutorial is dedicated to the ROSbot XL. However, most of the information and commands are also compatible with ROSbot 2R/2 PRO, and most changes are simple and come down to launching the appropriate container, depending on your hardware configuration. It is also possible to solve the tutorial using the Gazebo simulation.
If you don't already own a ROSbot, you can get one from the Husarion store.
The tutorials are designed to flow sequentially and are best followed in order. If you're looking to quickly assess the content of a specific tutorial, refer to the ROS 2 Tutorials repository, which contains the completed outcomes.
Install ROS package
First, we need to install the image_view package, which contains the image_save node. To install the additional ROS package, we use apt. The syntax of ROS packages is standardized and looks like this:
sudo apt-get install ros-$ROS_DISTRO-NAME-OF-PACKAGE
For image_view package use:
sudo apt-get install ros-$ROS_DISTRO-image-view
How service works?
The image_view package includes the image_saver node that allows you to save the image. In order for the node to work properly, we need to tell it what topic with the image it should subscribe to. Also we should remap the topic related to the camera info /camera_info. This topic contains information about camera parameters such as resolution or data for image calibration. We also set parameter save_all_image to false. With all this information, the command to run should look like this.
ros2 run image_view image_saver --ros-args -p save_all_image:=false -r /image:=<camera_topic> -r /camera_info:=<camera_info_topic>
<camera_topic>and<camera_info_topic>parameter depends on the type of camera you are using. Useros2 topic listto find camera topic.
At this point, the node is already running and waiting for the /save service to be called. We can call this service from the terminal. Usage of ros2 service is similar to ros2 topic.
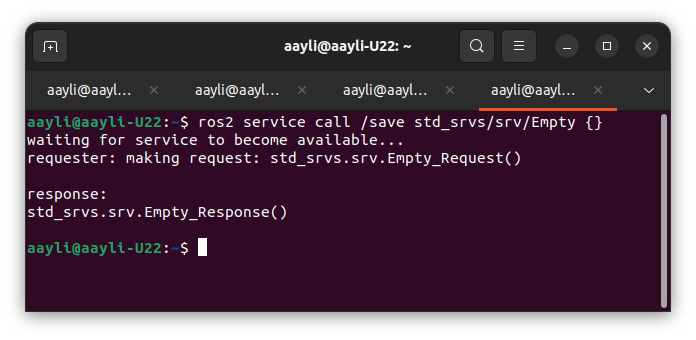
ros2 service call /save std_srvs/srv/Empty {}
As a result, you should see the following message and the photo should appear in your current home directory.
Create timer
Very often in robotics you have to perform an activity cyclically, every certain amount of time. In this case, we can use a timer. In this example, we create a basic timer action that will print a message in the terminal.
#include <chrono>

#include "rclcpp/rclcpp.hpp"
#include "sensor_msgs/msg/image.hpp"
#include "std_msgs/msg/u_int8.hpp"

using namespace std::placeholders;
using namespace std::chrono_literals;

class MyNode : public rclcpp::Node
{
public:
   MyNode() : Node("my_node")
   {
      subscriber_ = create_subscription<sensor_msgs::msg::Image>(
         "/image", rclcpp::SensorDataQoS(), std::bind(&MyNode::image_callback, this, _1));
      publisher_ = create_publisher<std_msgs::msg::UInt8>("/brightness", rclcpp::SensorDataQoS());
      timer_ = create_wall_timer(5s, std::bind(&MyNode::timer_callback, this));

      RCLCPP_INFO(get_logger(), "Node started!");
   }

private:
   void image_callback(const sensor_msgs::msg::Image::SharedPtr image)
   {
      long long sum = 0;
      for (uint8_t value : image->data)
      {
         sum += value;
      }
      int avg = sum / image->data.size();

      std_msgs::msg::UInt8 brightness_msg;
      brightness_msg.data = avg;
      publisher_->publish(brightness_msg);
   }

   void timer_callback()
   {
      RCLCPP_INFO(get_logger(), "Timer activate");
   }

   rclcpp::Subscription<sensor_msgs::msg::Image>::SharedPtr subscriber_;
   rclcpp::Publisher<std_msgs::msg::UInt8>::SharedPtr publisher_;
   rclcpp::TimerBase::SharedPtr timer_;
};

int main(int argc, char **argv)
{
  rclcpp::init(argc, argv);
  auto node = std::make_shared<MyNode>();
  rclcpp::spin(node);
  rclcpp::shutdown();
  return 0;
}
The code explained
-
Thanks to the addition of the
<chrono>library and the use ofusing namespace std::chrono_literals;function, we can determine the time in the computer in an easy and legible way (e.g.5smeans 5 seconds).#include <chrono>using namespace std::chrono_literals; -
Define publisher object.
rclcpp::TimerBase::SharedPtr timer_; -
Next, create a timer, which will call the
timer_callbackfunction after counting down 5 seconds.timer_ = create_wall_timer(5s, std::bind(&MyNode::timer_callback, this)); -
Creating a callback function, which prints a info.
void timer_callback(){RCLCPP_INFO(get_logger(), "Timer activate");}
Building configuration
In this case, we don't need to make any changes, because the chrono library is visible by default.
Build & run your code
In order to build and run the code, we follow the same procedure as in the previous chapter. Use colcon build to build code and ros2 run to run it.
Task 1
Please build and test above code. Now your node should print Timer activate every 5 seconds.
Adding parameters
Our timer works beautifully, however, what if we wanted the action to be performed once every 5s, and another time every 1s. This would require changing the code every time and rebuilding it. However, there is a much better way instead of changing the code, we can add a parameter specifying how often the timer should be executed. In the following, we will modify the node so that it is possible to change the action frequency.
#include <chrono>
#include "rclcpp/rclcpp.hpp"
#include "sensor_msgs/msg/image.hpp"
#include "std_msgs/msg/u_int8.hpp"
#include "std_msgs/msg/string.hpp"
#include "std_srvs/srv/empty.hpp"
using namespace std::placeholders;
using namespace std::chrono_literals;
class MyNode : public rclcpp::Node
{
public:
MyNode() : Node("my_node")
{
declare_parameter("timer_period_s", 5);
auto timer_period_s = std::chrono::seconds(get_parameter("timer_period_s").as_int());
subscriber_ = create_subscription<sensor_msgs::msg::Image>(
"/image", rclcpp::SensorDataQoS(), std::bind(&MyNode::image_callback, this, _1));
publisher_ = create_publisher<std_msgs::msg::UInt8>("/brightness", rclcpp::SensorDataQoS());
timer_ = create_wall_timer(timer_period_s, std::bind(&MyNode::timer_callback, this));
RCLCPP_INFO(get_logger(), "Node started!");
}
private:
void image_callback(const sensor_msgs::msg::Image::SharedPtr image)
{
long long sum = 0;
for (uint8_t value : image->data)
{
sum += value;
}
int avg = sum / image->data.size();
std_msgs::msg::UInt8 brightness_msg;
brightness_msg.data = avg;
publisher_->publish(brightness_msg);
}
void timer_callback()
{
   RCLCPP_INFO(get_logger(), "Timer activate");
}
rclcpp::Subscription<sensor_msgs::msg::Image>::SharedPtr subscriber_;
rclcpp::Publisher<std_msgs::msg::UInt8>::SharedPtr publisher_;
rclcpp::TimerBase::SharedPtr timer_;
};
int main(int argc, char **argv)
{
rclcpp::init(argc, argv);
auto node = std::make_shared<MyNode>();
rclcpp::spin(node);
rclcpp::shutdown();
return 0;
}
The code explained
-
In ROS 2,
declare_parameteris used to declare a parameter namedtimer_period_swith a default value (if parameter doesn't exist).get_parameterfunction is used to retrieve the value of a parameter. Withstd::chrono::secondsfunction we convert the parameter value to a appropriate type.declare_parameter("timer_period_s", 5);auto timer_period_s = std::chrono::seconds(get_parameter("timer_period_s").as_int()); -
We use a
timer_period_svariable to specify the frequency of the timer.timer_ = create_wall_timer(timer_period_s, std::bind(&MyNode::timer_callback, this));
Create launch file
As before, we can use the ros2 run command, this time with the additional argument -p timer_period_s:=1. So the entire command looks like this:
ros2 run tutorial_pkg my_first_node --ros-args -p timer_period_s:=1 -r /image:=<camera_topic>
<camera_topic>parameter depends on the type of camera you are using. Useros2 topic listto find camera topic.
However, we can see that slowly writing the command to run the script becomes more and more tedious. So let's do it differently and use the ros2 launch command discussed in the first chapter. Select your favorite language and create new new file inside launch directory.
- Python
- XML
- YAML
mkdir -p ~/ros2_ws/src/tutorial_pkg/launch/
touch ~/ros2_ws/src/tutorial_pkg/launch/my_launch_file.launch.py
Open this file and paste following code:
from launch import LaunchDescription
from launch_ros.actions import Node
def generate_launch_description():
my_node = Node(
package="tutorial_pkg",
executable="my_first_node",
name="my_node",
remappings=[("/image", "/your/camera/image")],
parameters=[{"timer_period_s": 2}]
)
return LaunchDescription([my_node])
Replace
/your/camera/imageaccording to the type of your camera. Useros2 topic listto find camera topic.
mkdir -p ~/ros2_ws/src/tutorial_pkg/launch/
touch ~/ros2_ws/src/tutorial_pkg/launch/my_launch_file.xml
Open this file and paste following code:
<launch>
<node pkg="tutorial_pkg" exec="my_first_node" name="my_node">
<remap from="/image" to="/your/camera/image"/>
<param name="timer_period_s" value="2"/>
</node>
</launch>
Replace
/your/camera/imageaccording to the type of your camera. Useros2 topic listto find camera topic.
mkdir -p ~/ros2_ws/src/tutorial_pkg/launch/
touch ~/ros2_ws/src/tutorial_pkg/launch/my_launch_file.yaml
Open this file and paste following code:
launch:
- node:
pkg: "tutorial_pkg"
exec: "my_first_node"
name: "my_node"
remap:
- from: "/image"
to: "/your/camera/image"
param:
- name: "timer_period_s"
value: 2
Replace
/your/camera/imageaccording to the type of your camera. Useros2 topic listto find camera topic.
Building configuration
Before we launch our file we need to change the configuration file to include the new files. To do this simply add this line into your CMakeList.txt.
install(DIRECTORY
launch
DESTINATION share/${PROJECT_NAME})
Launch your node
Now we can again build our package. From now on it is recommended to use an additional --symlink-install flag. Thanks to this flag, the files are linked instead of being copied, which makes the changes made in our package visible without the need to rebuild the code.
- Python
- XML
- YAML
colcon build --symlink-install
ros2 launch tutorial_pkg my_launch_file.launch.py
colcon build --symlink-install
ros2 launch tutorial_pkg my_launch_file.xml
colcon build --symlink-install
ros2 launch tutorial_pkg my_launch_file.yaml
Task 2
Change timer_period_s parameter value in launch file and test it. Properly created program should work in an intuitive way without rebuilding your code.
Create client
As you can see, creating a timer with parameters is relatively simple. In addition, we already know how services work, let's create a node that will save us one camera frame every certain number of seconds. So let's use the created timer to start the service and save the photo from the camera.
#include <chrono>
#include "rclcpp/rclcpp.hpp"
#include "sensor_msgs/msg/image.hpp"
#include "std_msgs/msg/u_int8.hpp"
#include "std_msgs/msg/string.hpp"
#include "std_srvs/srv/empty.hpp"
using namespace std::placeholders;
using namespace std::chrono_literals;
class MyNode : public rclcpp::Node
{
public:
MyNode() : Node("my_node")
{
declare_parameter("timer_period_s", 5);
auto timer_period_s = std::chrono::seconds(get_parameter("timer_period_s").as_int());
subscriber_ = create_subscription<sensor_msgs::msg::Image>(
"/image", rclcpp::SensorDataQoS(), std::bind(&MyNode::image_callback, this, _1));
publisher_ = create_publisher<std_msgs::msg::UInt8>("/brightness", rclcpp::SensorDataQoS());
timer_ = create_wall_timer(timer_period_s, std::bind(&MyNode::timer_callback, this));
client_ = create_client<std_srvs::srv::Empty>("/save");
RCLCPP_INFO(get_logger(), "Node started!");
}
private:
void image_callback(const sensor_msgs::msg::Image::SharedPtr image)
{
long long sum = 0;
for (uint8_t value : image->data)
{
sum += value;
}
int avg = sum / image->data.size();
std_msgs::msg::UInt8 brightness_msg;
brightness_msg.data = avg;
publisher_->publish(brightness_msg);
}
void timer_callback()
{
RCLCPP_INFO(get_logger(), "Timer activate");
if (!client_->wait_for_service(1s))
{
RCLCPP_ERROR(get_logger(), "Failed to connect to the image save service");
return;
}
auto request = std::make_shared<std_srvs::srv::Empty::Request>();
auto future = client_->async_send_request(request);
}
rclcpp::Subscription<sensor_msgs::msg::Image>::SharedPtr subscriber_;
rclcpp::Publisher<std_msgs::msg::UInt8>::SharedPtr publisher_;
rclcpp::TimerBase::SharedPtr timer_;
rclcpp::Client<std_srvs::srv::Empty>::SharedPtr client_;
};
int main(int argc, char **argv)
{
rclcpp::init(argc, argv);
auto node = std::make_shared<MyNode>();
rclcpp::spin(node);
rclcpp::shutdown();
return 0;
}
The code explained
-
Begin with importing required header for
std_srvs/Emptymessage type. This type of message has no field and can not carry any data, it can be used only for invoking action in another node and getting reply when its done.#include "std_srvs/srv/empty.hpp" -
Declare publisher object.
rclcpp::Client<std_srvs::srv::Empty>::SharedPtr client_; -
Next, define a client on your system to call a
std_srvs::srv::Emptyservice named/save.client_ = create_client<std_srvs::srv::Empty>("/save"); -
Add to timer callback.
if (!client_->wait_for_service(1s)){RCLCPP_ERROR(get_logger(), "Failed to connect to the image save service");return;}auto request = std::make_shared<std_srvs::srv::Empty::Request>();auto future = client_->async_send_request(request);
Some cameras have a different QoS (Quality of Service) policy, which causes incompatibility with the image_saver node. This causes the program to function incorrectly and cause errors to appear. To fix the error, it is worth familiarizing yourself with the available parameters provided by the manufacturer.
Building configuration
To build project you need to add the new std_srvs dependency to the CMakeList.txt.
cmake_minimum_required(VERSION 3.8)
project(tutorial_pkg)
# Set C++ standard to C++14
if(NOT CMAKE_CXX_STANDARD)
set(CMAKE_CXX_STANDARD 14)
endif()
if(CMAKE_COMPILER_IS_GNUCXX OR CMAKE_CXX_COMPILER_ID MATCHES "Clang")
add_compile_options(-Wall -Wextra -Wpedantic)
endif()
# find dependencies
find_package(ament_cmake REQUIRED)
find_package(rclcpp REQUIRED)
find_package(sensor_msgs REQUIRED)
find_package(std_msgs REQUIRED)
find_package(std_srvs REQUIRED)
add_executable(my_first_node src/my_first_node.cpp)
ament_target_dependencies(my_first_node rclcpp sensor_msgs std_msgs std_srvs)
install(TARGETS
my_first_node
DESTINATION lib/${PROJECT_NAME}
)
install(DIRECTORY
launch
DESTINATION share/${PROJECT_NAME})
ament_package()
Create launch file
To test the node, we can use the ros2 run command again. However, it would require that in addition to my_first_node, you also run the image_saver node. Instead, we can add an additional node to our launch file.
- Python
- XML
- YAML
Open this file and paste following code:
from launch import LaunchDescription
from launch_ros.actions import Node
def generate_launch_description():
my_node = Node(
package="tutorial_pkg",
executable="my_first_node",
name="my_node",
remappings=[("/image", "/your/camera/image")],
parameters=[{"timer_period_s": 2}]
)
image_saver = Node(
package="image_view",
executable="image_saver",
name="image_saver",
remappings=[("/image", "/your/camera/image"), ("/camera_info", "/your/camera/camera_info")],
parameters=[{"save_all_image": False}]
)
return LaunchDescription([my_node, image_saver])
Replace
/your/camera/imageaccording to the type of your camera. Useros2 topic listto find camera topic.
pen this file and paste following code:
<launch>
<node pkg="tutorial_pkg" exec="my_first_node" name="my_node">
<remap from="/image" to="/your/camera/image"/>
<param name="timer_period_s" value="2"/>
</node>
<node pkg="image_view" exec="image_saver" name="image_saver">
<remap from="/image" to="/your/camera/image"/>
<remap from="/camera_info" to="/your/camera/camera_info"/>
<param name="save_all_image" value="false" />
</node>
</launch>
Replace
/your/camera/imageaccording to the type of your camera. Useros2 topic listto find camera topic.
Open this file and paste following code:
launch:
  - node:
      pkg: "tutorial_pkg"
      exec: "my_first_node"
      name: "my_node"
      remap:
        - from: "/image"
          to: "/your/camera/image"
      param:
        - name: "timer_period_s"
          value: 2
- node:
pkg: "image_view"
exec: "image_saver"
name: "image_saver"
remap:
- from: "/image"
to: "/your/camera/image"
- from: "/camera_info"
to: "/your/camera/camera_info"
param:
- name: "save_all_image"
value: false
- name: "filename_format"
value: "./saved_images/image%04d.%s"
Replace
/your/camera/imageand/your/camera/camera_infoaccording to the type of your camera. Useros2 topic listto find camera topic.
Build your code and run it. After running this file, you may notice that a new save_images folder has been created in your current directory. On the side of this folder you can see how frames are written to it.
Create service
The final modification in the node will be the provision of service. Service will return information regarding how many images were saved.
#include <chrono>

#include "rclcpp/rclcpp.hpp"
#include "sensor_msgs/msg/image.hpp"
#include "std_msgs/msg/u_int8.hpp"
#include "std_msgs/msg/string.hpp"
#include "std_srvs/srv/empty.hpp"
#include "std_srvs/srv/trigger.hpp"

using namespace std::placeholders;
using namespace std::chrono_literals;

class MyNode : public rclcpp::Node
{
public:
   MyNode() : Node("my_node")
   {
      declare_parameter("timer_period_s", 5);
      auto timer_period_s = std::chrono::seconds(get_parameter("timer_period_s").as_int());

      subscriber_ = create_subscription<sensor_msgs::msg::Image>(
         "/image", rclcpp::SensorDataQoS(), std::bind(&MyNode::image_callback, this, _1));
      publisher_ = create_publisher<std_msgs::msg::UInt8>("/brightness", rclcpp::SensorDataQoS());
      timer_ = create_wall_timer(timer_period_s, std::bind(&MyNode::timer_callback, this));
      client_ = create_client<std_srvs::srv::Empty>("/save");
      server_ = create_service<std_srvs::srv::Trigger>(
         "/image_counter", std::bind(&MyNode::counter_callback, this, _1, _2));

      RCLCPP_INFO(get_logger(), "Node started!");
   }

private:
   void image_callback(const sensor_msgs::msg::Image::SharedPtr image)
   {
      long long sum = 0;
      for (uint8_t value : image->data)
      {
         sum += value;
      }
      int avg = sum / image->data.size();

      std_msgs::msg::UInt8 brightness_msg;
      brightness_msg.data = avg;
      publisher_->publish(brightness_msg);
   }

   void timer_callback()
   {
      RCLCPP_INFO(get_logger(), "Timer activate");

      if (!client_->wait_for_service(1s))
      {
         RCLCPP_ERROR(get_logger(), "Failed to connect to the image save service");
         return;
      }

      saved_imgs_++;
      auto request = std::make_shared<std_srvs::srv::Empty::Request>();
      auto future = client_->async_send_request(request);
   }

   void counter_callback(const std_srvs::srv::Trigger::Request::SharedPtr req,
      const std_srvs::srv::Trigger::Response::SharedPtr res)
   {
      res->success = 1;
      res->message = "Saved images: " + std::to_string(saved_imgs_);
   }

   uint saved_imgs_ = 0;
   rclcpp::Subscription<sensor_msgs::msg::Image>::SharedPtr subscriber_;
   rclcpp::Publisher<std_msgs::msg::UInt8>::SharedPtr publisher_;
   rclcpp::TimerBase::SharedPtr timer_;
   rclcpp::Client<std_srvs::srv::Empty>::SharedPtr client_;
   rclcpp::Service<std_srvs::srv::Trigger>::SharedPtr server_;
};

int main(int argc, char **argv)
{
  rclcpp::init(argc, argv);
  auto node = std::make_shared<MyNode>();
  rclcpp::spin(node);
  rclcpp::shutdown();
  return 0;
}
The code explained
-
Begin with including required header for
std_srvs/Triggermessage type. It has no field for request and two fields for response:bool successandstring message.#include "std_srvs/srv/trigger.hpp" -
Define variable for storing number of saved images.
uint saved_imgs_ = 0; -
Declare publisher object.
rclcpp::Service<std_srvs::srv::Trigger>::SharedPtr server_; -
Next, define a server on your system to providing the
std_srvs::srv::Triggerservice named/image_counter. Functionstd::bindlike in subscriber points to callback.server_ = create_service<std_srvs::srv::Trigger>("/image_counter", std::bind(&MyNode::counter_callback, this, _1, _2)); -
Increment image counter after saving frame.
saved_imgs_++; -
Callback function to execute when service is called. Inside the function, we set up the response fields according to the std_srvs/Trigger service.
void counter_callback(const std_srvs::srv::Trigger::Request::SharedPtr req,const std_srvs::srv::Trigger::Response::SharedPtr res){res->success = 1;res->message = "Saved images: " + std::to_string(saved_imgs_);}
Running your code
Build your node and execute launch file. Then call service using ros2 service call command.
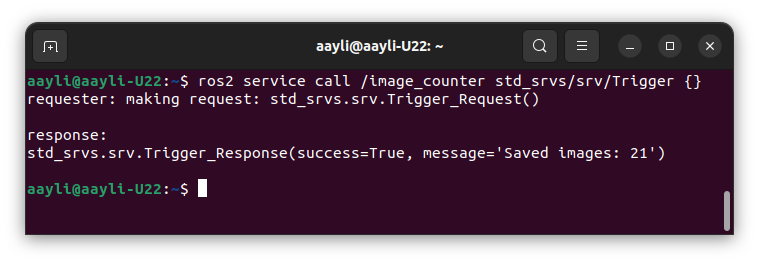
ros2 service call /image_counter std_srvs/srv/Trigger {}
As a response you should get something like this:
Summary
Congratulations! You understand the basics of using the basic communication interfaces in ROS. From now on you should have no problems writing your own node code, adding parameters, build it and run it with either ros2 run or ros2 launch. By now, you should be familiar with the following concepts in ROS (Robot Operating System):
- running ROSbot/Gazebo simulator
- subscription to published topics
- publish new topic
- create timer
- provide service
- call to provided service
by Rafał Górecki, Husarion
Need help with this article or experiencing issues with software or hardware? 🤔
- Feel free to share your thoughts and questions on our Community Forum. 💬
- To contact service support, please use our dedicated Issue Form. 📝
- Alternatively, you can also contact our support team directly at: support@husarion.com. 📧