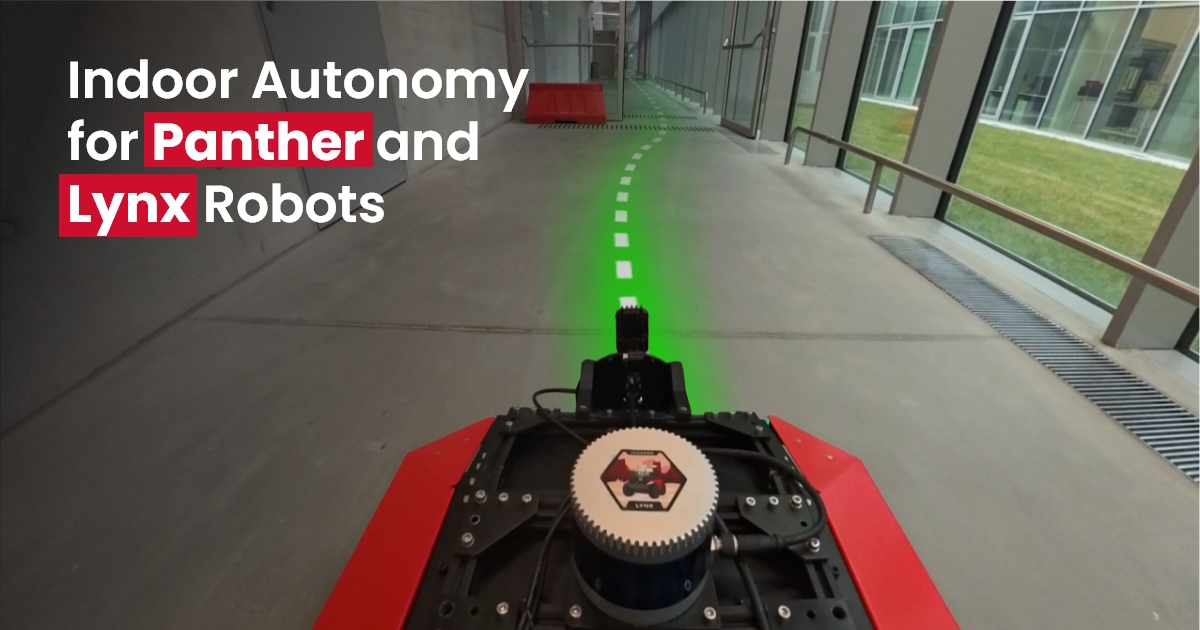
Autonomous Navigation and Docking for Panther & Lynx UGVs

Panther and Lynx are versatile mobile robot platforms designed for a wide range of applications. One popular use case is autonomous navigation, such as transporting goods in industrial or logistics settings.
To make this easier, we’ve created a reference autonomy setup that’s modular, open-source, and easy to adapt to your needs. It's available on our GitHub: 👉 husarion-ugv-autonomy
In this blog post, we’ll walk you through:
- System architecture and component layout.
- How to adapt the setup to your specific project requirements.
- Preparing the WiBotic charging station for autonomous docking.
- Mapping, navigation, and docking procedures
One Setup for Multiple Robots and Environments
The same autonomy setup works with:
- Panther & Lynx: platforms with minimal modifications.
- Simulation and real-world deployments: you can use the same codebase to validate your setup in simulation before deploying it on real hardware.
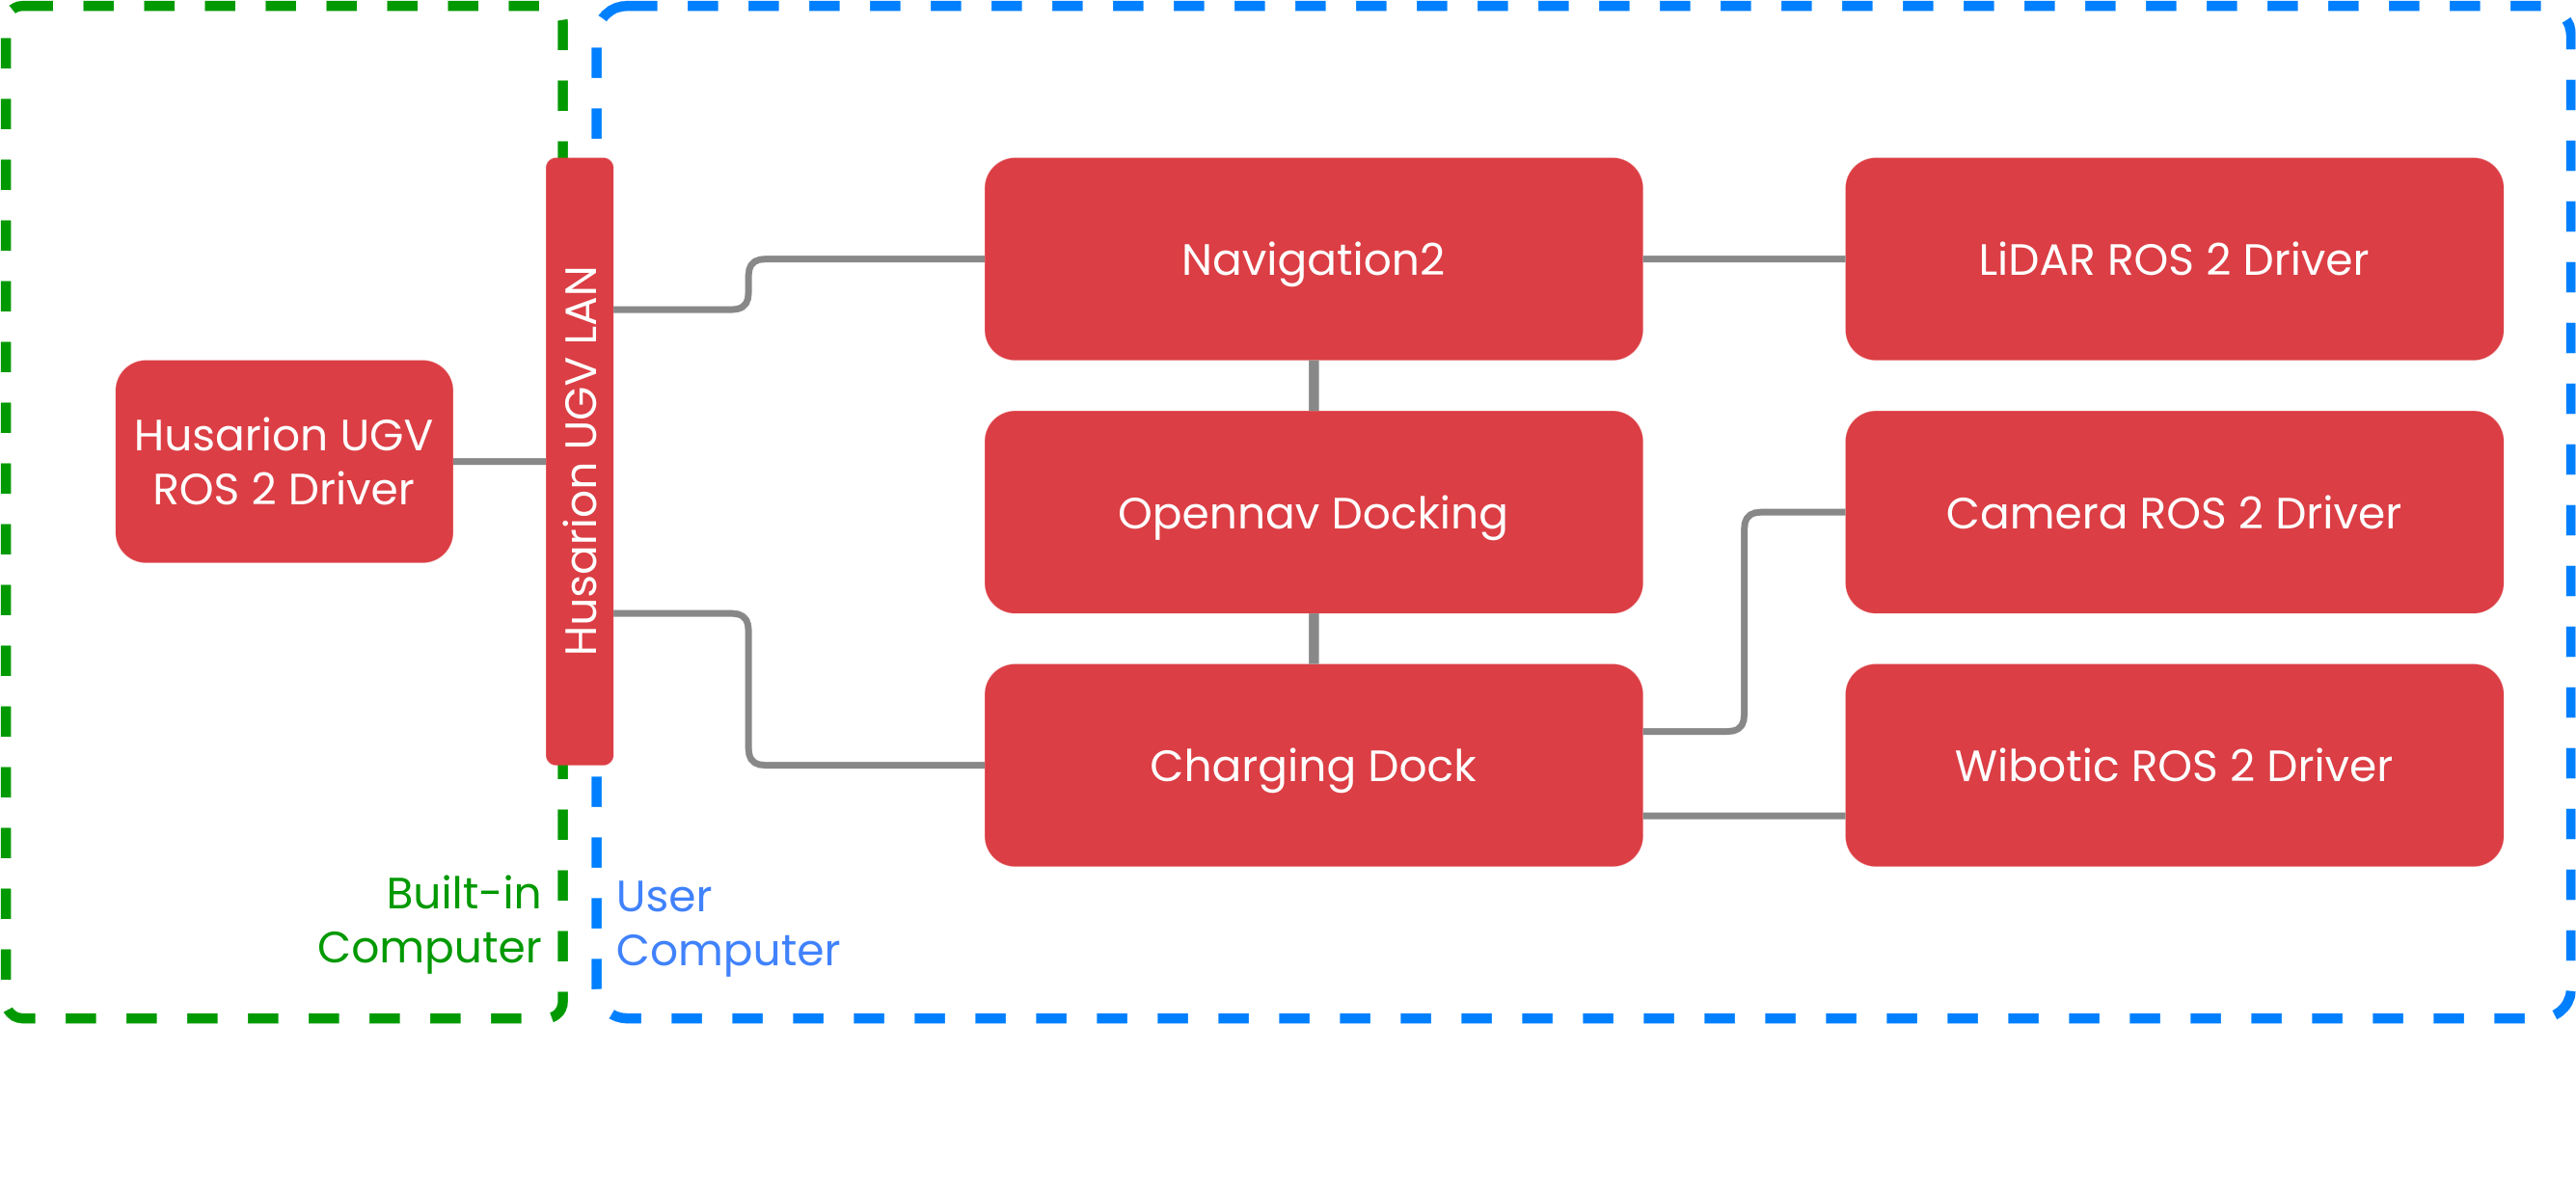
System Architecture
The setup is divided between the Built-In computer and the User Computer for modularity and performance.
-
Built-In Computer (Panther/Lynx):
- ROS 2 Driver: Handles low-level communication and motor control for the Panther/Lynx platform.
- Direct integration with hardware components such as lights, battery management and safety features.
-
User Computer:
- Nav2 Stack: Implements mapping, high-level autonomous navigation, such as path planning and obstacle avoidance.
- nterfaces with external sensors (LiDAR, cameras).
- Detects the position of the charging station.
Requirements
To launch this demo you will need:
- Husarion Lynx or Panther UGVs
- User Computer inside
- LiDAR for mapping and navigation
- WiBotic Wireless Charging station WCH01 and WCH02 (for docking),
- CAN01 USB-CAN Converter for charging feedback (for docking),
- RGB camera (for docking)
To show you how to setup additional sensors we will use RPlidar and OAK D Pro Wide.
Hardware setup
- Mount the WCH01 wireless receiver to your robot.
- Connect CAN01 between the User Computer and the WiBotic receiver for feedback.
- Mount the LiDAR and camera in open area on the top cover and make sure the LiDAR’s beams aren’t obstructed.
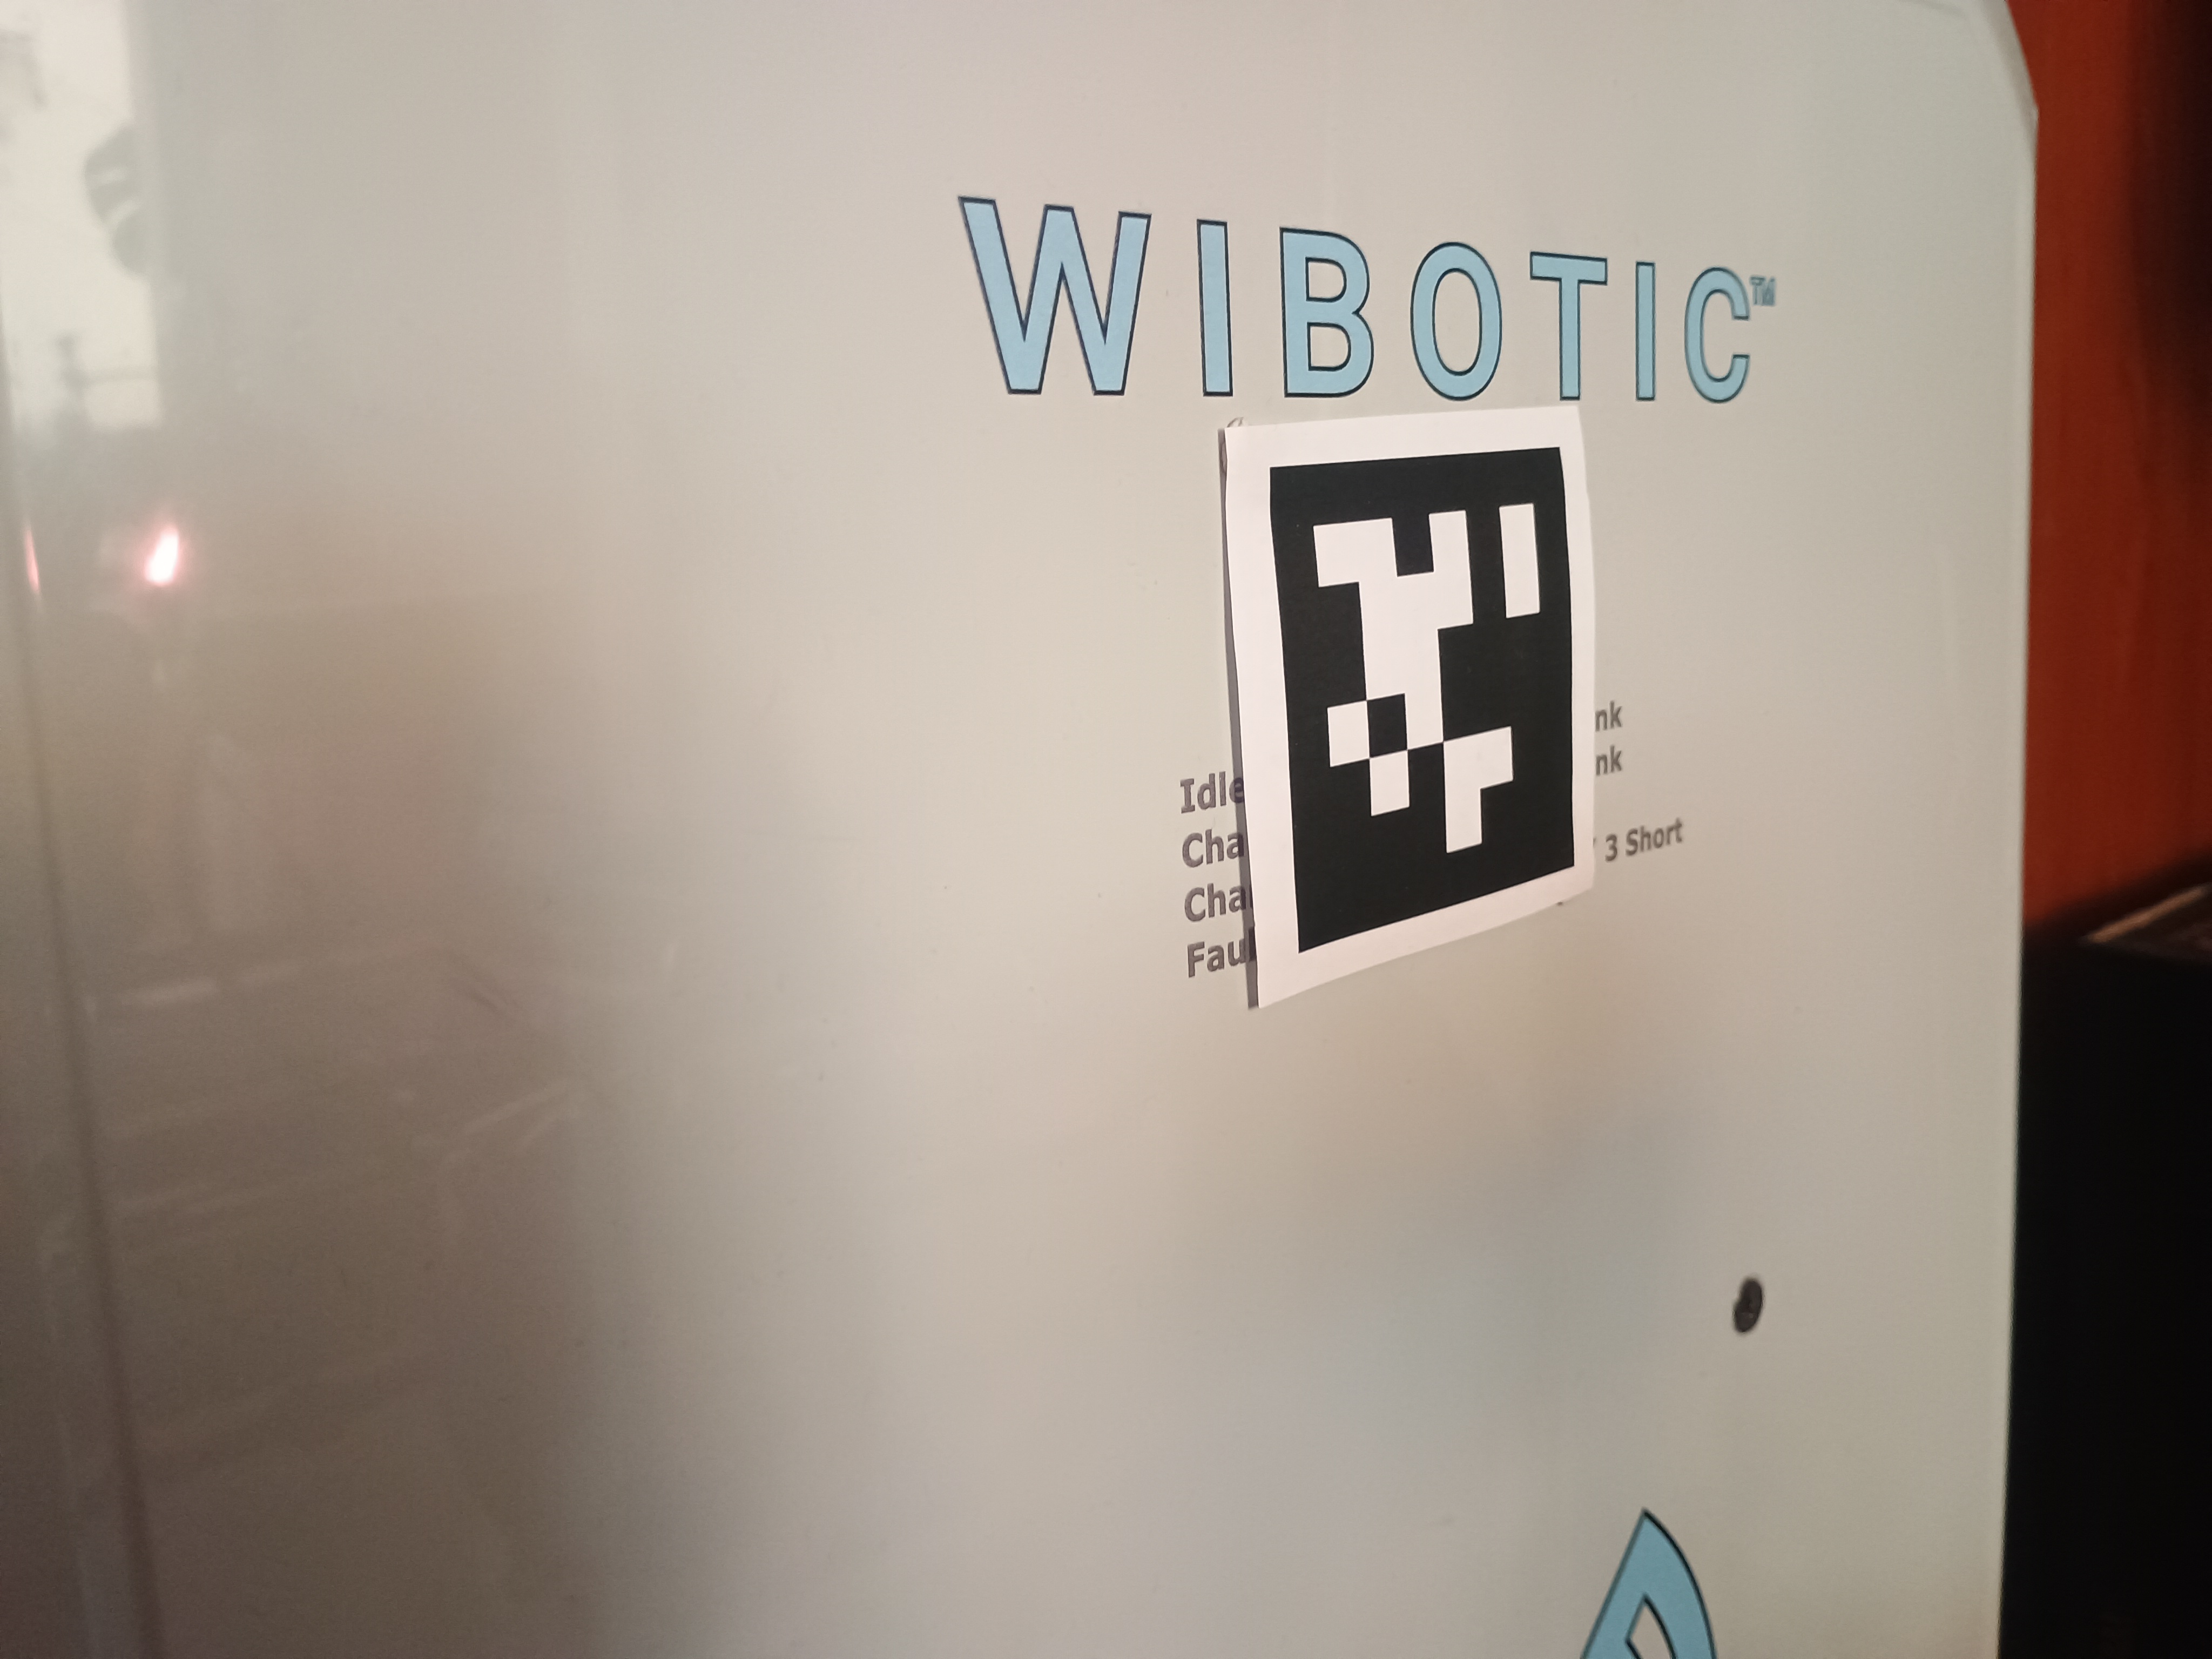
- Position the camera ~50cm above the ground to detect the AprilTag on the charging station.
Print and attach an AprilTag to your charging station. Default tag configuration:
- family
36h11, - ID
0, - tag size
80mm.
To generate tags you can use this generator.
Software Setup
Log in to the User Computer
To connect to the Husarion UGV, first, you need to connect your computer/laptop to the robot's WiFi network. Once you're connected, you can log into the User Computer using SSH (a secure way to access another computer remotely). To do this, open a terminal and type:
ssh husarion@10.15.20.3
Please remember to change the default password (husarion) to your own using:
passwd husarion
Set Up the Repository
Go to husarion-ugv-autonomy repository and use the template by click the [Use this template] button. The button is located in the upper right corner of the page.

Then clone your repository to the User Computer.
In the tutorial we clone our template repository but it is highly recommended to use your own repositories based on our template.
git clone https://github.com/husarion/husarion-ugv-autonomy
cd husarion-ugv-autonomy
Our setup is designed to be flexible and configurable, allowing you to tailor it to your specific requirements. Here’s how you can make adjustments:
1. Using a Different LiDAR or camera
If you want to use a different LiDAR or camera model:
- Create your own compose file with sensor drivers based on RPlidar compose.
- Look at our other available components here.
2. Changing the Sensor Placement
To change where the sensors are mounted:
- Modify the parameters of a
static_transform_publisherinsidesensors/compose.rplidar.yaml,sensors/compose.luxonis.yamlor your own compose file.
Running the Demo
Start Sensor Drivers
To run previously prepared sensors use docker compose -f <file> up -d command. For our case it is:
docker compose -f sensors/compose.luxonis.yaml -f sensors/compose.rplidar.yaml up -d
Then, check if your sensors are set up correctly:
-
using
ros2 topic list -tcheck if you see data topics from drivers,husarion@user-computer:~$ros2 topic list -t
[...]
/oak/rgb/camera_info [sensor_msgs/msg/CameraInfo]
/oak/rgb/image_raw [sensor_msgs/msg/Image]
[...]
/scan [sensor_msgs/msg/LaserScan] -
check if transformations are correct and sensors are included in the
tftree of the robot. You can use prepared visualization look at🕹️ Step 3: Control the robot from a Web Browserfrom the README.md.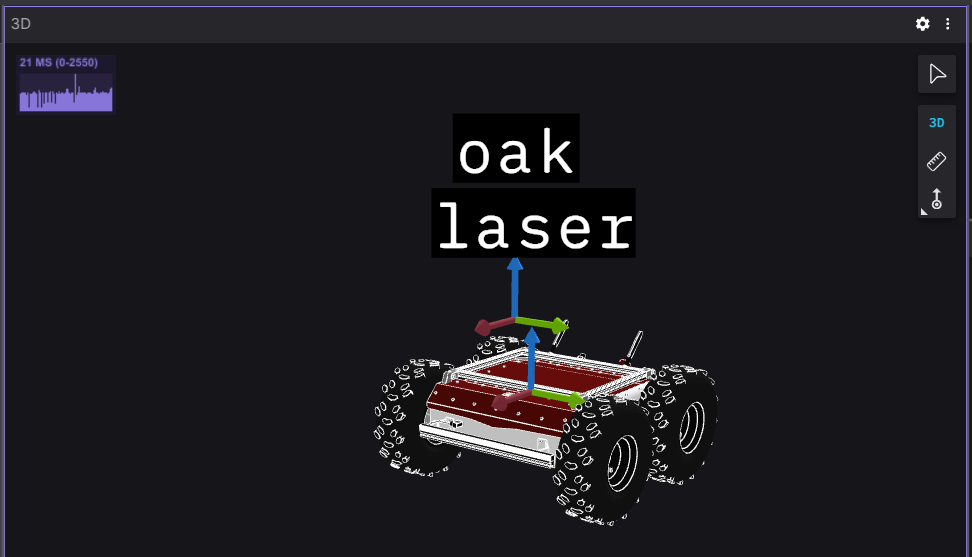
Launch Autonomy Stack
Follow the instructions in the README.md to:
- Launch sensor drivers
- Map the environment
- Navigate with goal poses
- Dock to the charging station
Summary
The Husarion UGV Panther and Lynx, combined with the modular and open husarion-ugv-autonomy reference setup, provide a powerful solution for autonomous navigation. With this setup, you can quickly prototype, customize, and deploy solutions tailored to your specific needs.
Check out the setup on GitHub and start building today: GitHub: husarion-ugv-autonomy
If you have any comments or questions, you can easily reach us at our Community Portal, by e-mail at contact@husarion.com, or through GitHub's Issues and Pull Requests.