ROSbot + ROSDS Quick Start
This tutorial will walk you through connecting ROSbot to ROS Development Studio (RDS) cloud service. We will show you, how to setup ROSbot to be controlled remotely with application hosted in cloud.
Step 1: ROSbot configuration
ROSbot configuration is required only once, to proceed with setup, you will need to connect with ROSbot through SSH or remote desktop and issue all commands in terminal.
Clone RDS repository for real robot connection and install dependencies:
mkdir RDS
cd RDS
git clone https://bitbucket.org/theconstructcore/rosds_real_robot_connection.git
cd rosds_real_robot_connection/
./realrobot_setup.sh rosbot
We will use Husarion tutorial_pkg as an example, but you can configure in the same way any other ROS application.
Wa assume that you are working on fresh ROSbot image. If you were following any other Husarion tutorials, then you may have already installed husarion_pkg repository, in that case, you can skip this workspace setup.
Prepare workspace and clone repository:
mkdir ~/ros_workspace
mkdir ~/ros_workspace/src
cd ~/ros_workspace/src
catkin_init_workspace
git clone https://github.com/husarion/tutorial_pkg.git
cd ~/ros_workspace
catkin_make
echo '. ~/ros_workspace/devel/setup.sh' >> ~/.bashrc
. ~/.bashrc
Step 2: Connecting ROSbot to RDS cloud
Below setup is required each time ROSbot is connecting to RDS:
RDS cloud uses Husarnet to provide low-latency, secure connection between cloud environment and physical robot. Husarnet is a P2P Virtual LAN network, so from your ROSbot and RDS environment point of view, they are in the same LAN network. That means you can execute some ROS nodes in the RDS and other ones in the physical robot.
ROSbot can be connected to RDS using web panel, go to web browser and open, please substitute ROSbotIP with your device IP in local network:
ROSbotIP:3000
You will see connection panel:
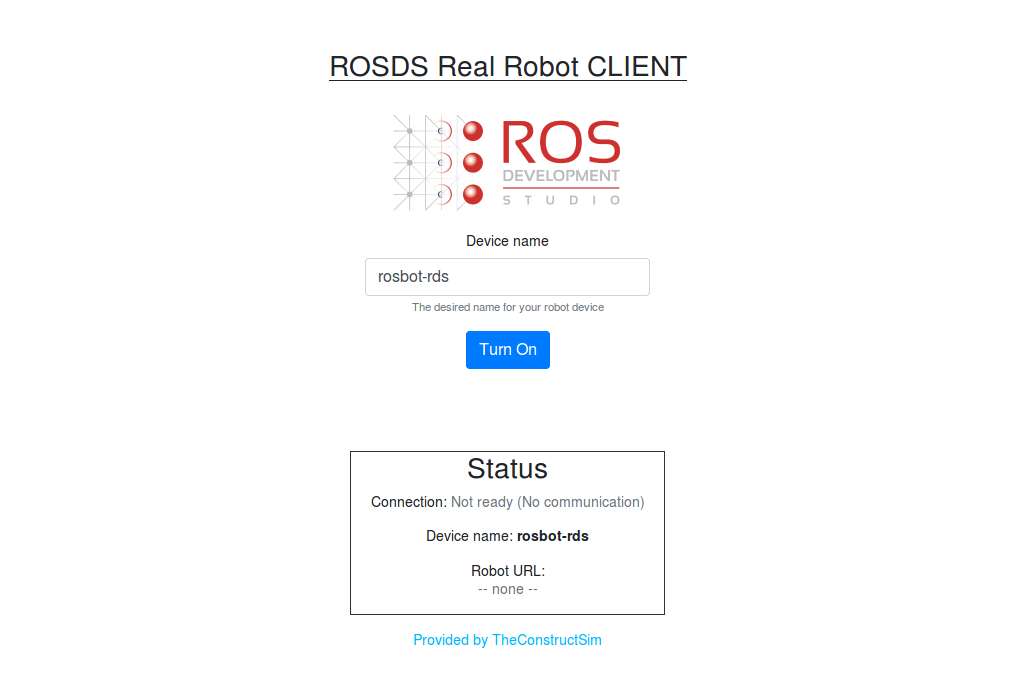
In Device name field type name of your device rosbot-rds then push button Turn On, you will see link under ROSbot URL:
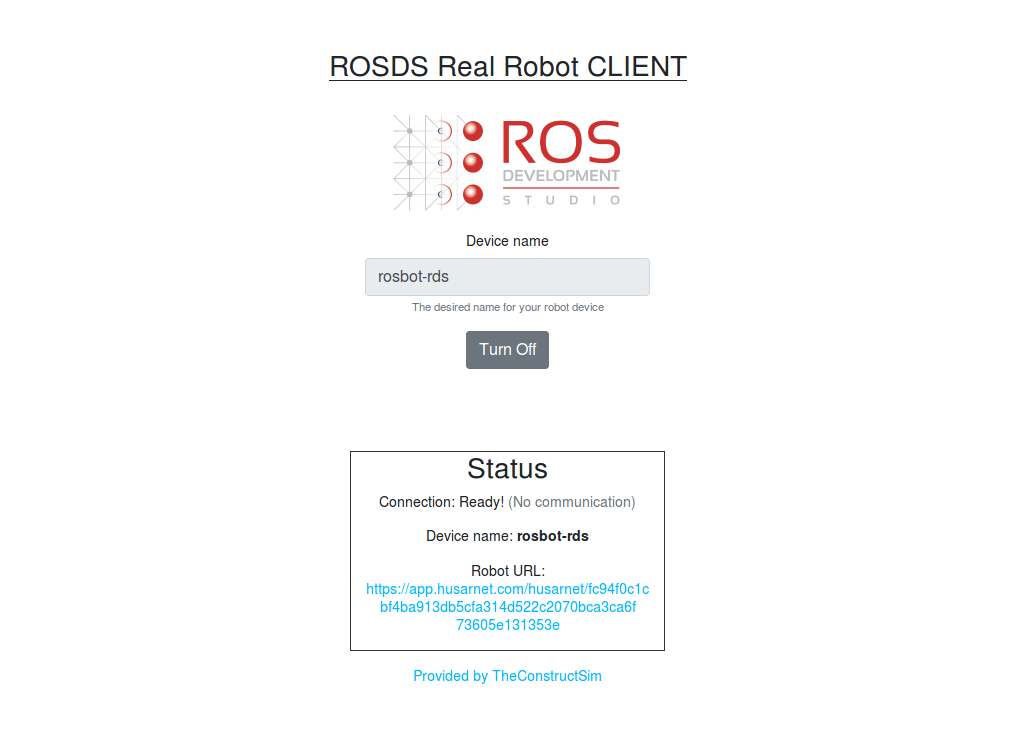
ROSbot is ready to connect with RDS.
Step 3: Working on RDS
Open ROSject prepared for this tutorial.
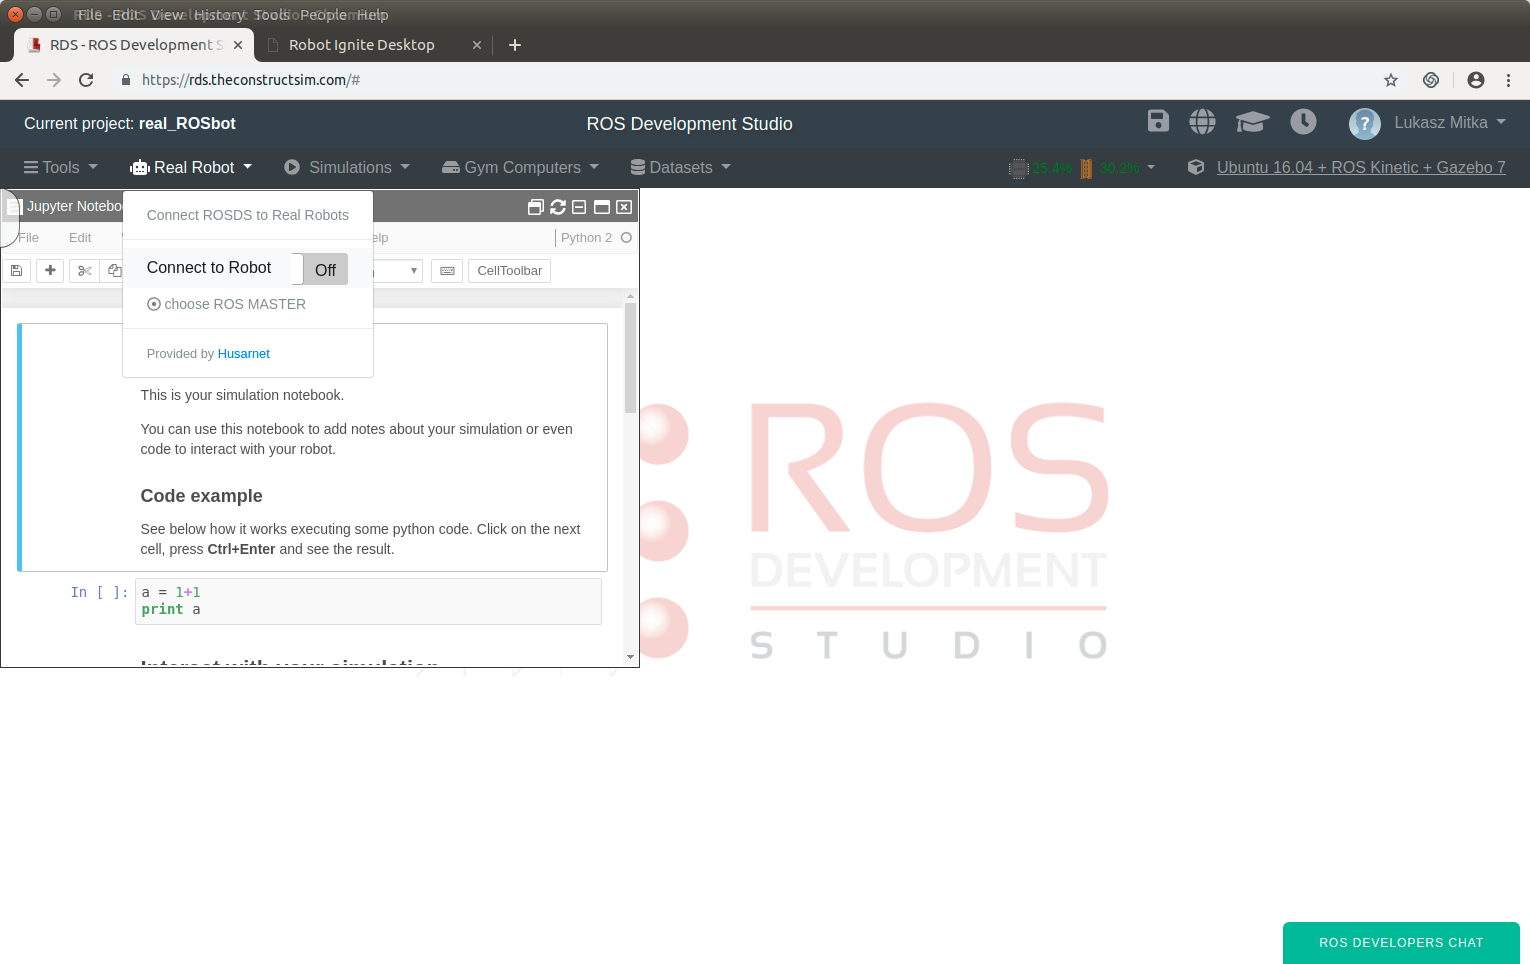
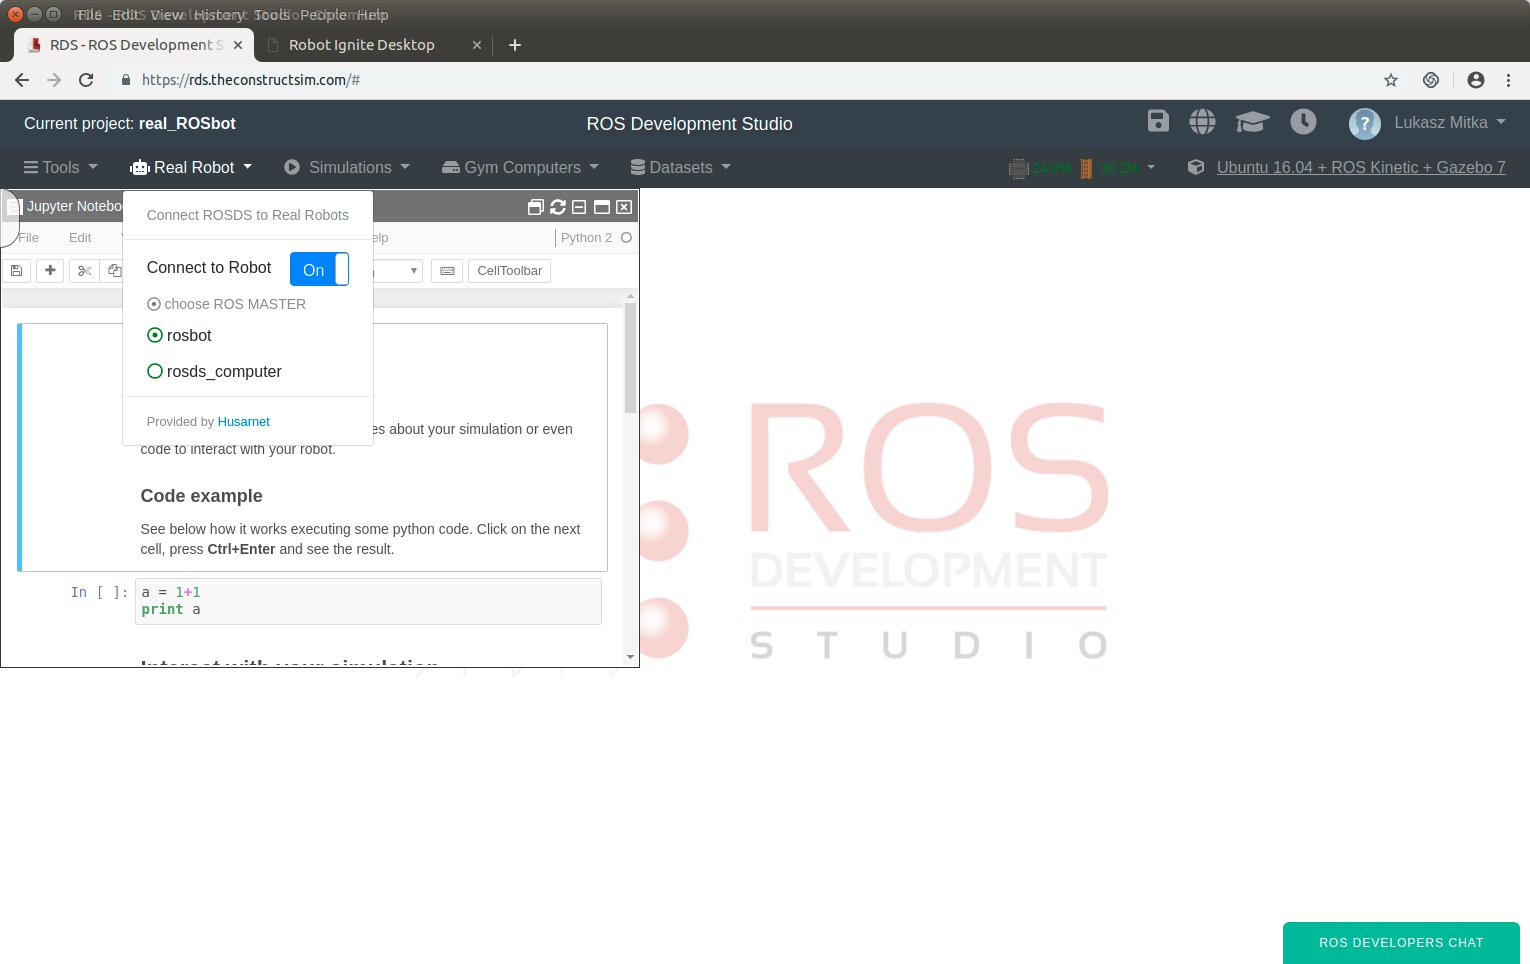
Open menu Real Robot and choose button Connect to Robot
In dialog menu provide rosbot-rds in Robot name field and in *Robot URL paste link that you have copied earlier.
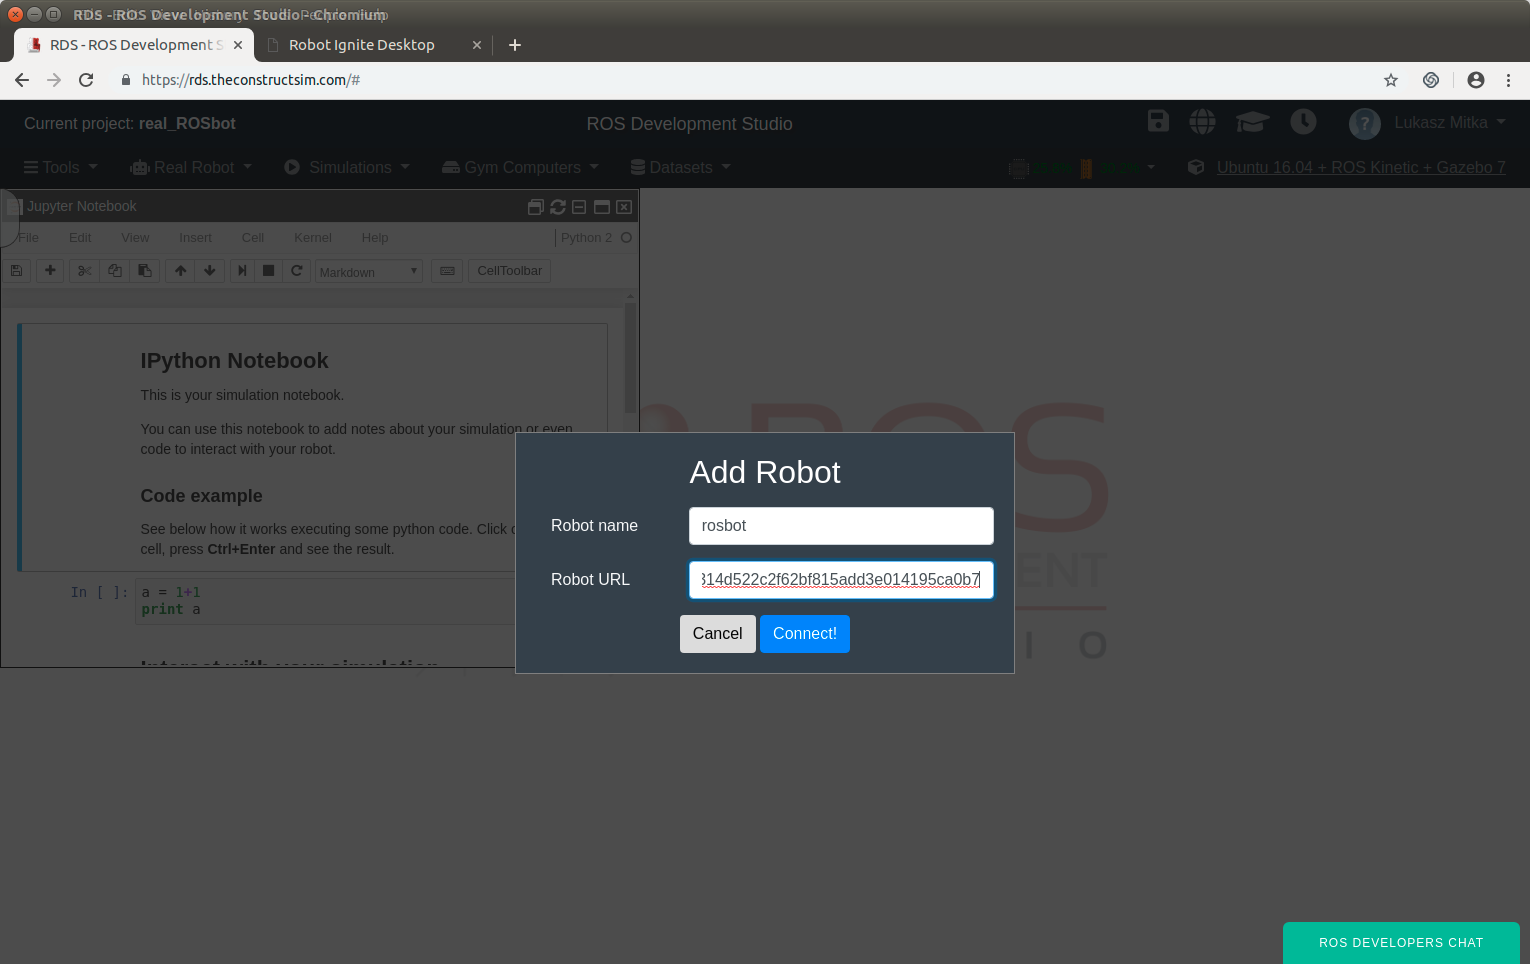
When process is finished, you should see menu allowing you to choose master device, select rosbot.
Select Tools -> Shell to open terminal view, connect to ROSbot through SSH:
ssh husarion@rosbot-rds
You will be prompted to accept new trusted address, type yes then you will need to provide password, default for ROSbot is husarion.
Launch selected application:
roslaunch tutorial_pkg tutorial_7_core.launch
In another terminal, again connect through SSH to ROSbot and execute:
/opt/husarion/tools/rpi-linux/ros-core2-client /dev/ttyCORE2
In third terminal view launch visualization tools:
roslaunch rosbot_description model_preview.launch
Select Tools -> Graphical Tools
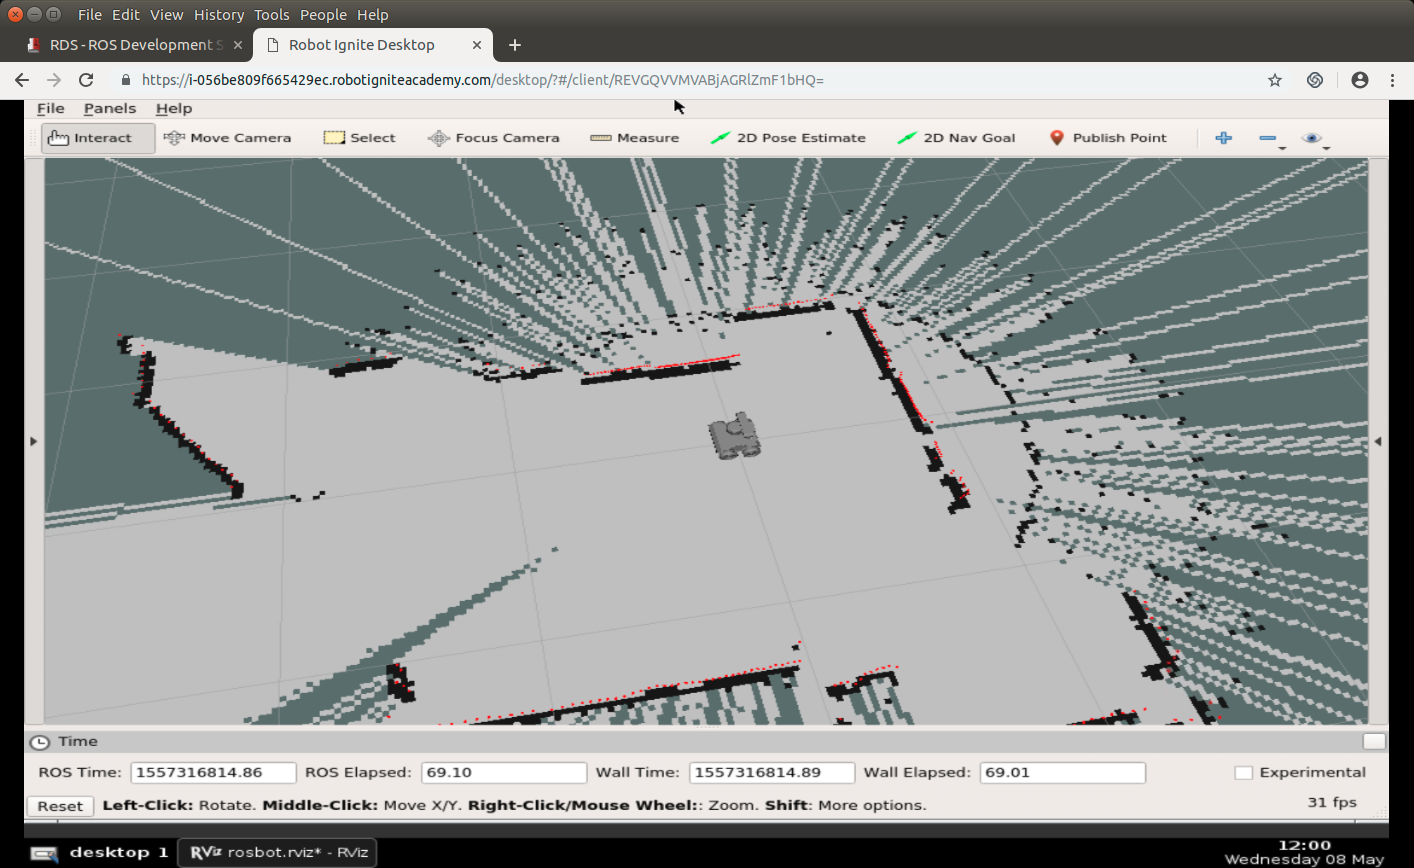
You will see visualization of ROSbot, laser scans and generated map.
Use 2D Nav Goal tool to set robot destination.
You can observe as real ROSbot drives to point selected on map. You may also observe as Lidar scan are changing accordingly to ROSbot position and reflect real obstacles around device.