Panther - quick start
Panther is a rugged Unmanned Ground Vehicle (UGV) platform, engineered for demanding outdoor environments. Equipped with high-profile wheels and four powerful BLDC motors, plus an IP54/66-rated chassis, it’s designed to tackle the toughest challenges. Panther’s versatility enables seamless integration of LIDARs, 3D cameras, manipulators, and other components through its V-slot mounting rail, available power ports, and extensive communication interfaces. With open-source ROS and ROS 2 drivers, along with a robust suite of software examples, Panther makes developing your product or research project both simple and intuitive.
- Unboxing
- Software Configuration
Since the video above was published, the LED animation behavior and the Wi-Fi setup procedure have changed. Check the current meaning of LED Animations and how to configure the Get Internet Access.
If you don't have Panther yet, you can get it from the online store.
Unboxing
Package Content
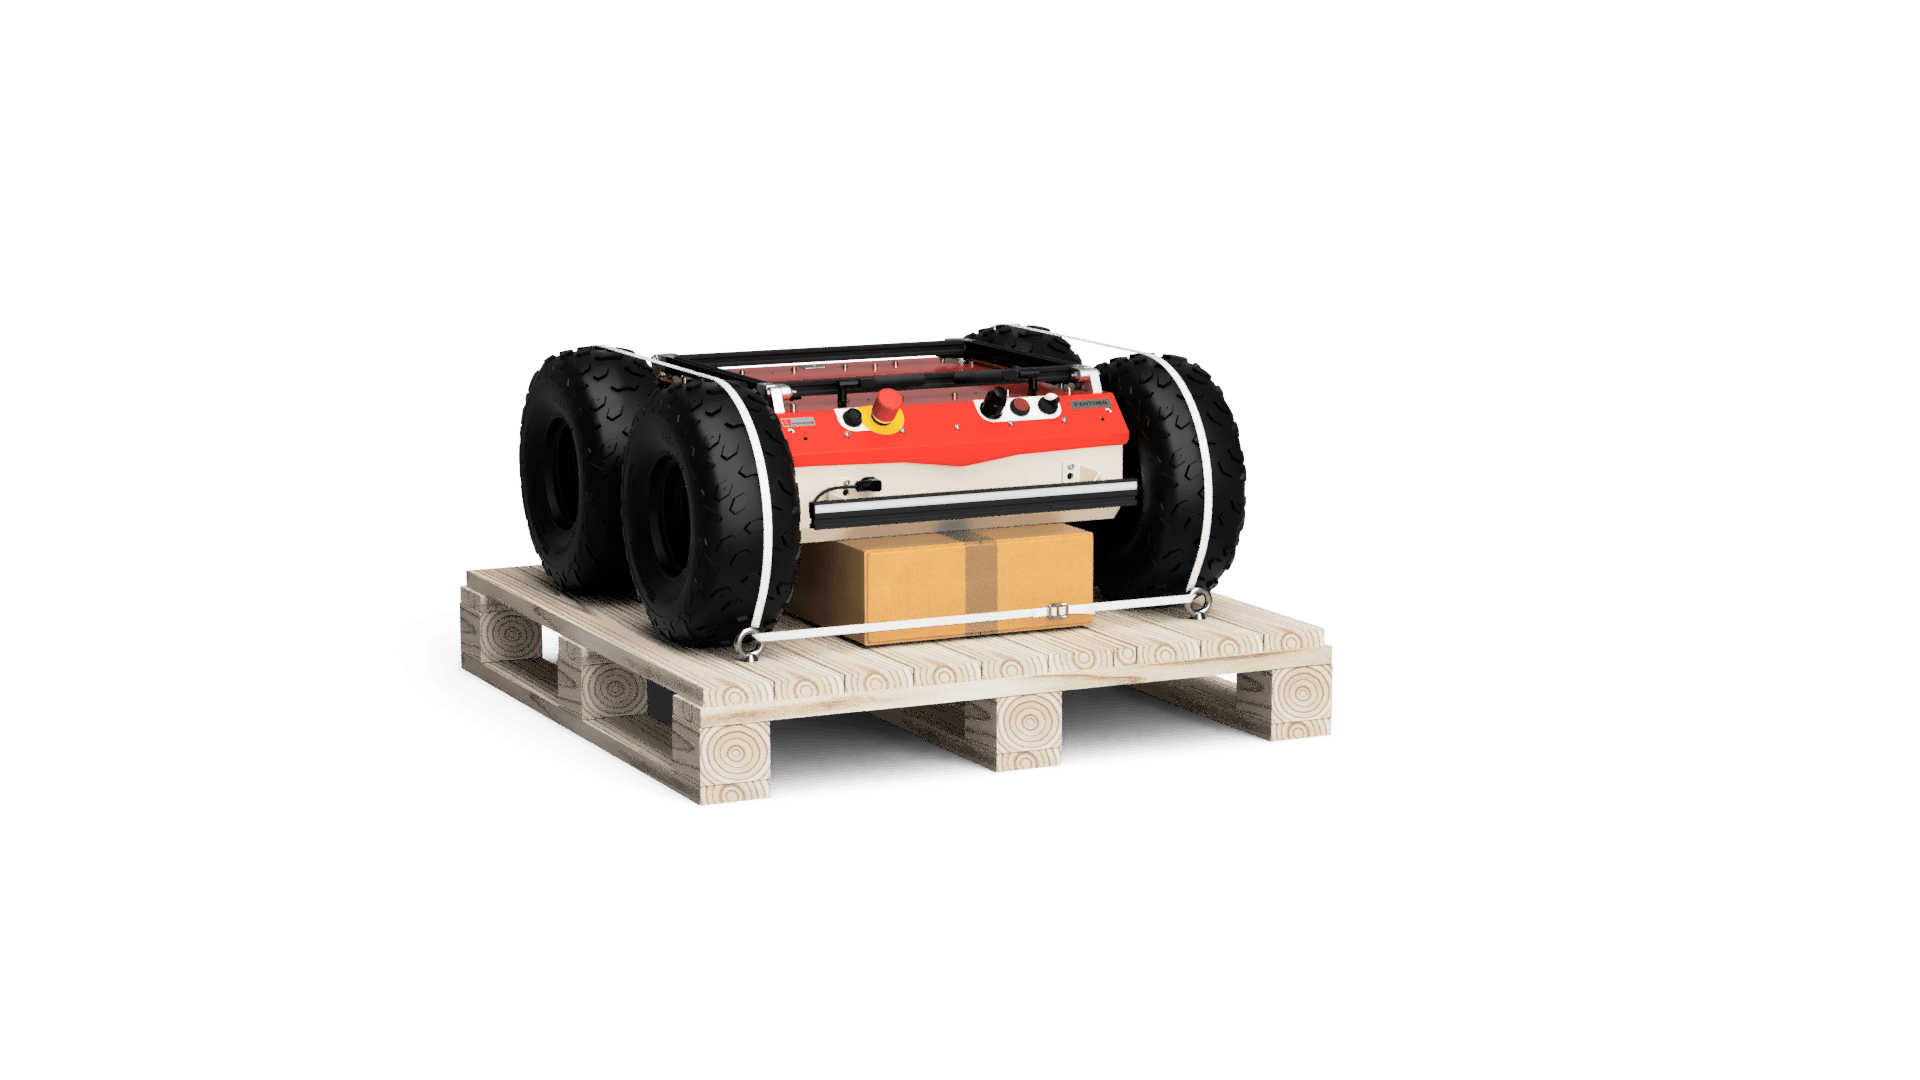
The standard package contains:
- Panther robot
- Accessories box:
- Charger
- Logitech F710 gamepad
- RUTX11 accessories
- Additional content may vary depending on optional items purchased
Unboxing Robot
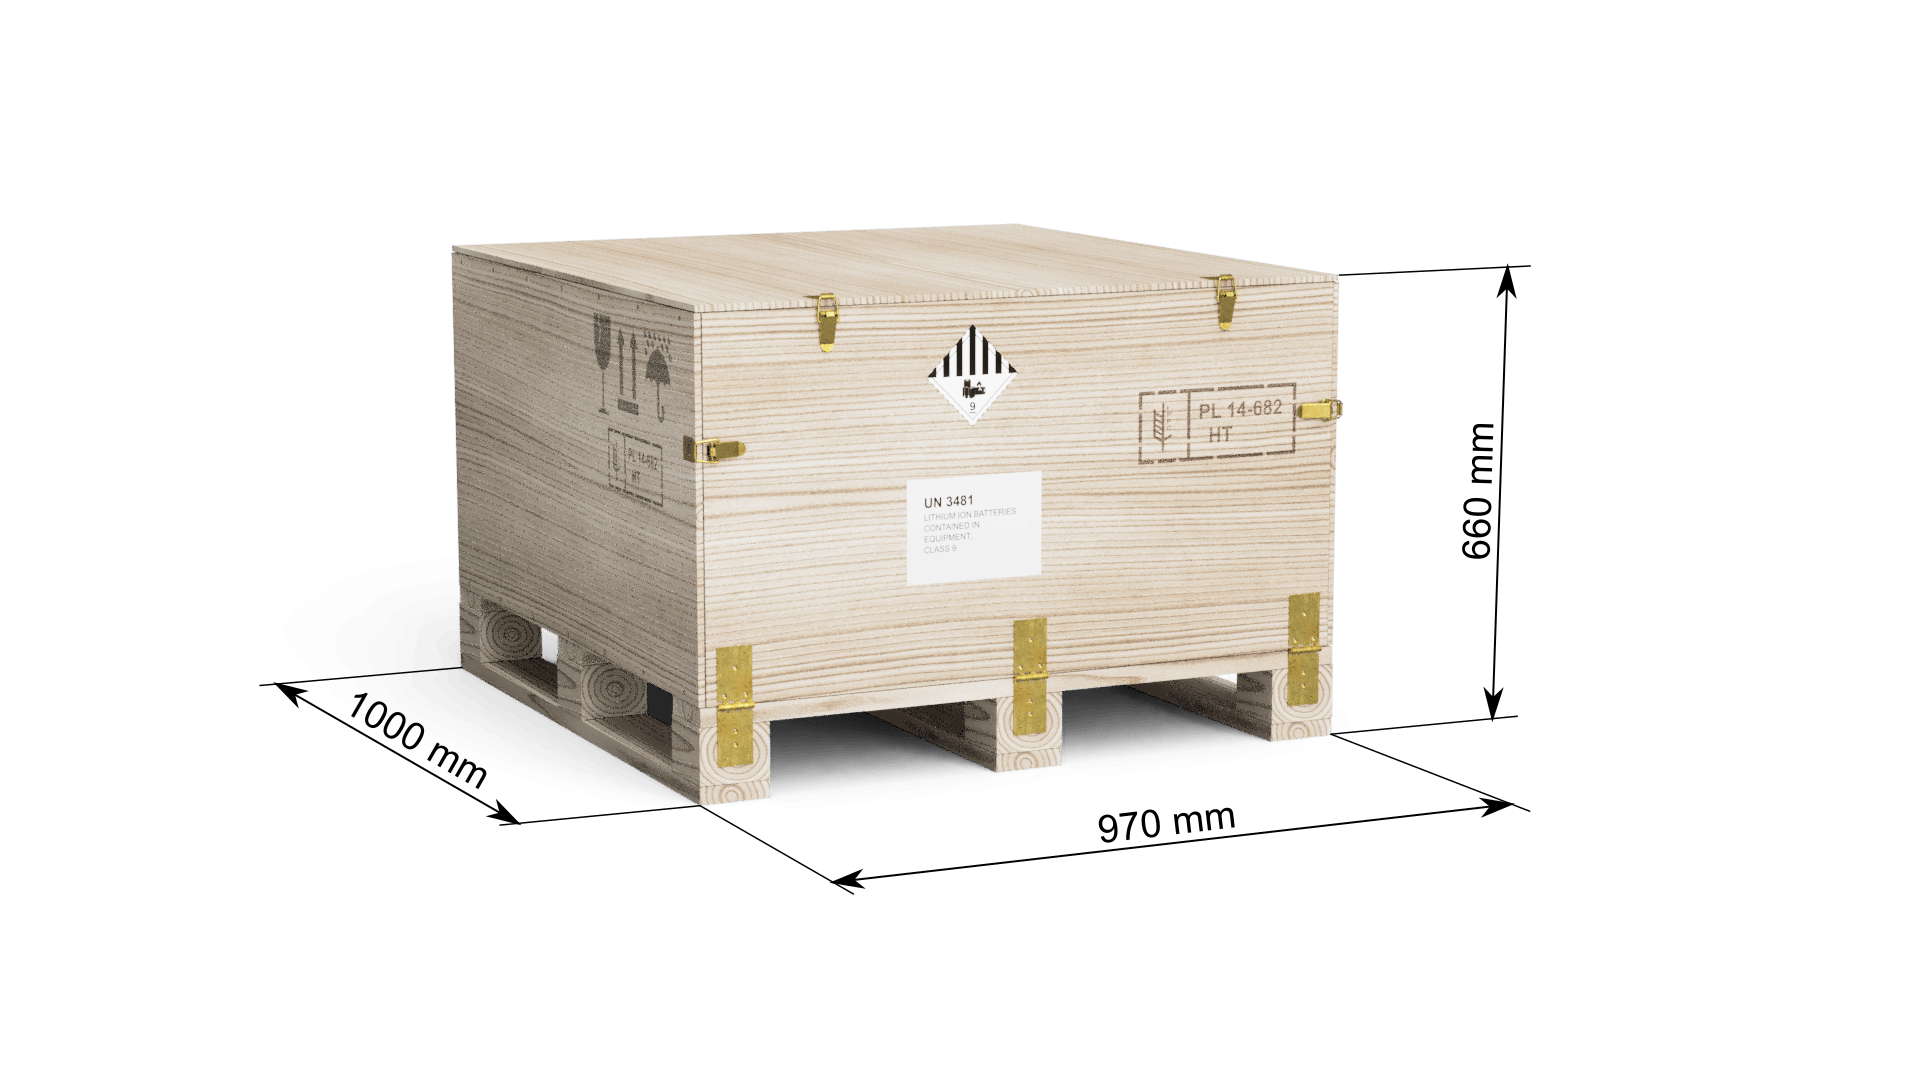
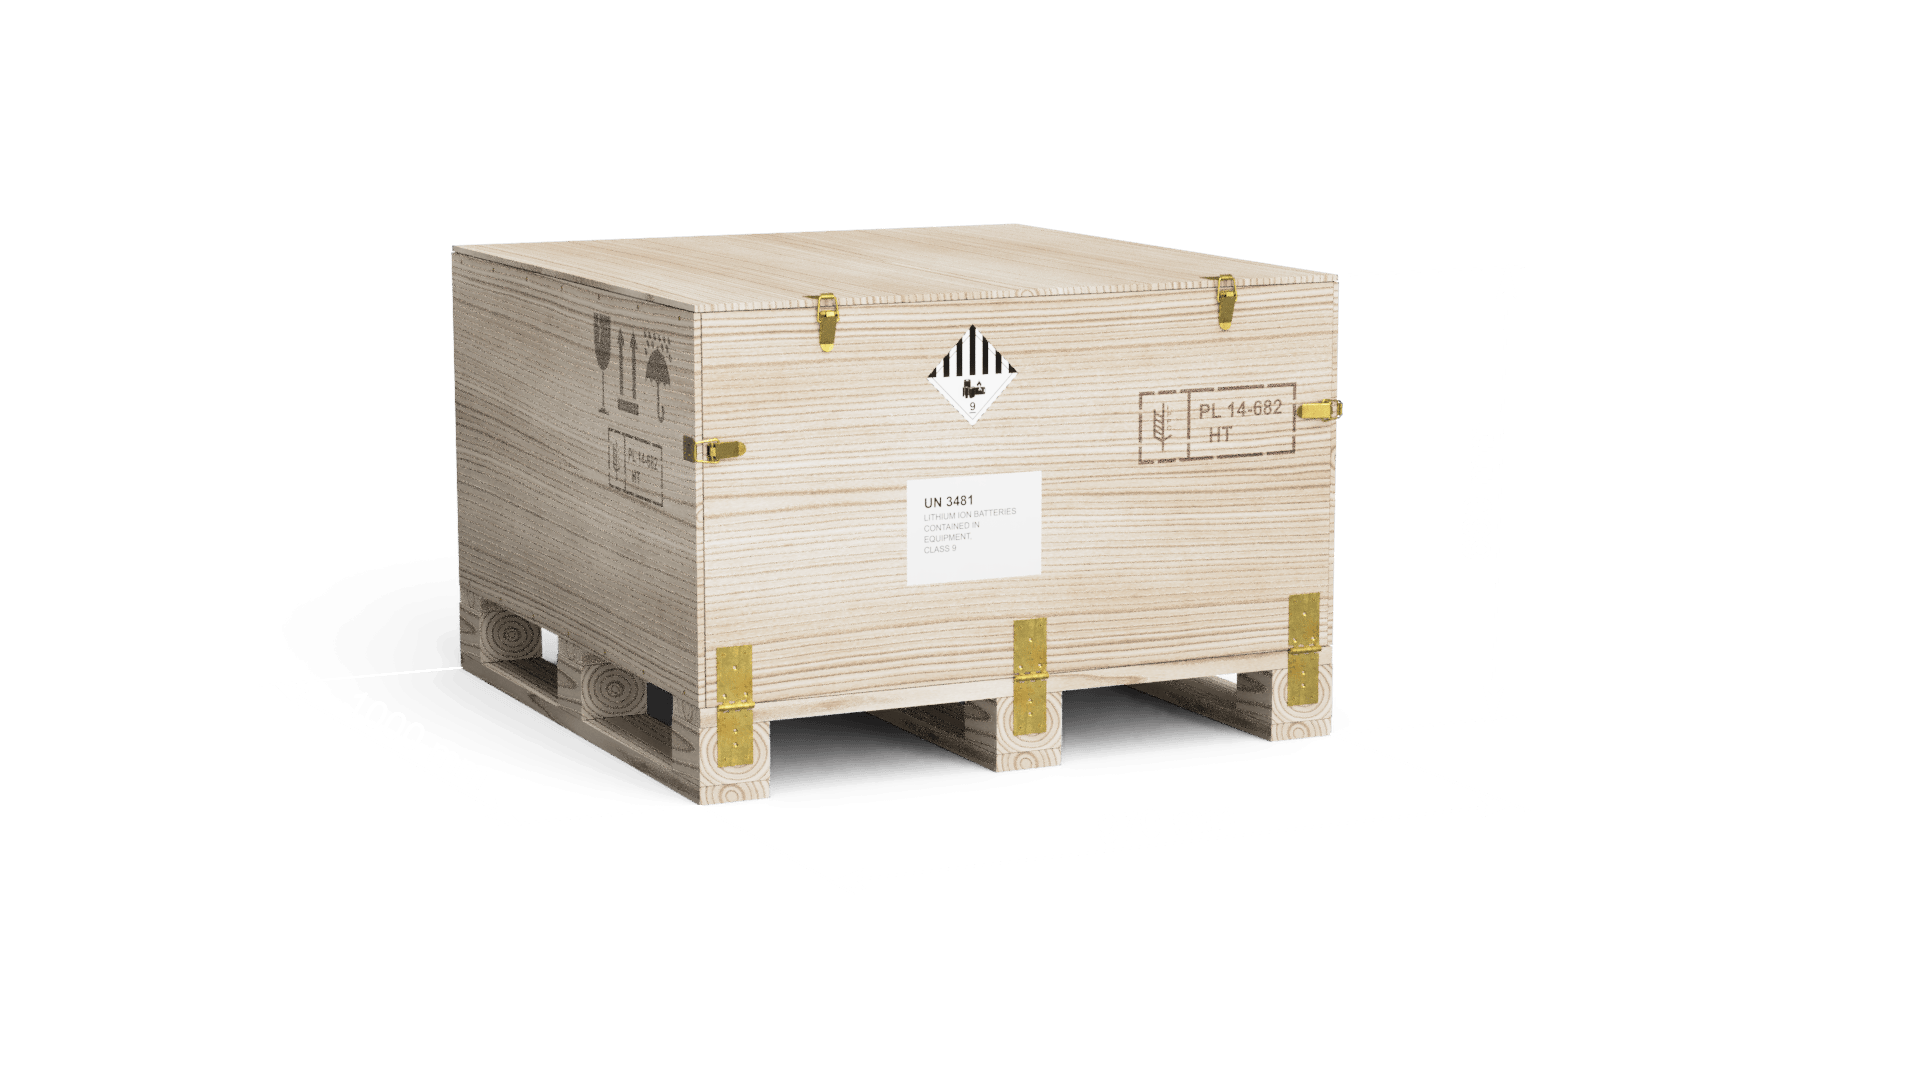
The Panther robot is shipped in a wooden box, like the one shown below. Unboxing is quick and can be done in a few simple steps. Follow the instructions carefully when you receive your robot.
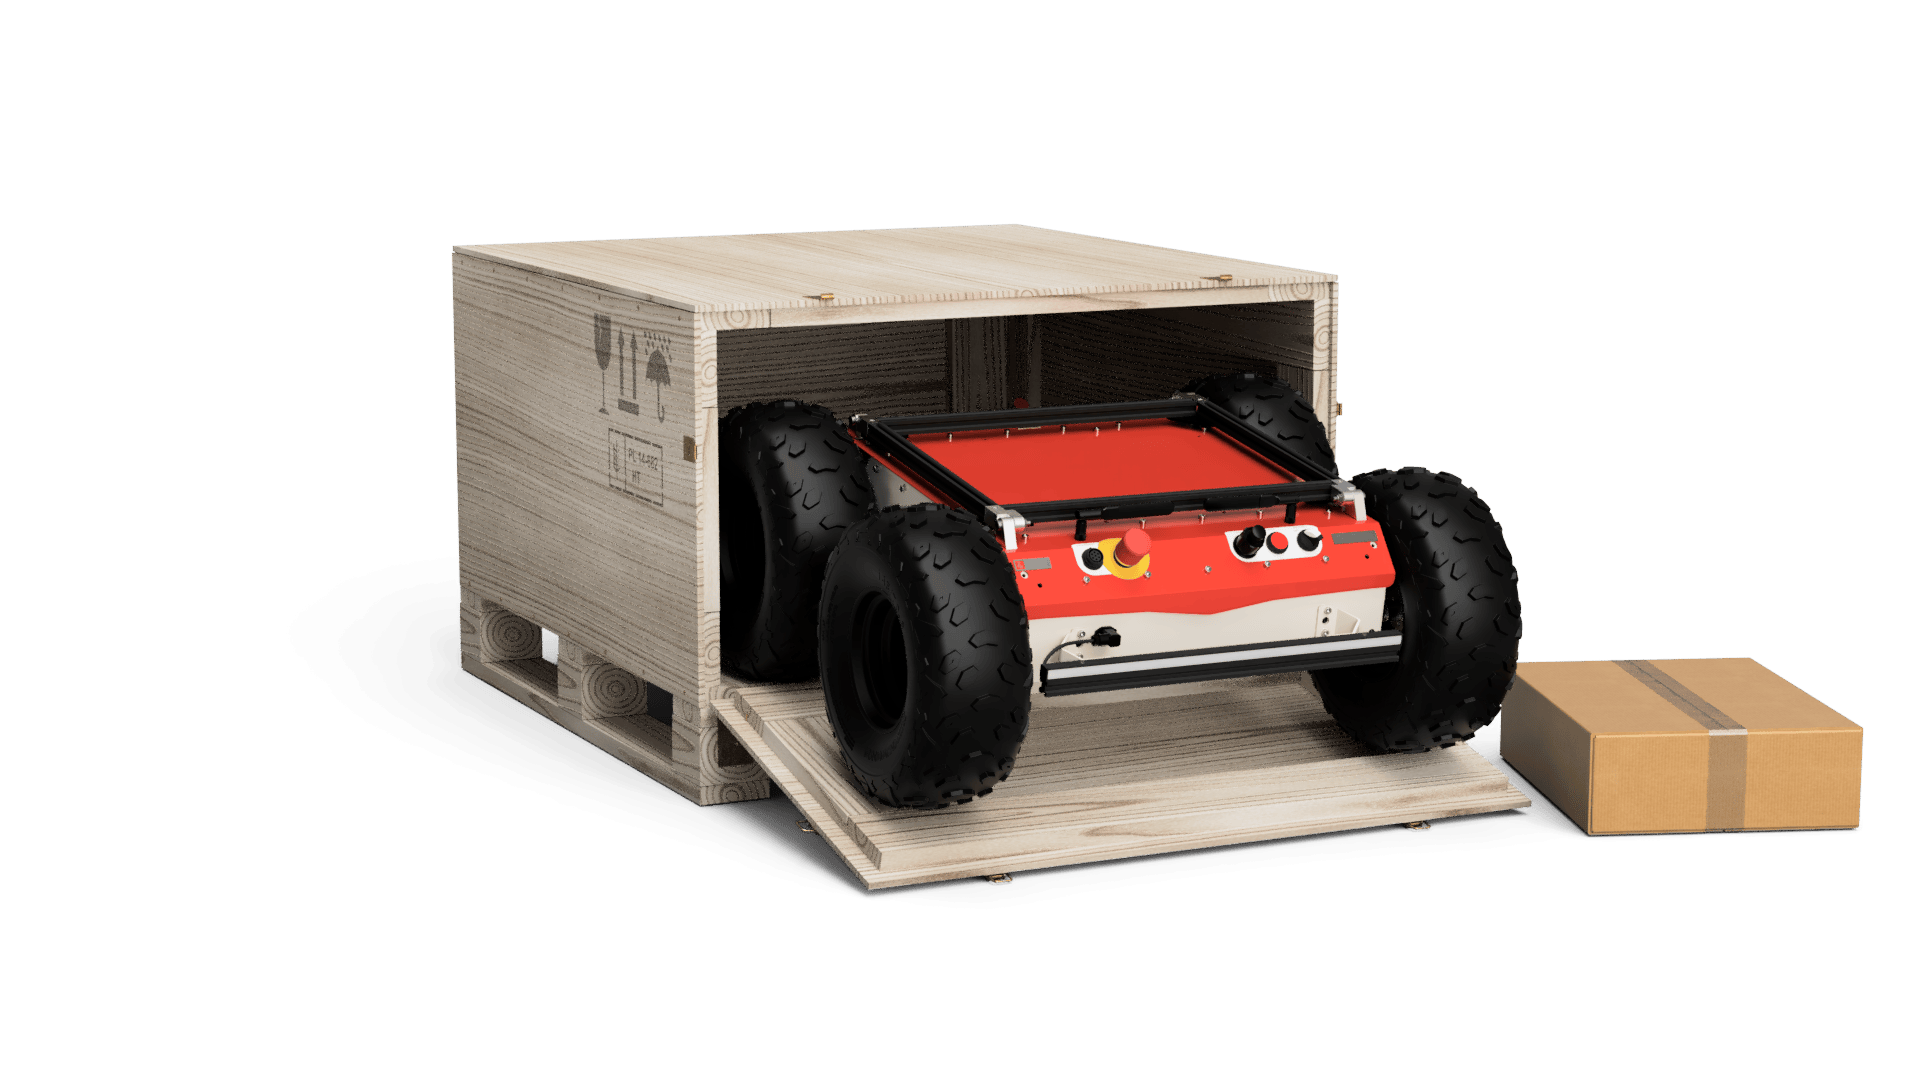
First, unlock and open the front side of the box.

Before taking the robot out, remove any components blocking it, such as the accessories box, and cut the white straps that secure the robot. Then, grasp the robot by its bumper and carefully pull it out of the box.
If you feel resistance while removing the robot or the accessories, do not force it. Instead, go to the Disassembling the Box section to avoid damaging the robot or components.
If your Panther includes a manipulator, do not follow this guide. Please check the Manipulator Manual Section, which contains essential safety instructions.
Disassembling the Box
- Unscrew the screws holding the box’s upper part to the base, then carefully lift and remove the top section.
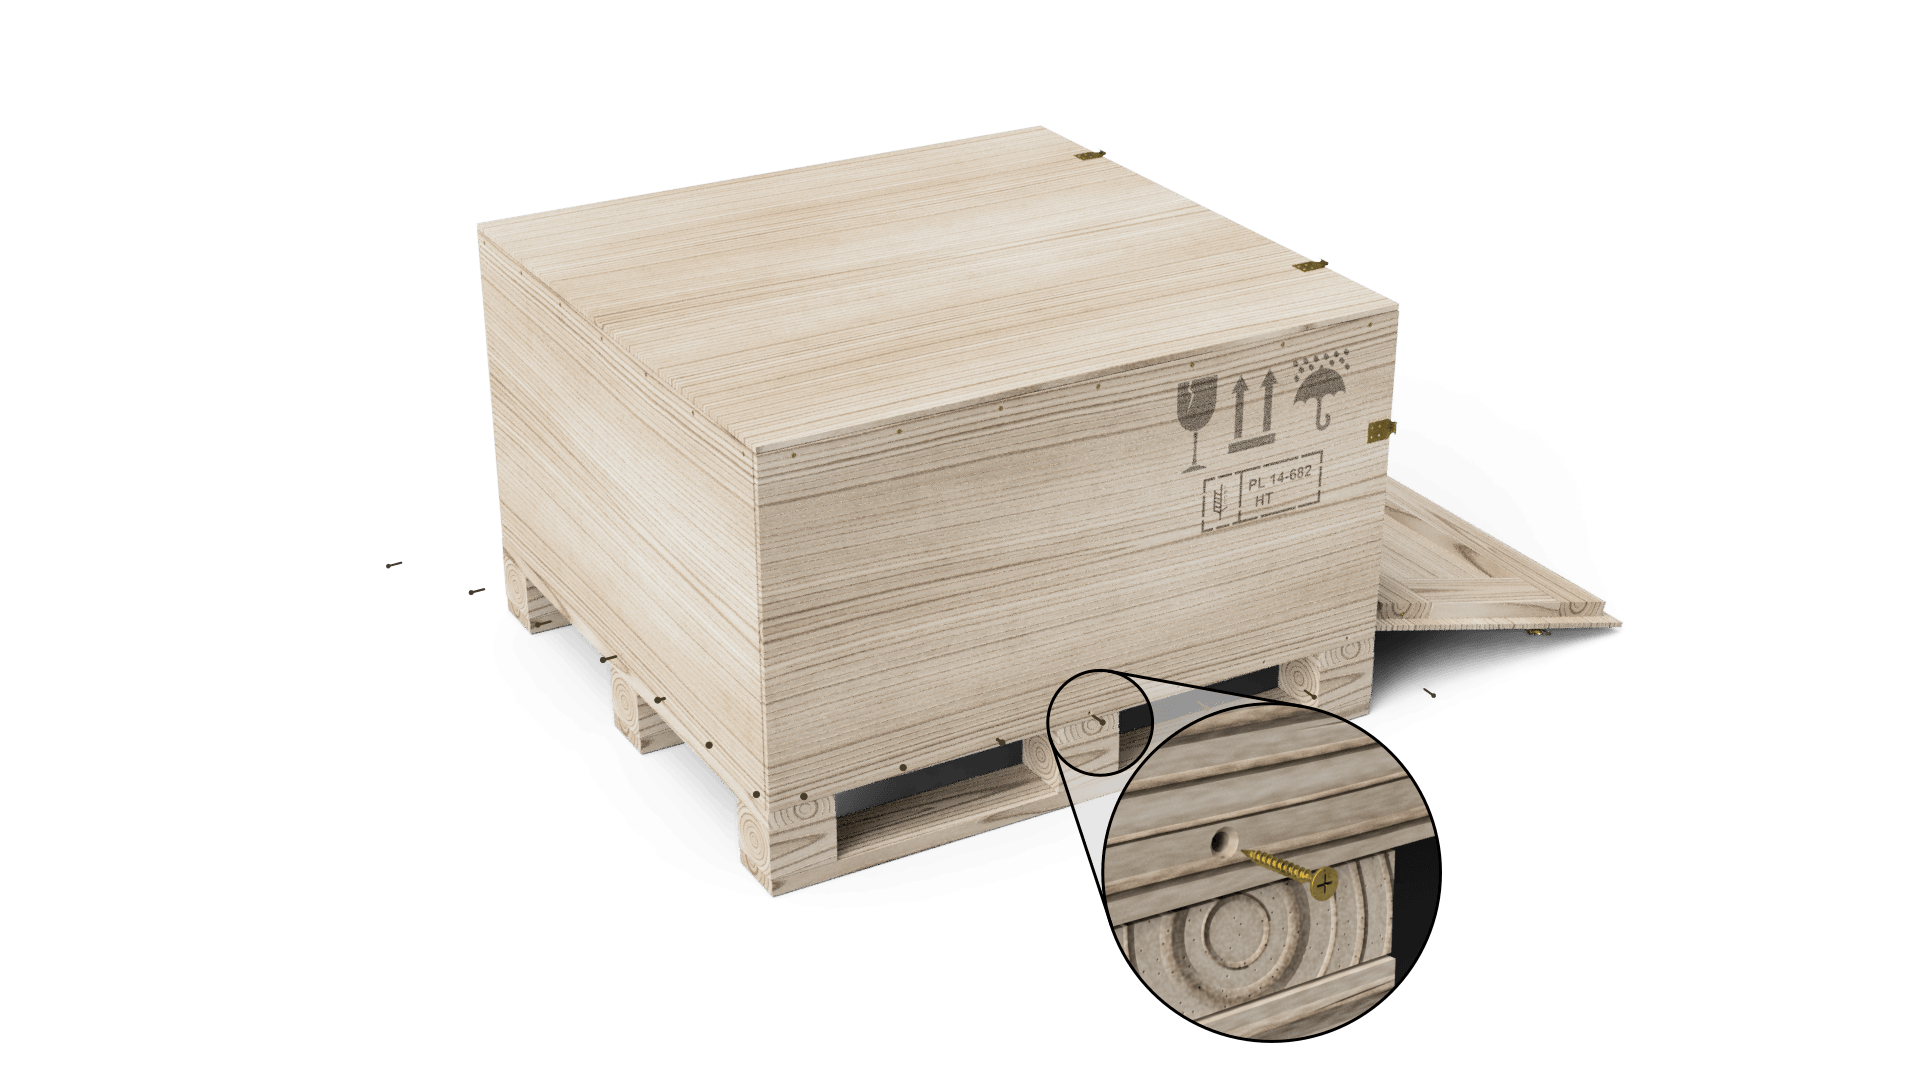
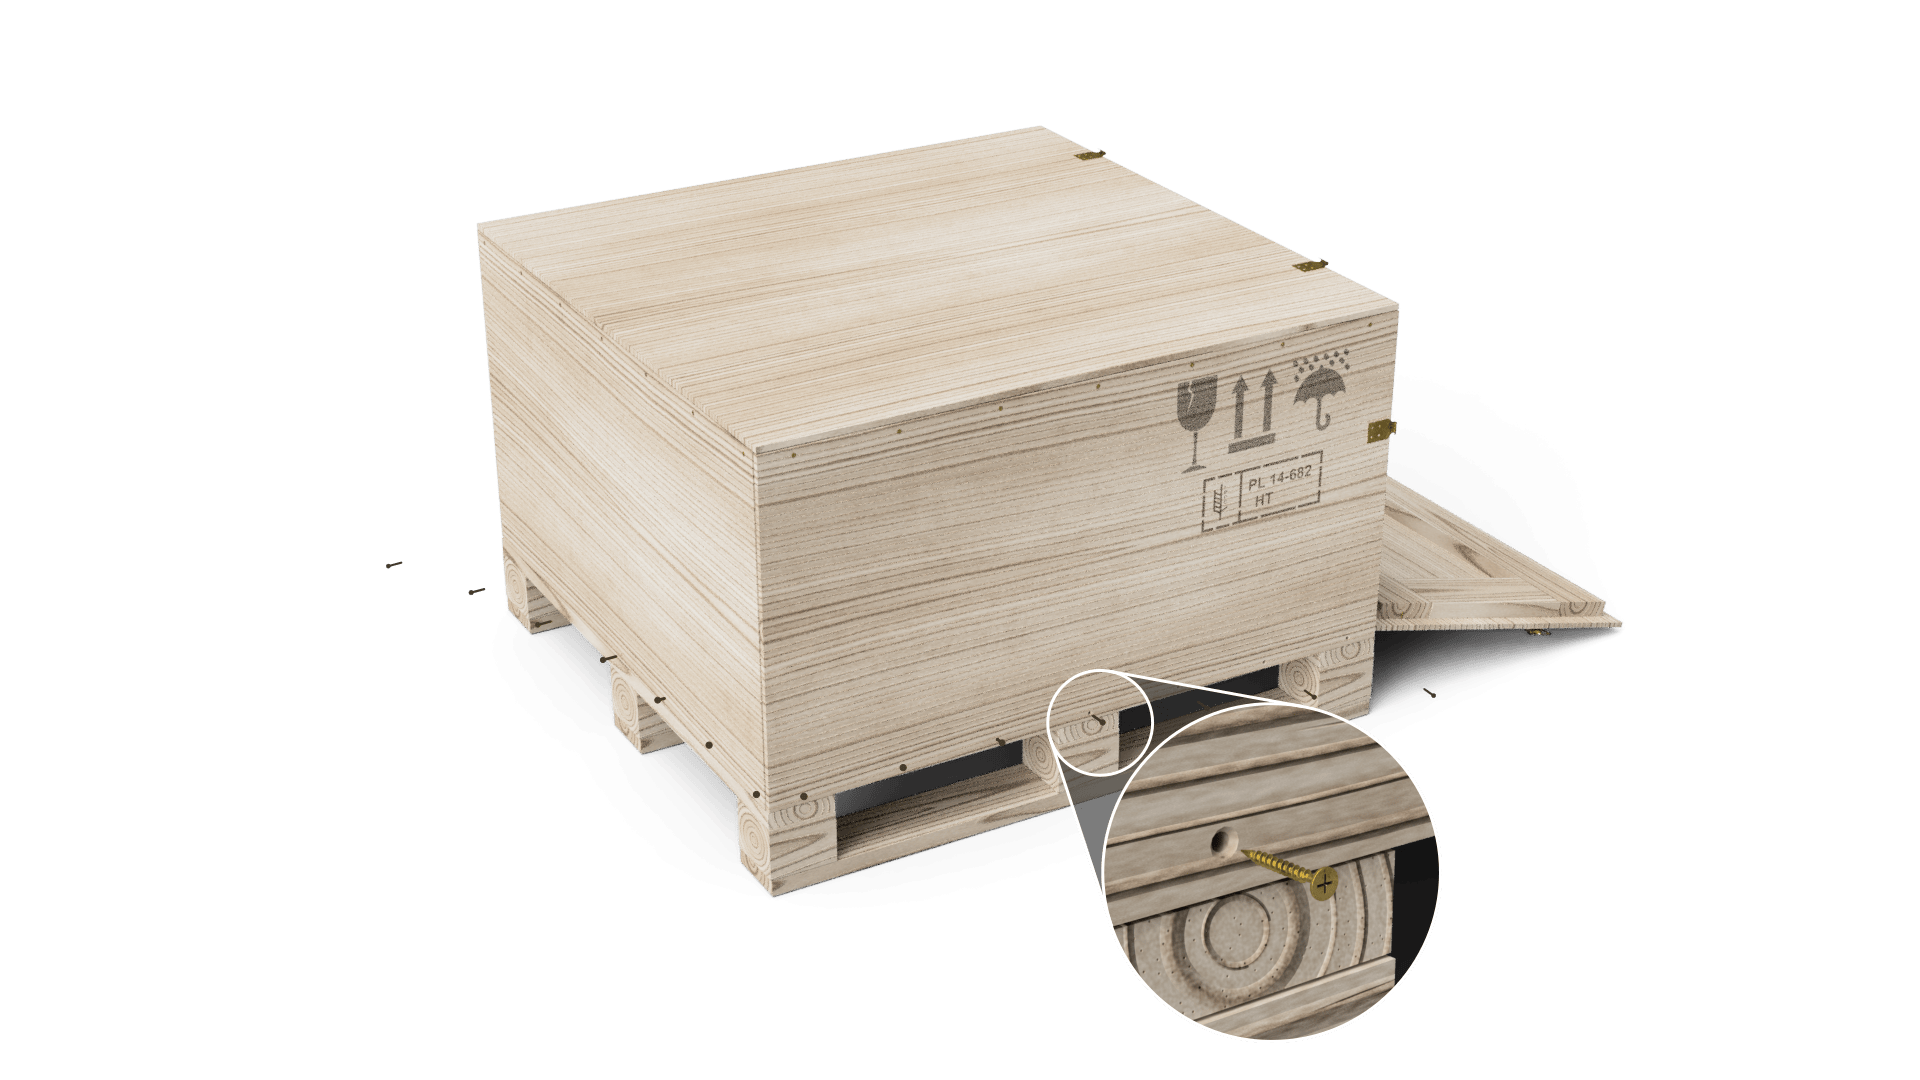
- Cut any remaining white straps and remove additional components, such as the accessories box.
- After clearing the box, you can safely lift the Panther off the platform using its bumper.
Quick Demo
We know that you would really like to read the Quick Demo section now, but your safety is the most important thing.
A brief safety information
- Please read the Safety Instructions first.
- If you are not sure how something works, please read the Panther manual.
- Please remember that the mechanical Emergency Button is available on the robot as well as software one in the WebUI and the Gamepad, but in some cases, you may not be able to use them quickly enough to stop the robot before causing damage.
- A detailed description of the safety features is available in the Safety section.
- Panther v1.2+
- Panther v1.0 - v1.06
Here is a very basic demo that allows you to use your Panther for the first time without coding:
Rotate the two-position Main Switch to the ON position. Push the Power Button for 1 second, a red light on the Power Button, and the LED panels on the Bumpers (called Bumper Lights) will light up. Wait for Wi-Fi to come up:
SSID: Panther_<serial_number> or Panther_5G_<serial_number>
PASS: husarion
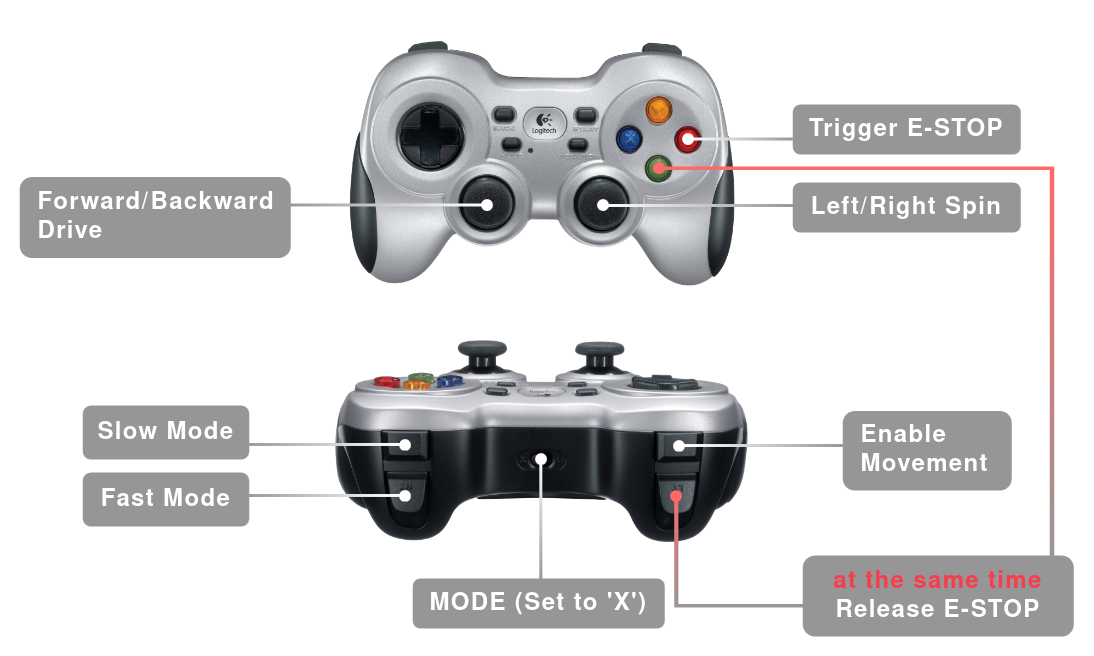
- Gamepad
- WebUI
Joystick control is possible by connecting a dongle to the USB port on the rear panel of the robot. When the robot boots correctly (white light at the front and red lights at the rear), you can:
- Hold LT button and press A to release the E-stop.
- To control Panther hold the LB button and use the left stick to drive forward/backward (additionally left/right when using mecanum wheels) and the right stick to turn the robot.
- Press B to trigger E-stop on Panther.
Connect to Wi-Fi and open the WebUI joystick in your browser at http://10.15.20.2:8080/ui. It allows you to monitor the robot’s status and execute commands such as activating or resetting the E-stop, as well as controlling the robot using a joystick.
When the robot boots correctly (white light at the front and red lights at the rear), you can unlock the Emergency Button and reset the E-stop using the WebUI. The bumper lights should start animating and moving to the sides.
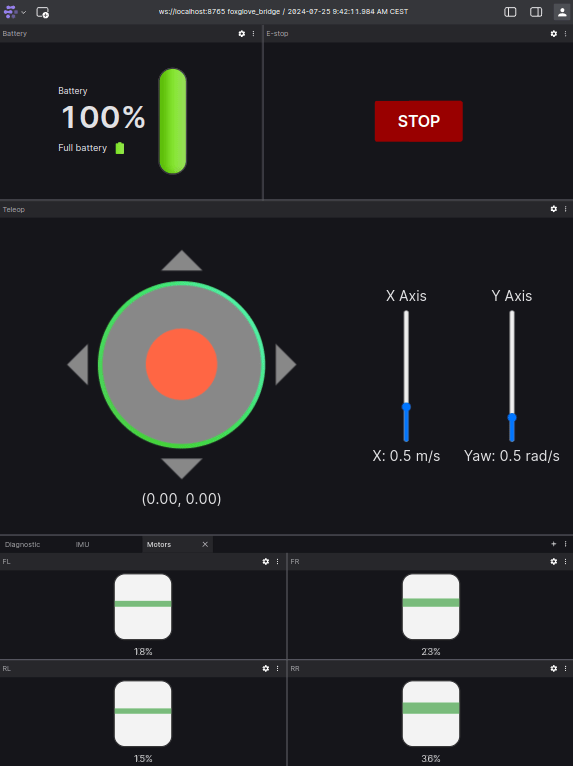
Move the robot carefully, as Panther is a heavy robot with powerful motors. Especially during a first run, be prepared to push the Emergency Button rapidly if necessary.
Here is a very basic demo that allows you to use your Panther for the first time without coding:
Unlock the Emergency button and set the power switch to the right (it is a 3 pose switch, set to the 3rd pose), and then wait for Wi-Fi to come up:
SSID: Panther_<serial_number>
PASS: husarion
Connect to Wi-Fi and open the WebUI joystick available in your browser at 10.15.20.2:8000. It allows you to manually control your robot and manage the E-stop.
When the robot is booted correctly, you should see red lights flashing. Now you can reset E-stop using WebUI. Bumper Lights should start flashing green.
Use the WebUI joystick carefully, as Panther is quite a heavy robot with powerful motors. Especially during a first run, be prepared to push the Emergency Button rapidly if needed.
Useful Resources
Below is a list of links to the most important and frequently used sections about the robot.
- Connecting a User Computer
One of the most important aspects of most projects is installing a User Computer, which is responsible for operating sensors and running user-defined functionalities. Read the detailed instructions on how to install and configure the User Computer. - Get Internet Access
To complete the User Computer setup, you need to provide Internet access to it. Follow the steps to connect your Panther to a Wi-Fi network. - Husarion UGV Configurator
A TUI application that simplifies configuration changes, ROS driver version updates, and log retrieval. - Manual
The complete Panther manual contains detailed information about the robot’s hardware and software. - ROS 2 API
A description of the software architecture design and shared ROS 2 API documentation, containing detailed information about all available ROS 2 nodes, topics, and services.
Reference Projects
Below youi can find some example projects and demos that you can use as a starting point for your own applications.
| link | description |
|---|---|
| husarion_ugv_autonomy_ros | Autonomous mapping & navigation demo for Panther. Using navigation2 and slam_toolbox |