Run ROS on multiple machines
This tutorial was created and is based on AWS RoboMaker as of July 2019. Please refer to the official documentation for the latest and most accurate information, as there may have been updates or changes since then.
AWS RoboMaker allows you to easily develop a software for robot, test it in the simulation environment and than deploy it to the whole robot fleet at once.
However in many cases you need to run ROS on multiple machines, eg.
a) to give your robot more computing power for video processing or perform multi-robot SLAM b) to control your robots through the internet, for example using Rviz or web user interface c) to rapidly prototype robot software without being limited to computing power of your robot
In this tutorial we will show you:
- how to setup ROS on Virtual Machine running on AWS cloud
- how to connect your physical robot to that VM, and create multi-machine distributed ROS system
- how to program your robot with RoboMaker
- how to use Rviz to control a physical robot
Configure AWS Environment
Before we use AWS RoboMaker to build and deploy the tutorial applications, we must first set up the AWS environment. To simplify the configuration, we will use AWS CloudFormation. CloudFormation enables us to use a template file to define the configuration of our environment. We will use CloudFormation to create a bucket in Amaazon S3, as well as to create the necessary permissions in AWS Identity and Access Manager (IAM) that AWS RoboMaker requires to simulate and deploy our robot applications.
To deploy the template, sign in to the CloudFormation console. Following the following steps to deploy the template:
- Download the template file from here.
- Click the Create Stack button.
- Under Choose a template, choose Upload a template to Amazon S3 and click Choose File.
- Browse to the rosbot_tutorial_template.yaml file you download in Step 1 above.
- Click Next.
- On the next screen, provide a Stack name. This should be something descriptive such as "ROSbot-setup".
- In the S3BucketName field, provide a globally-unique name for the S3 bucket that will be created. This S3 bucket will be used to store your robot application bundles, as well as any logs that your robot may generate during simulation. Use a name unique to you, such as "<user_id>-rosbot-tutorial". Replace "<user-id>" with a unique string.
- Choose Next.
- On the Options page, leave all defaults and choose Next.
- On the Review page, click the checkbox to acknowledge that CloudFormation will create IAM resources on your behalf.
- Click Create.
After a few brief minutes, the stack will be created. When the status has changed to CREATE_COMPLETE, choose the stack you just created, and view its Outputs. You will see 3 key/value pairs. You will use these values later in this guide.
Setup Husarnet account
ROS software can be distributed among different devices as long as they are in the same LAN network. Your robot, AWS virtual machine and laptop are in different networks, so we will setup a VPN connection between them. For establishing secure and low-latency connection, we will use Husarnet VPN. You can log in or create an account here (free plan will be sufficient for this tutorial). Later we will explain, how to register devices in Husarnet.
ROSbot setup in RoboMaker
ROSbot need some system modifications before Greengrass will be able to run and deploy applications. To configure ROSbot:
- Sign in to the AWS RoboMaker console.
- In the left navigation pane, choose Fleet Management and then choose Robots.
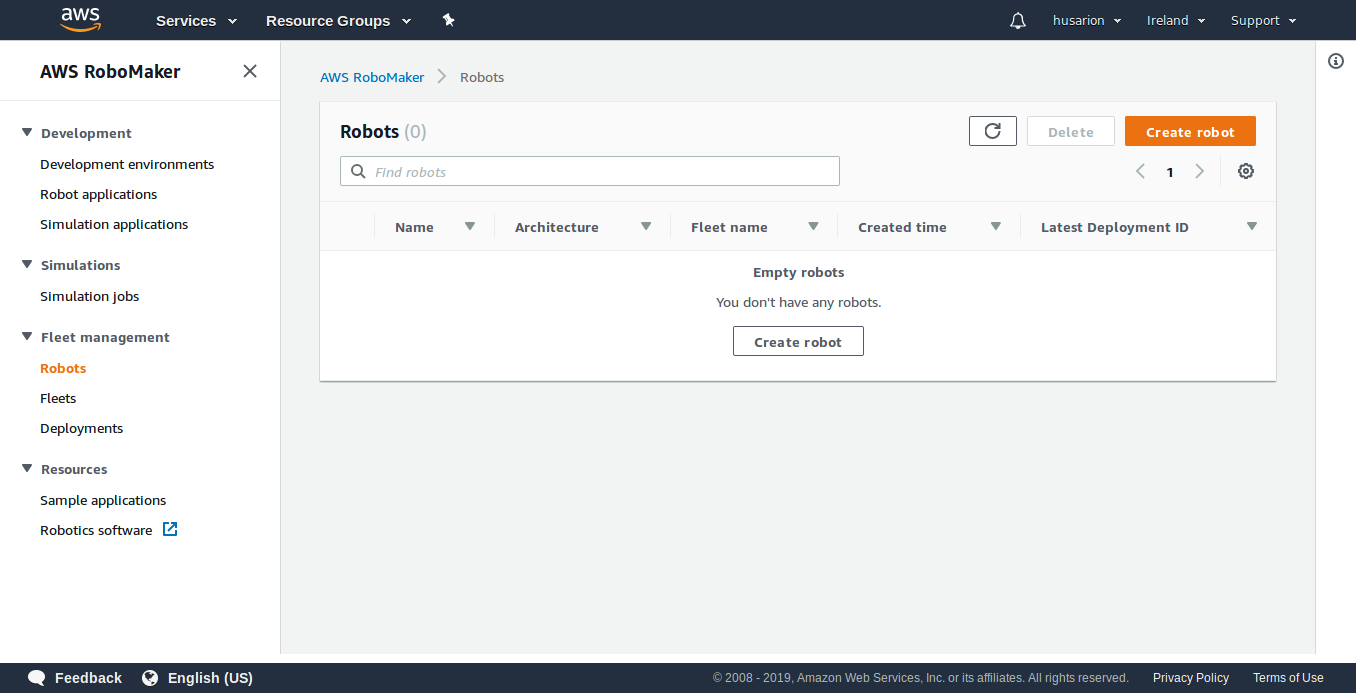
- Choose *Create robot.
- In the Name field, type
ROSbot. - From the Architecture dropdown menu choose ARMHF.
- From the AWS Greengrass group dropdown menu choose Create new.
- In the AWS Greengrass prefix field type
ROSbot. - In the IAM role select ROSbot-deployment-role.
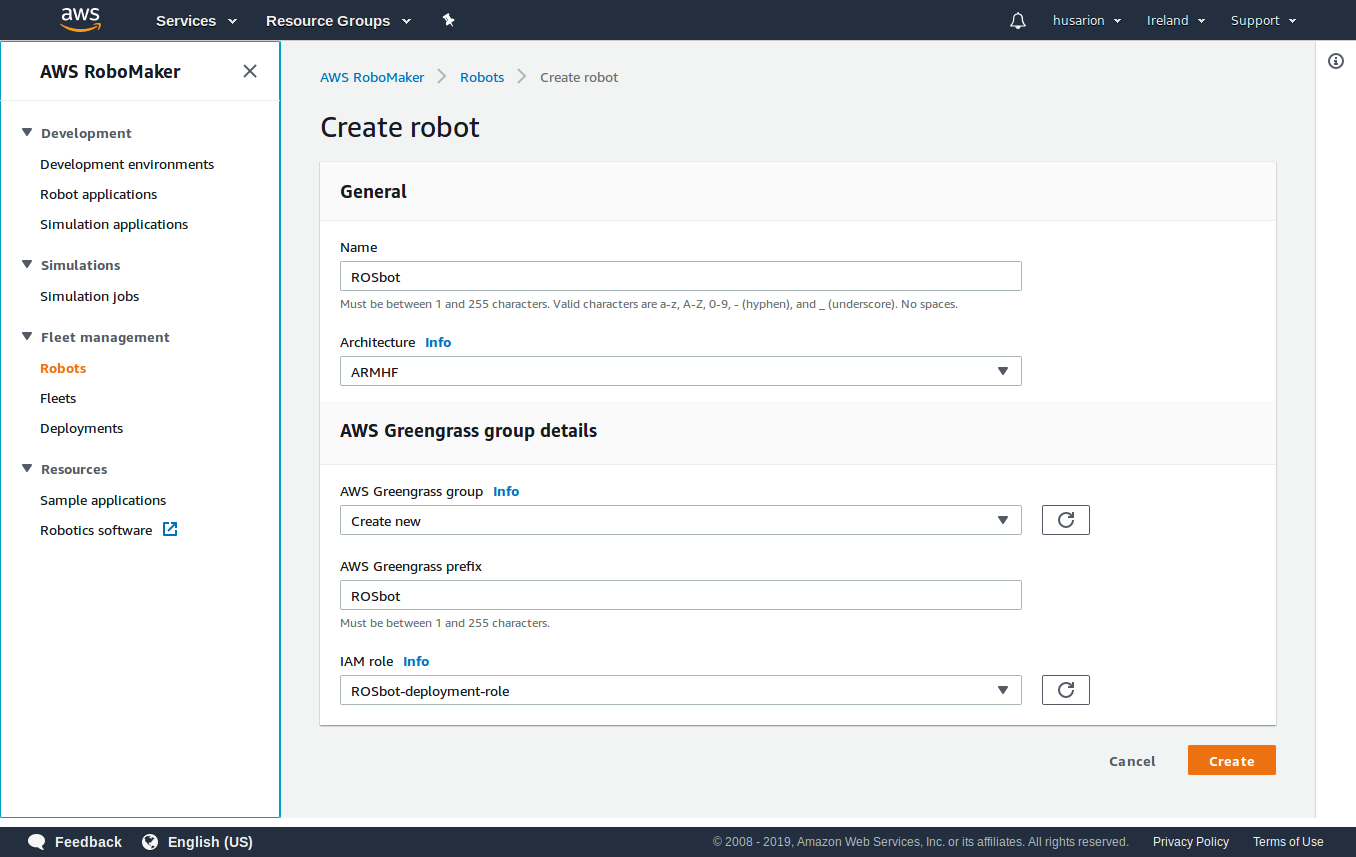
- Proceed with Create, you will be redirected to Download your Core device page.
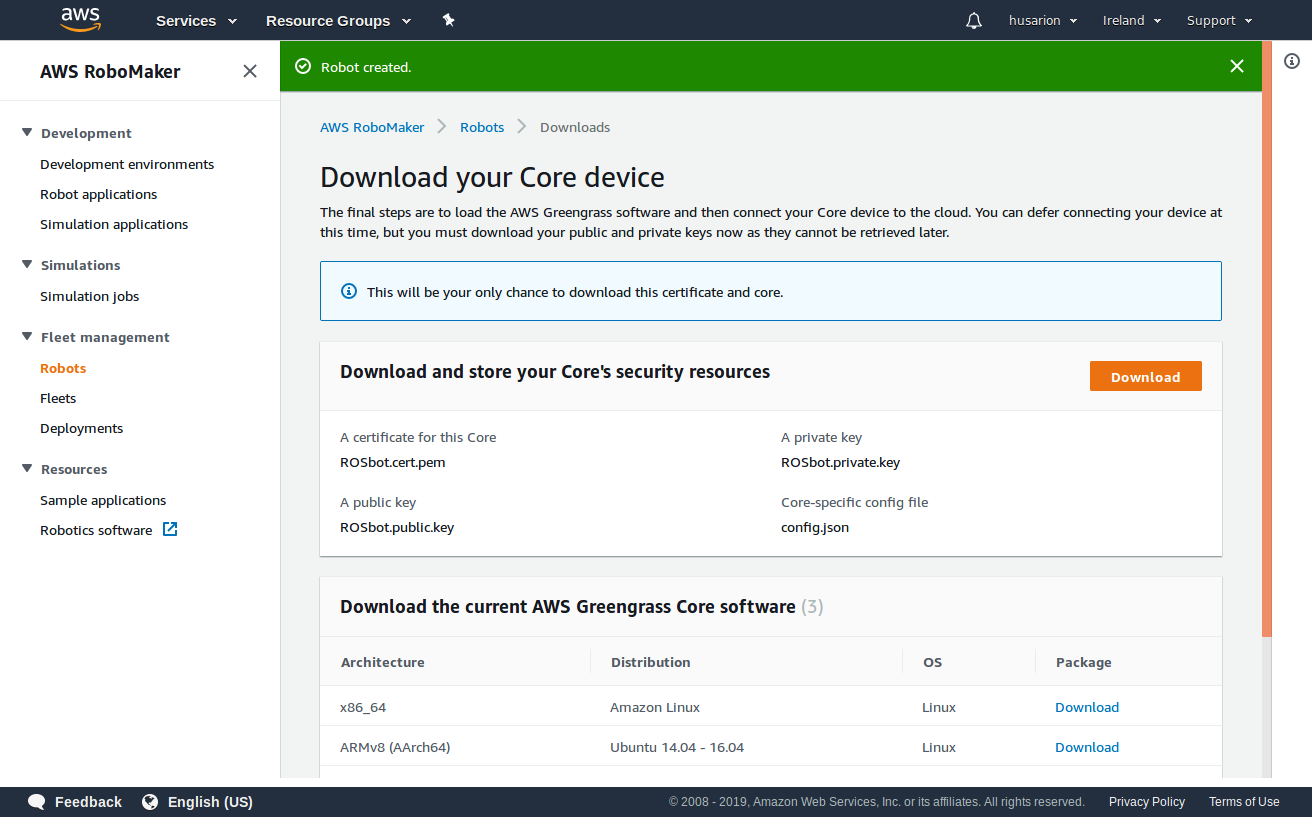
-
Choose Download button next to Download and store your Core's security resources.
-
You will get
ROSbot-setup.zipfile, it needs to be uploaded to ROSbot. The upload process will vary, depending on your host operating system.
On Linux
Navigate to directory where the file is downloaded, by default it should be ~/Downloads.
cd ~/Downloads
- Copy the file to your ROSbot, you will need to substitute
ROSBOT_IPwith device address you noted earlier:
scp ROSbot-setup.zip husarion@ROSBOT_IP:ROSbot-setup.zip
On Windows
You will need an SCP client, download and install WinSCP.
Start WinSCP, you will see the login dialog:

- From
File protocoldropdown menu choose:SFTP. - In
Host namefield provide rosbot IP address that you noted earlier, it is the value which we described asROSBOT_IP. - In
Port numberfield provide22. - In
User namefield providehusarion. - In
Passwordfield providehusarion.
When all fields are filled up, click Login button to connect, you will see file manager view.

In the left tab navigate to directory where you downloaded the ROSbot-setup.zip file. In the right tab navigate to /home/husarion directory.
Drag and drop the ROSbot-setup.zip to the right tab.
When the transfer is finished, close the window.
ROSbot setup on device
You will need to make some system configurations on device. Depending on your host system, you can connect to your ROSbot with different methods:
On Linux
Open terminal and start ssh connection, you will need to substitute ROSBOT_IP with device address you noted earlier:
ssh husarion@ROSBOT_IP
Proceed to Device setup section.
On Windows
Press WinKey + r then type mstsc.
You will see a window appear:

Type in your device IP address and click connect.
You will see the ROSbot desktop, from the top menu, choose the Applications -> Terminal.
Device setup
Type the following lines in the terminal to update the package list and upgrade packages:
sudo apt update
sudo apt dist-upgrade
In the terminal execute below commands:
- Copy the
setup_ROSbot_for_gg.shfile to your ROSbot and run it as root:
wget https://raw.githubusercontent.com/husarion/rosbot-robomaker/master/setup_ROSbot_for_gg.sh
chmod a+x setup_ROSbot_for_gg.sh
sudo ./setup_ROSbot_for_gg.sh
- Unzip ROSbot security resources:
cd ~
sudo unzip ROSbot-setup.zip -d /greengrass
- Register ROSbot within Husarnet network:
sudo husarnet websetup
As a response, you will get registration link, open it in your browser and follow instructions.
When asked for device name, provide rosbot.
From dropdown menu Add to network choose Create new network and provide name tutorial.
Check Change device hostname... checkbox.
Push Add device to your account button.
- Restart ROSbot to apply changes.
At this moment, ROSbot is ready to start AWS GreenGrass and accept incoming deployments.
Connect with ROSbot again, open terminal and start the GreenGrass:
sudo /greengrass/ggc/core/greengrassd start
Leave the ROSbot turned on, it will wait for deployment.
Creating a RoboMaker IDE
Application will be built using the RoboMaker environment. To create the IDE:
- Sign in to the AWS RoboMaker console
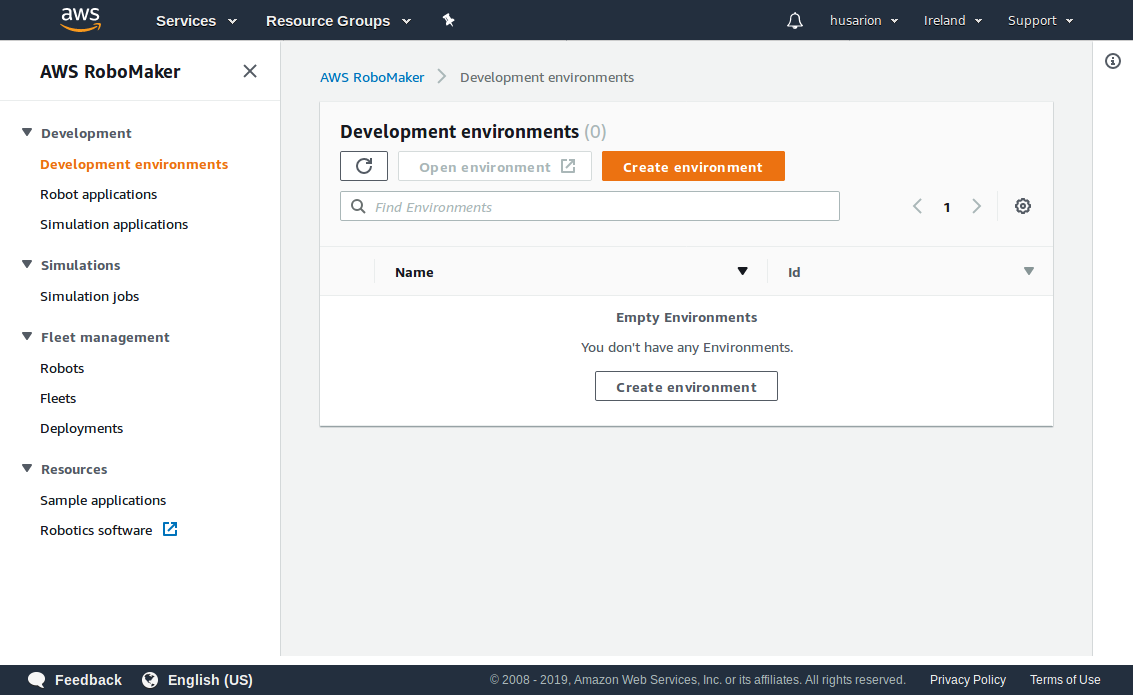
- On the left, expand Development, choose Development environments, and then choose Create environment.
- In the Create AWS RoboMaker development environment page, enter
rosbot_envas the environment name. - Accept the default Instance type (
m4.large). You can select different instances type to improve bundling performance. - In VPC dropdown list choose the default value.
- In the Subnets dropdown list choose the first subnet. You can select different subnet if necessary.
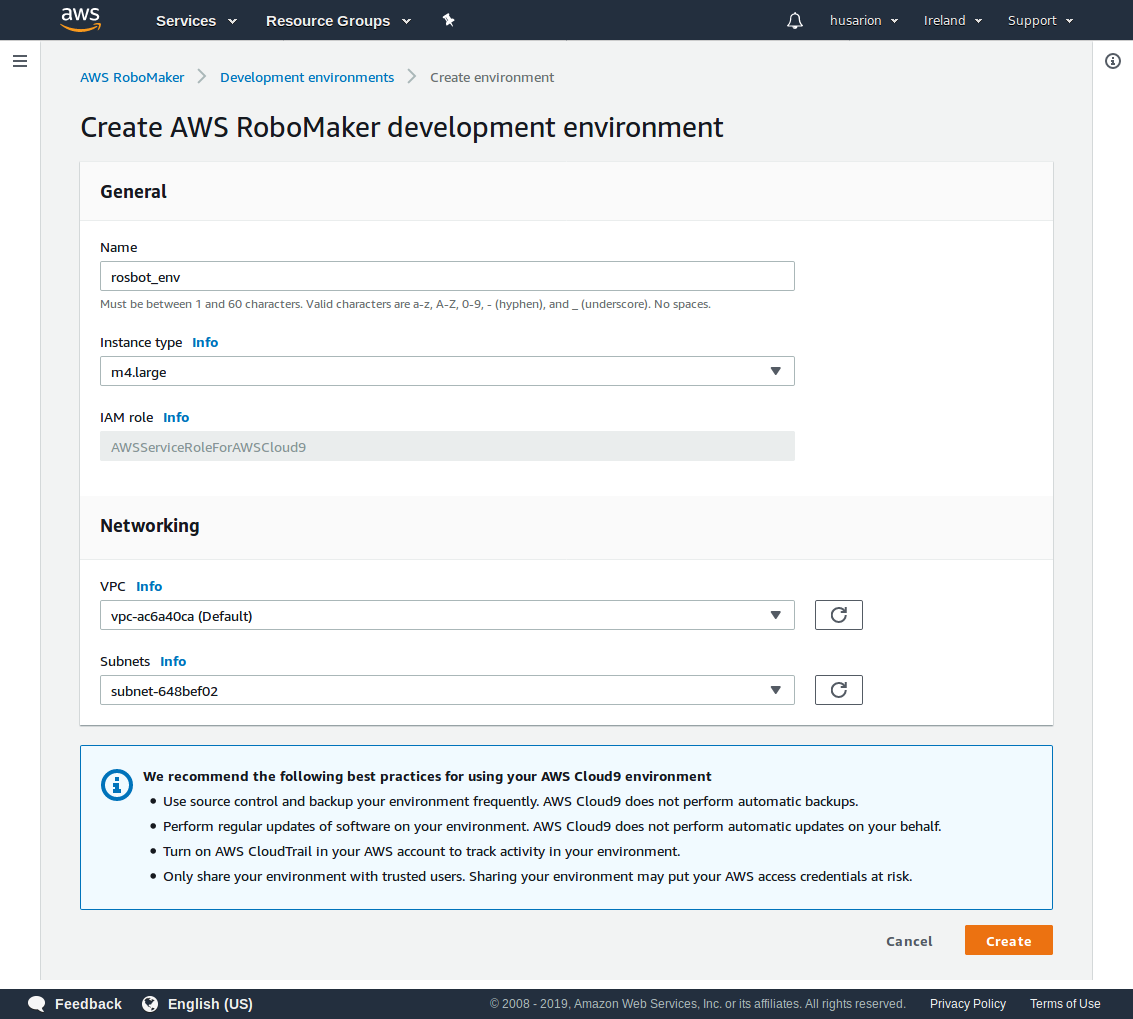
- Choose Create to create the AWS Cloud9 development environment.
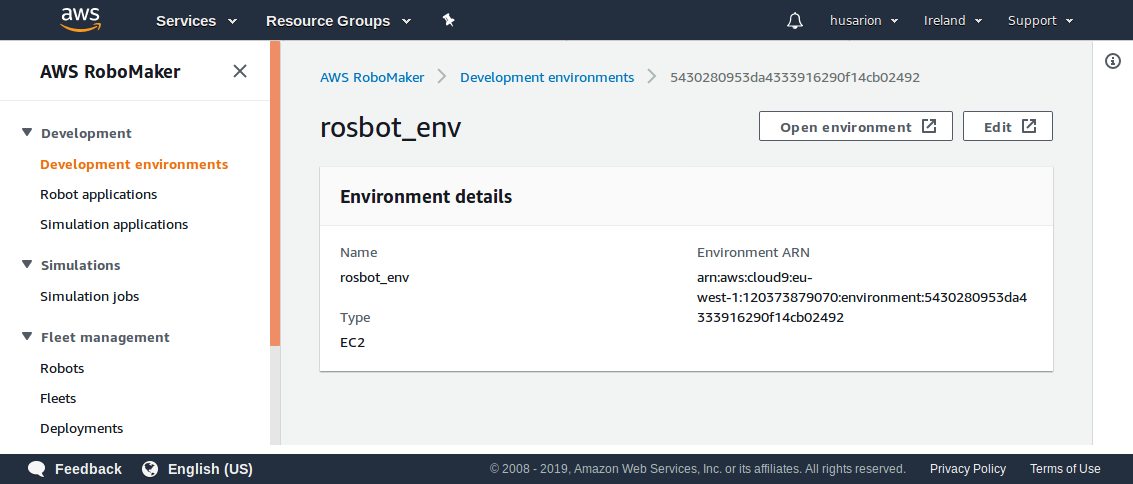
Deploying the application
To deploy application, you will use RoboMaker environment created in previous step:
-
Go to AWS RoboMaker home console.
-
On the left, expand Development, choose Development environments, and then choose
rosbot_env. -
Open the development environment with Open environment button.
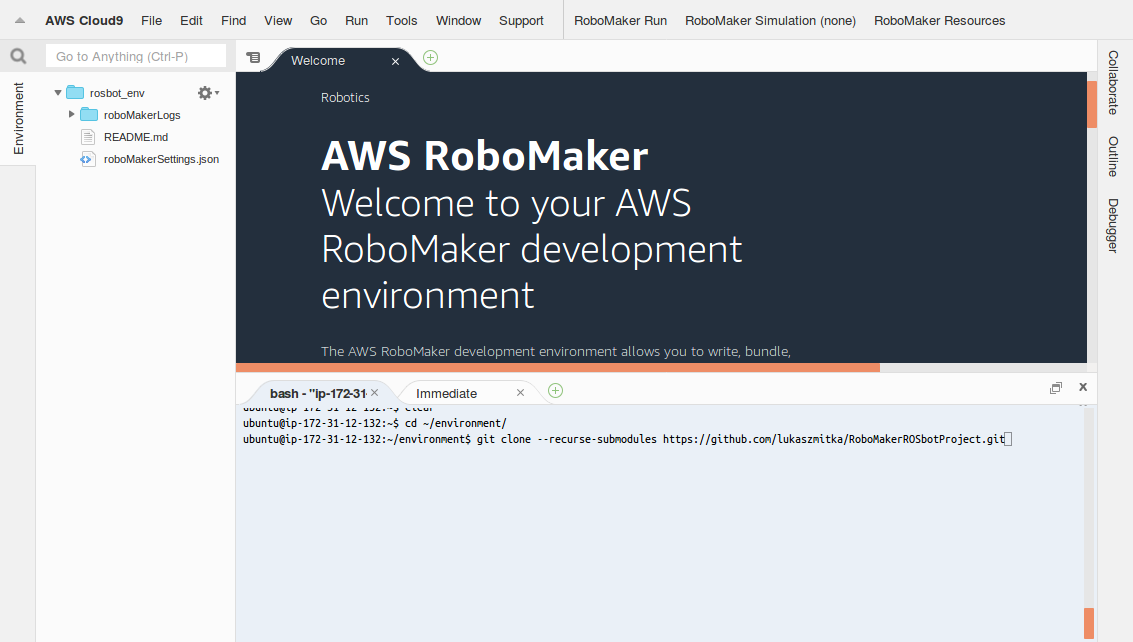
- In the IDE, go to bash tab and clone the
rosbot-robomakerrepository in~/environment/directory:
cd ~/environment/
git clone --recurse-submodules https://github.com/husarion/rosbot-robomaker.git RoboMakerROSbotProject
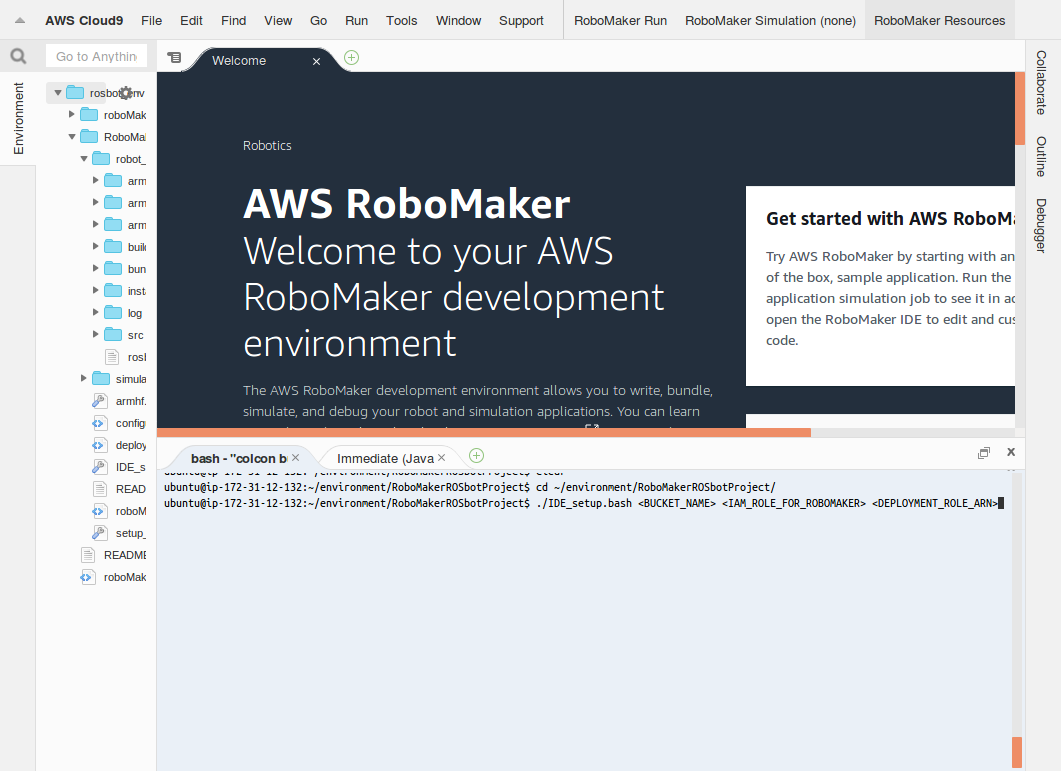
- Start the configuration script. You need to provide the S3 bucket name and the ARNs of the IAM roles that were created by CloudFormation earlier. The parameters to the script should be set to the corresponding values provided in the output of your CloudFormation stack:
cd ~/environment/RoboMakerROSbotProject/
./IDE_setup.bash <S3BucketName> <RoboMakerRole> <ROSbotDeploymentRole> --launch tutorial_robomaker_1_rosbot.launch
The script will configure EC2 Instance to serve as computation node.
During the script execution, you will be prompted to use registration links for robomaker IDE and EC2 instance, add both devices to tutorial network.
When both devices are added, go to Husarnet dashboard again and make sure that rosbot is set to be ROS master.
The script will install all dependencies, configure project, build and set the deployment job.
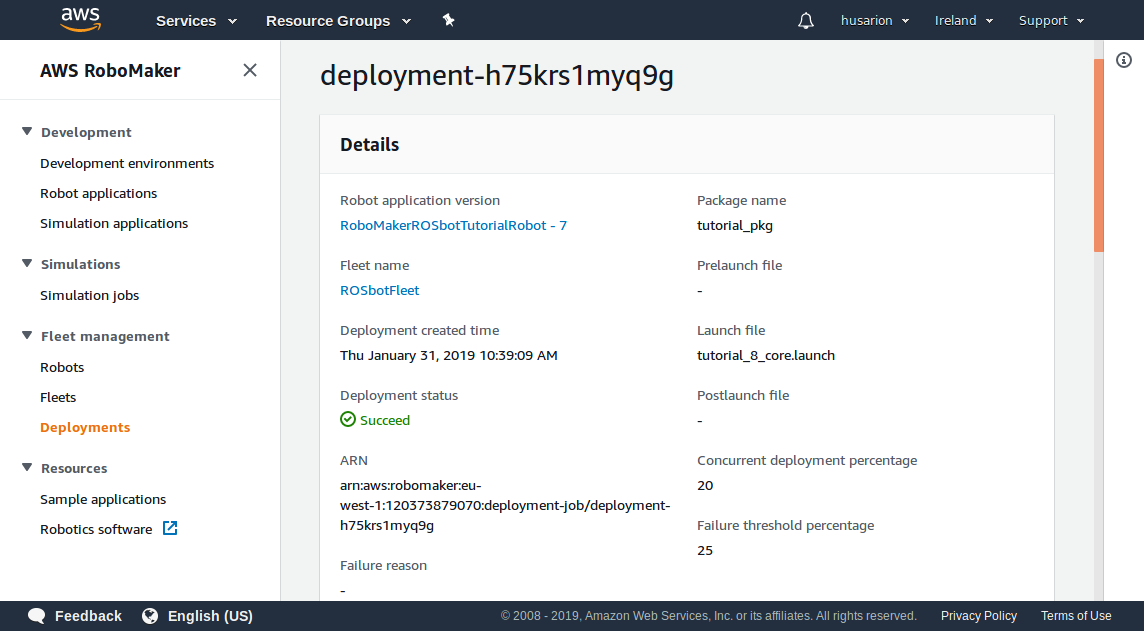
When the script is done with its job, you can observe the deployment process:
- Sign in to the AWS RoboMaker console.
- In the left navigation pane, choose Fleet Management and then choose Deployments.
- When new deployment will appear, open it by clicking its name.
- Deployment job will start tasks both on ROSbot and EC2 instance.
Controlling the robot
ROSbot is prepared to autonomously navigate towards destination selected by user.
You will use ROSbot remote desktop to set destination and observe progresses:
-
Connect through remote desktop with ROSbot
-
Open new terminal window
-
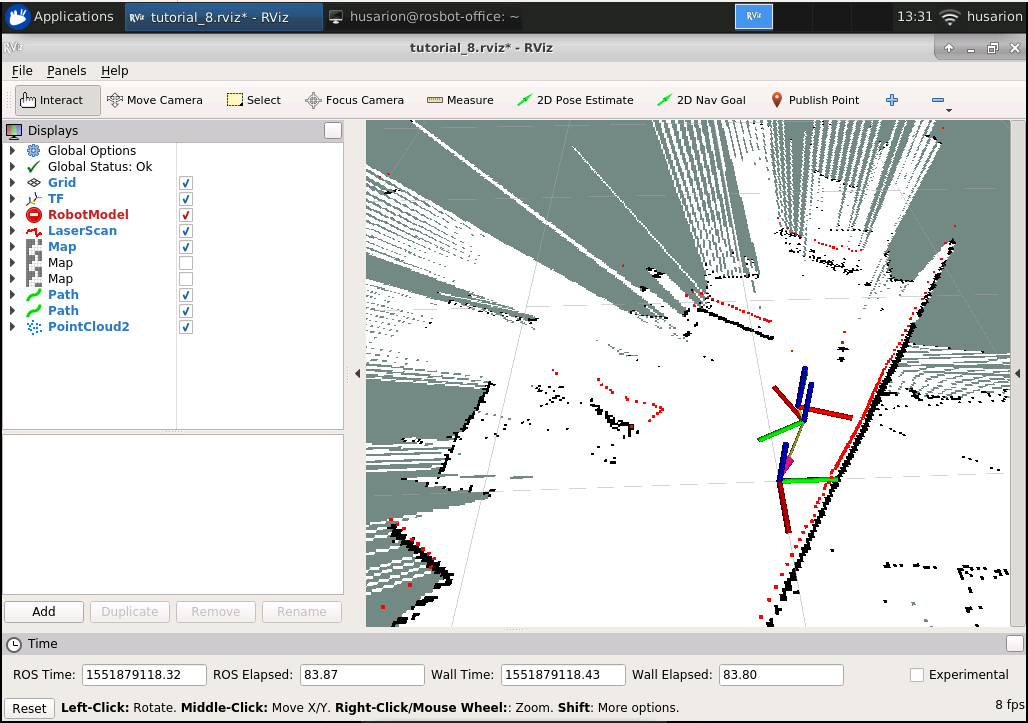
Start rviz by typing:
rviz -d $(rospack find tutorial_pkg)/rviz/tutorial_8.rviz
You will see the Rviz visualization tool with created map and ROSbot position. Planned trajectory will appear as soon as destination is set.
To set a destination point on a map, use 2D Nav Goal button in Rviz.
You can see an example map being created on the screenshot below.
Summary
After completing this tutorial you will know how to connect ROSbot, EC2 cloud compute instance, RoboMaker IDE and your laptop in single VPN network using Husarnet.
Also, you will know how to configure ROSbot and EC2 instance to cooperate as consistent robotic system. Above example shows how to outsource map building and path planning processes to cloud environment, by following this method, you can outsource any computation demanding task.
by Łukasz Mitka, Husarion
Need help with this article or experiencing issues with software or hardware? 🤔
- Feel free to share your thoughts and questions on our Community Forum. 💬
- To contact service support, please use our dedicated Issue Form. 📝
- Alternatively, you can also contact our support team directly at: support@husarion.com. 📧