Autoware.Auto Simulation Demo
Introduction
This guide was created in February 2022, so some adjustments may need to be made to ensure it works with the most recent releases of Autoware.Auto
This tutorial contains easy steps on first setup and usage of Autoware.Auto on a custom robot. If you want run Autoware.Auto in Simulation environment for the first time it's the perfect place.
What can you expect?
After running this quick tutorial you will be able to run the same simulation as on video below:
Pre requirements
- You don`t need to have ROS2 on your machine, it will run in ADE.
- You only need Ubuntu (preferably 20.04) with Docker.
- If your computer has Nvidia GPU, the NVIDIA Container Toolkit will also be needed.
For full demo source code refer here.
What is Autoware.Auto?
Autoware.Auto a open-source project designed to implement autonomous driving functionalities. It operates on ROS 2 and allows users to setup autonomous perception and planning stack on their platform. Autoware features modular architecture allowing users to swap in and out components of the system as they wish. The goal of this tutorial is to demonstrate that it can operate not only on cars but also on Panther robot designed by Husarion. If you want to learn more about Autoware.Auto check out the official website and also the repository on GitLab.
What will you learn?
By following these easy steps you can launch and test Autoware.Auto autonomous driving functionalities in realistic simulation environment using SVL simulator. On top of that the demo repository contains official Agile Development Environment (ADE), witch will allow you to experiment and develop with the latest version of Autoware.Auto.
First Setup of Autoware Demo
Installation of ADE
ADE is a docker-based development environment, it comes with the latest version of Autoware.Auto software preinstalled.
Pre requirements:
-
Install Docker, instructions here.
-
If you Have Nvidia GPU, install NVIDIA Container Toolkit, instructions here.
Next install ADE. To install it execute the code below.
cd /usr/local/bin/
sudo wget https://gitlab.com/ApexAI/ade-cli/-/jobs/1341322851/artifacts/raw/dist/ade+x86_64
sudo mv ade+x86_64 ade
sudo chmod +x ade
sudo ./ade update-cli
If you find some problems installing ADE please refer to the official installation guide here.
Setting up demo packages
Clone the demo repository:
git clone https://github.com/husarion/autoware-playground.git
All following commands will be executed from the path where you have the repository cloned
Then launch and update ADE container:
cd autoware-playground/adehome/AutowareDemo/
sudo ade update-cli
ade start --update --enter
cd AutowareDemo
vcs import < autoware.auto.foxy.repos
Last step is to build the demo packages and set up sourcing of the ROS environment in .bashrc
colcon build --symlink-install

echo 'source /opt/AutowareAuto/setup.bash' >> ~/.bashrc
echo 'source ~/AutowareDemo/install/setup.bash' >> ~/.bashrc
To exit ADE just type exit inside the container
exit
Setting up SVL simulator
Start and setup
Autoware.Auto is linked with SVL simulator witch emulates real surroundings for your robots to operate in. You will need to create a SVL account to run your simulation.
Our demo package contains the simulator with adaptations to use skid seer drive. To launch it you need to execute following commands:
cd autoware-playground/Panther_simulator
./simulator
In order to link it to cloud use instructions here
Add assets needed to run the simulation
In this step you will need to add a map and vehicle.
In oreder to run the demo add following assets:
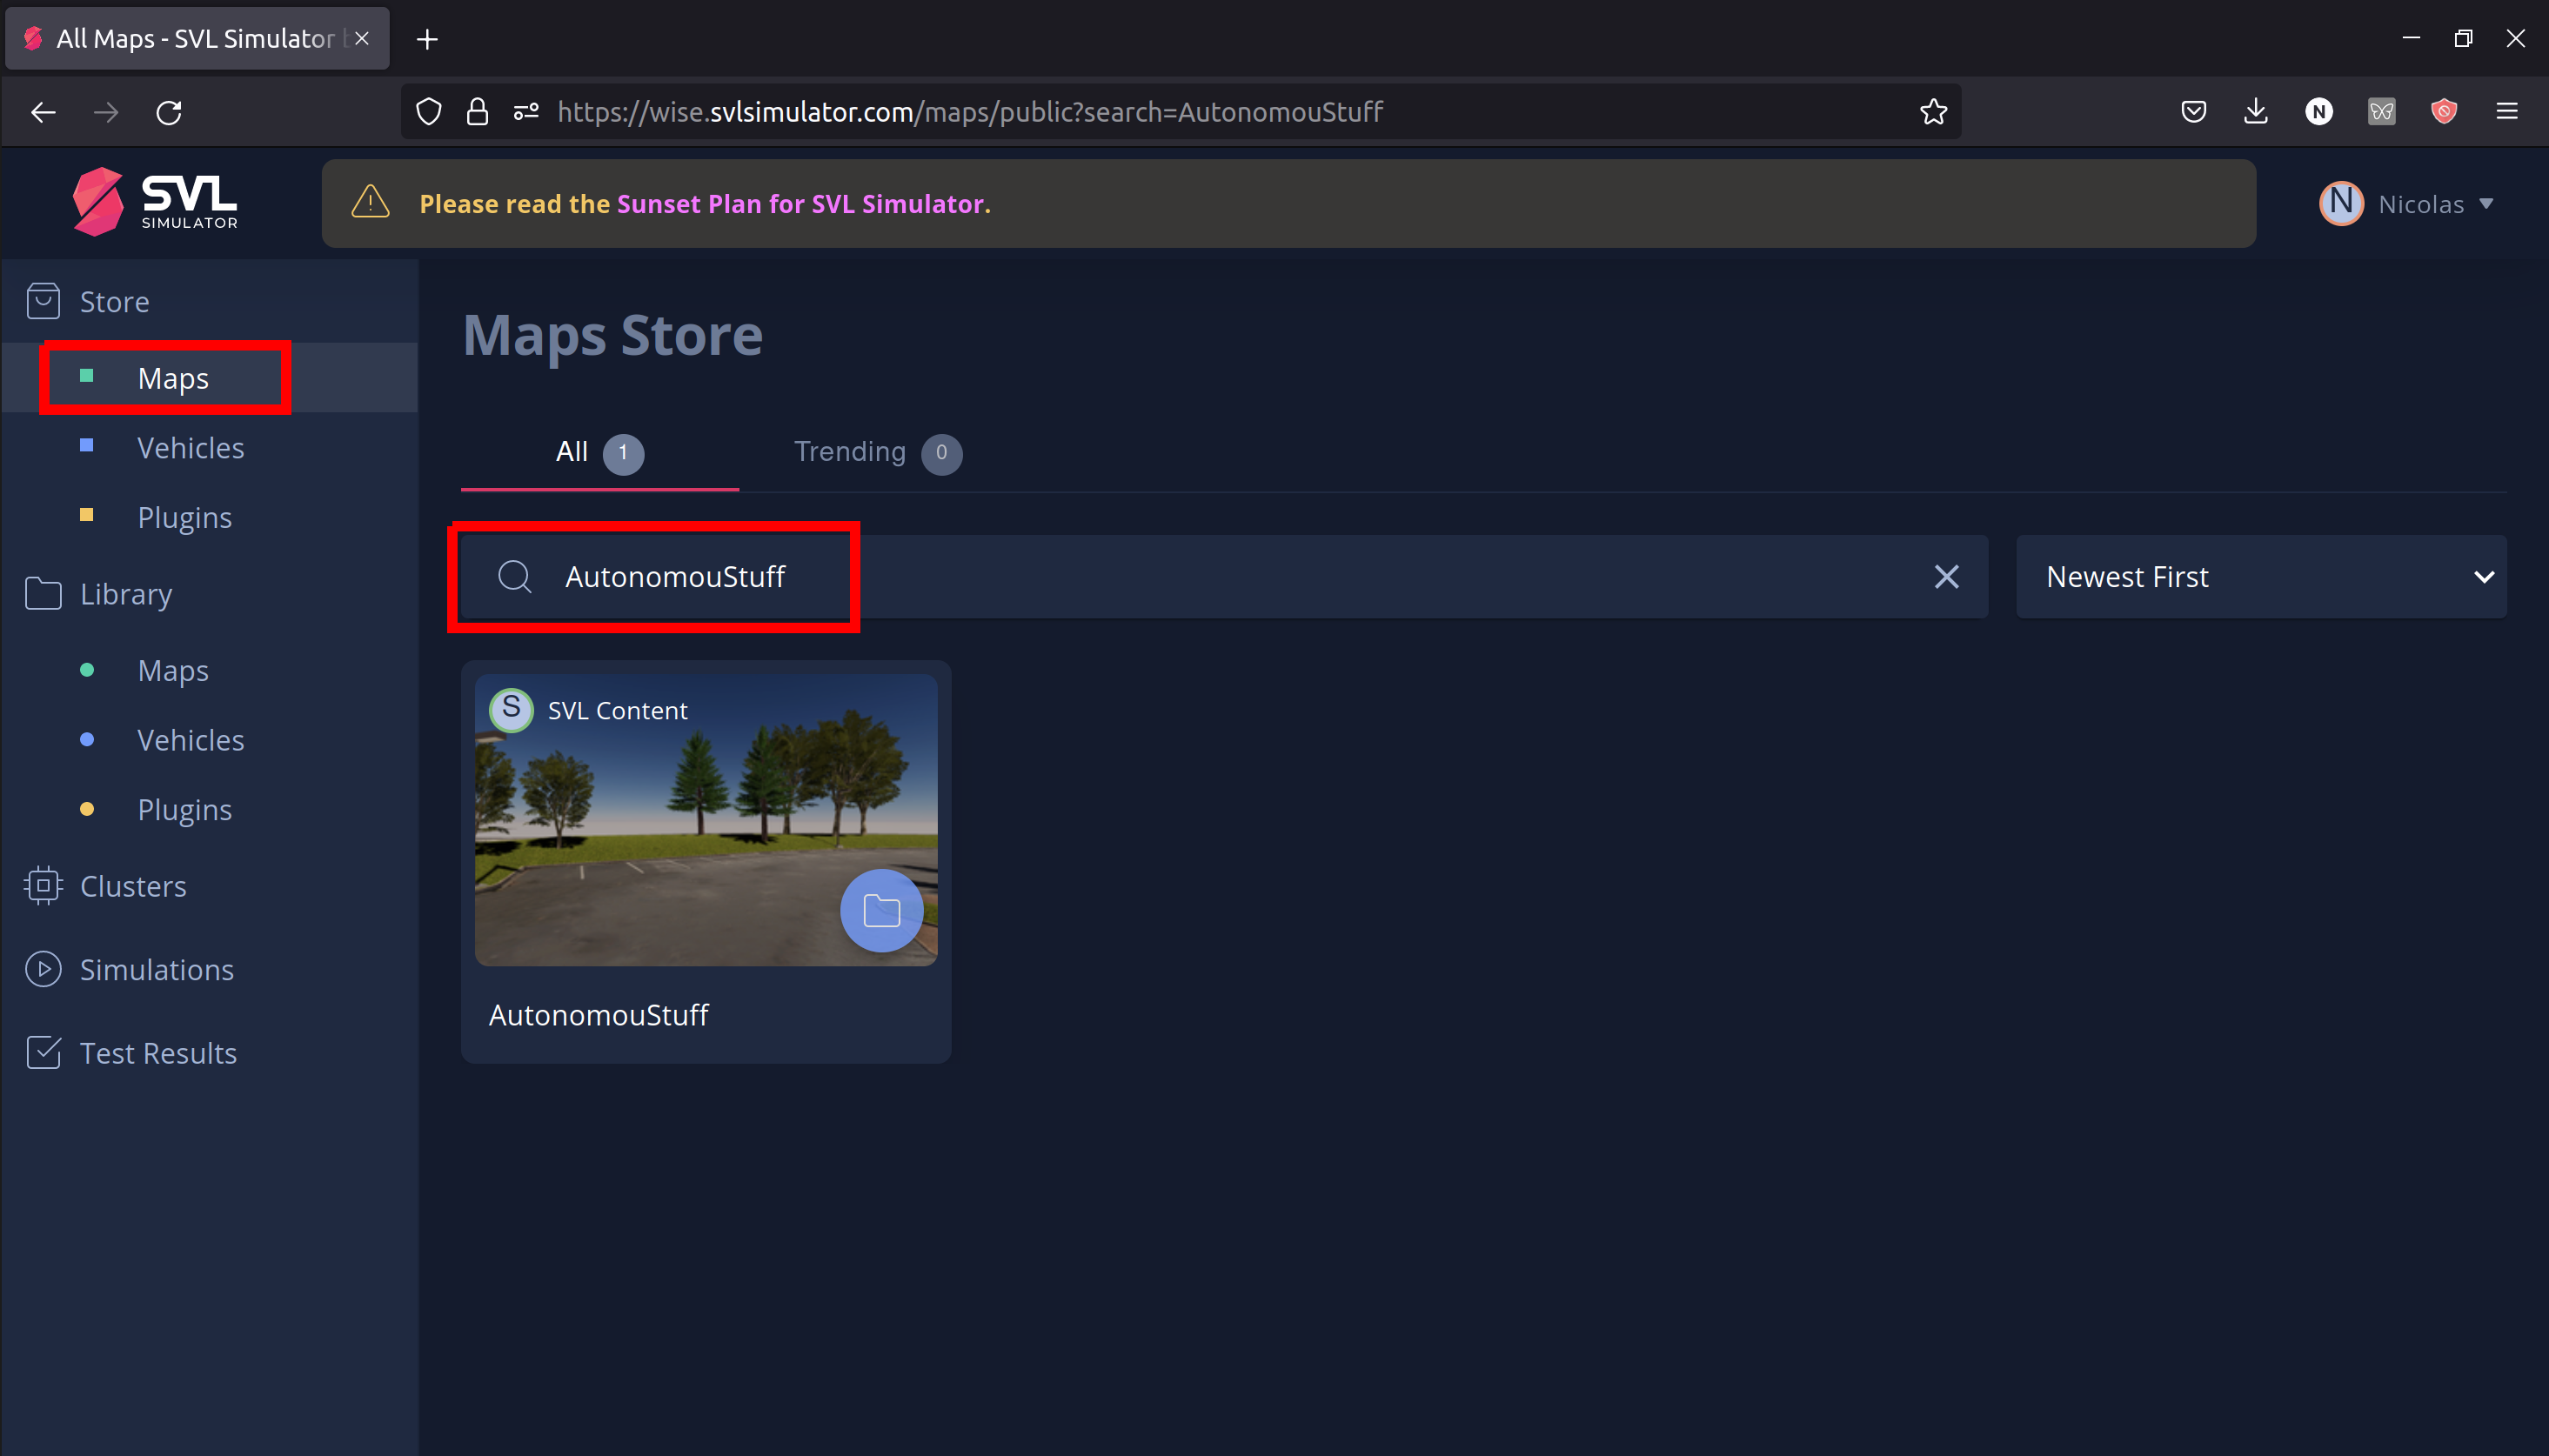
AutonomouStuffmapPantherrobot form vehicles page
You can do so by searching in the SVL store. Example of map adding is shown below.
Create a simulation
To create a simulation you will need to do following steps on the SVL website:
- Go to
Simulationstab and selectAdd New. - In General tab:
- select name and cluster,
- leave the rest unchanged.
- In Test case tab select
- Runtime Template:
Random Traffic, - Map:
Autonomous Stuff, - Vehicle:
Panther+ senors:Panther Autoware.Auto, - leave the rest unchanged.
- In Autopilot tab select
Autoware.Autowith bridge connectionlocalhost:9090. - Publish the simulation.
Launching the demo
- Its advised to do it in fresh terminal with all SVL, and ADE processes down.
- Always start the SVL simulator before running Autoware.Auto
Start ADE
First make sure no ADE containers are up:
docker container kill $(docker ps -a -q --filter="name=ade*")
Start ADE:
cd autoware-playground/adehome/AutowareDemo/
ade start
Start SVL Simulator
autoware-playground/Panther_simulator/simulator
Next open SVL web app and run your simulation form there. Click play button in SVl.
Correctly launched simulation should look like this:
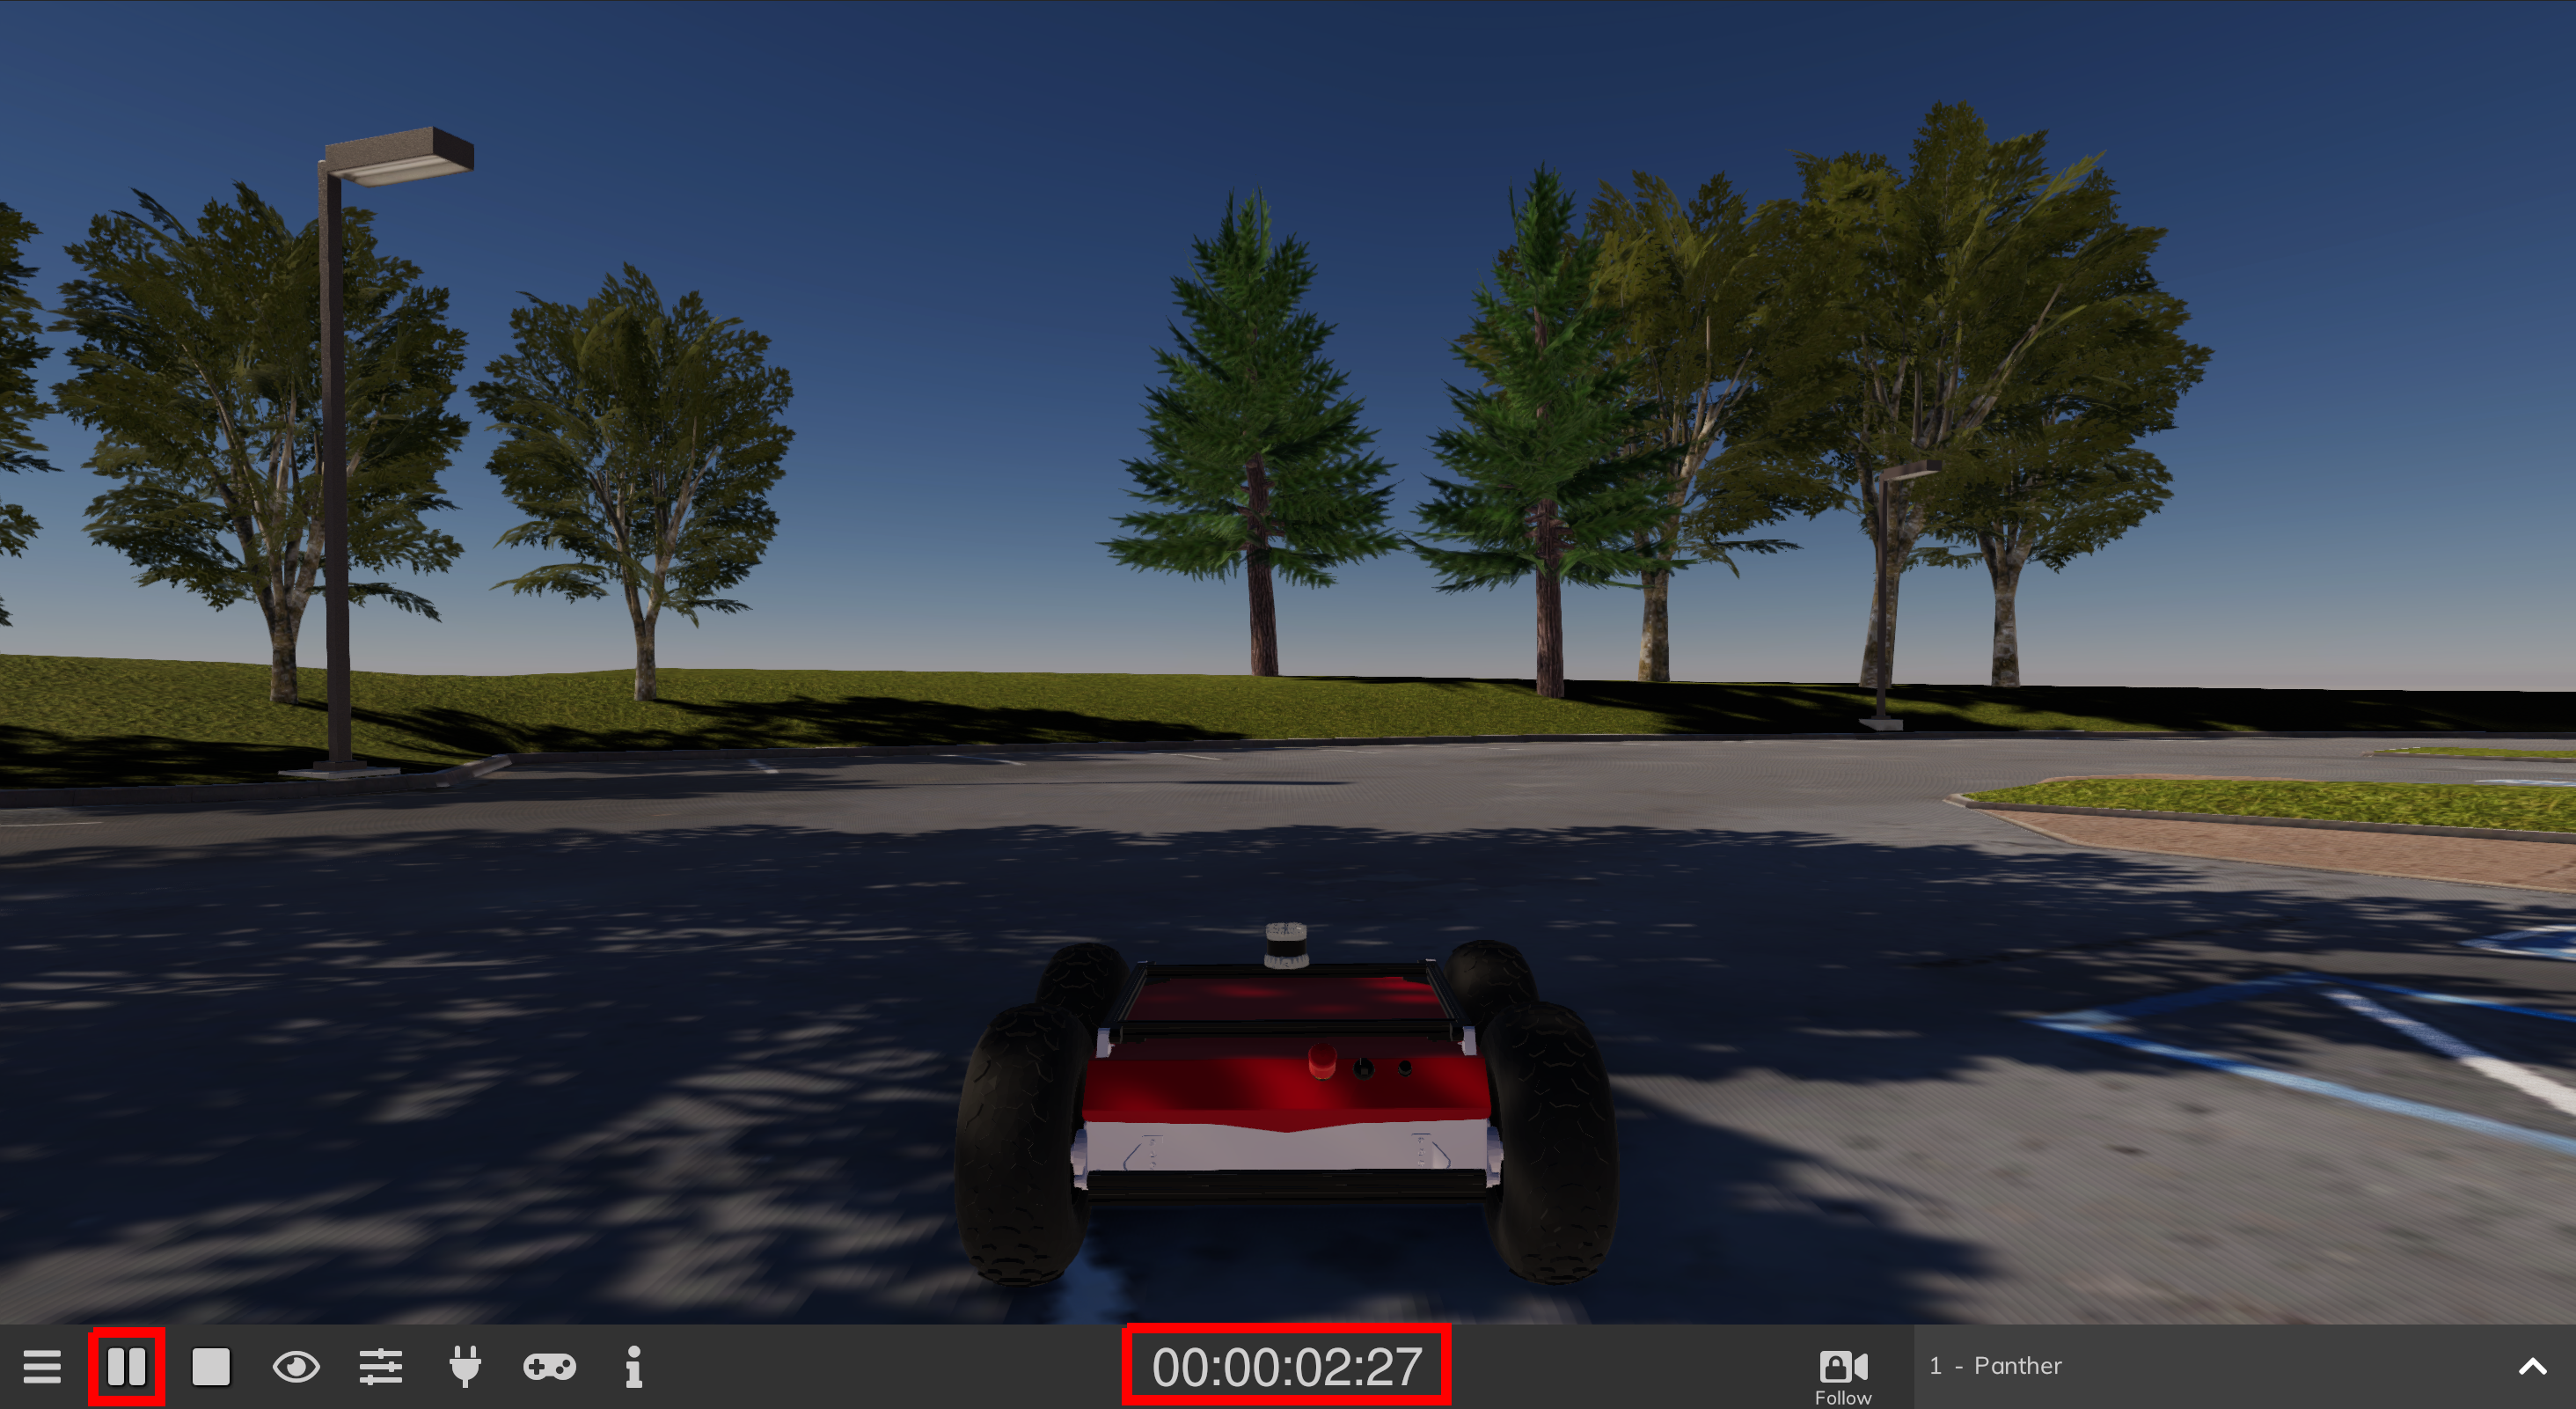
Make sure that you clicked play button and the sim time is running!
Start the demo
Terminal 1:
ade enter
lgsvl_bridge
Terminal 2:
ade enter
ros2 launch panther_sim_demo sim_panther.launch.py
Demo usage
Select starting position using 2D Pose Estimate tool, Panther should jump to this position and detected objects should become visible in rviz.
Panther always spawns in the same place, so just select the pose visible on the picture below
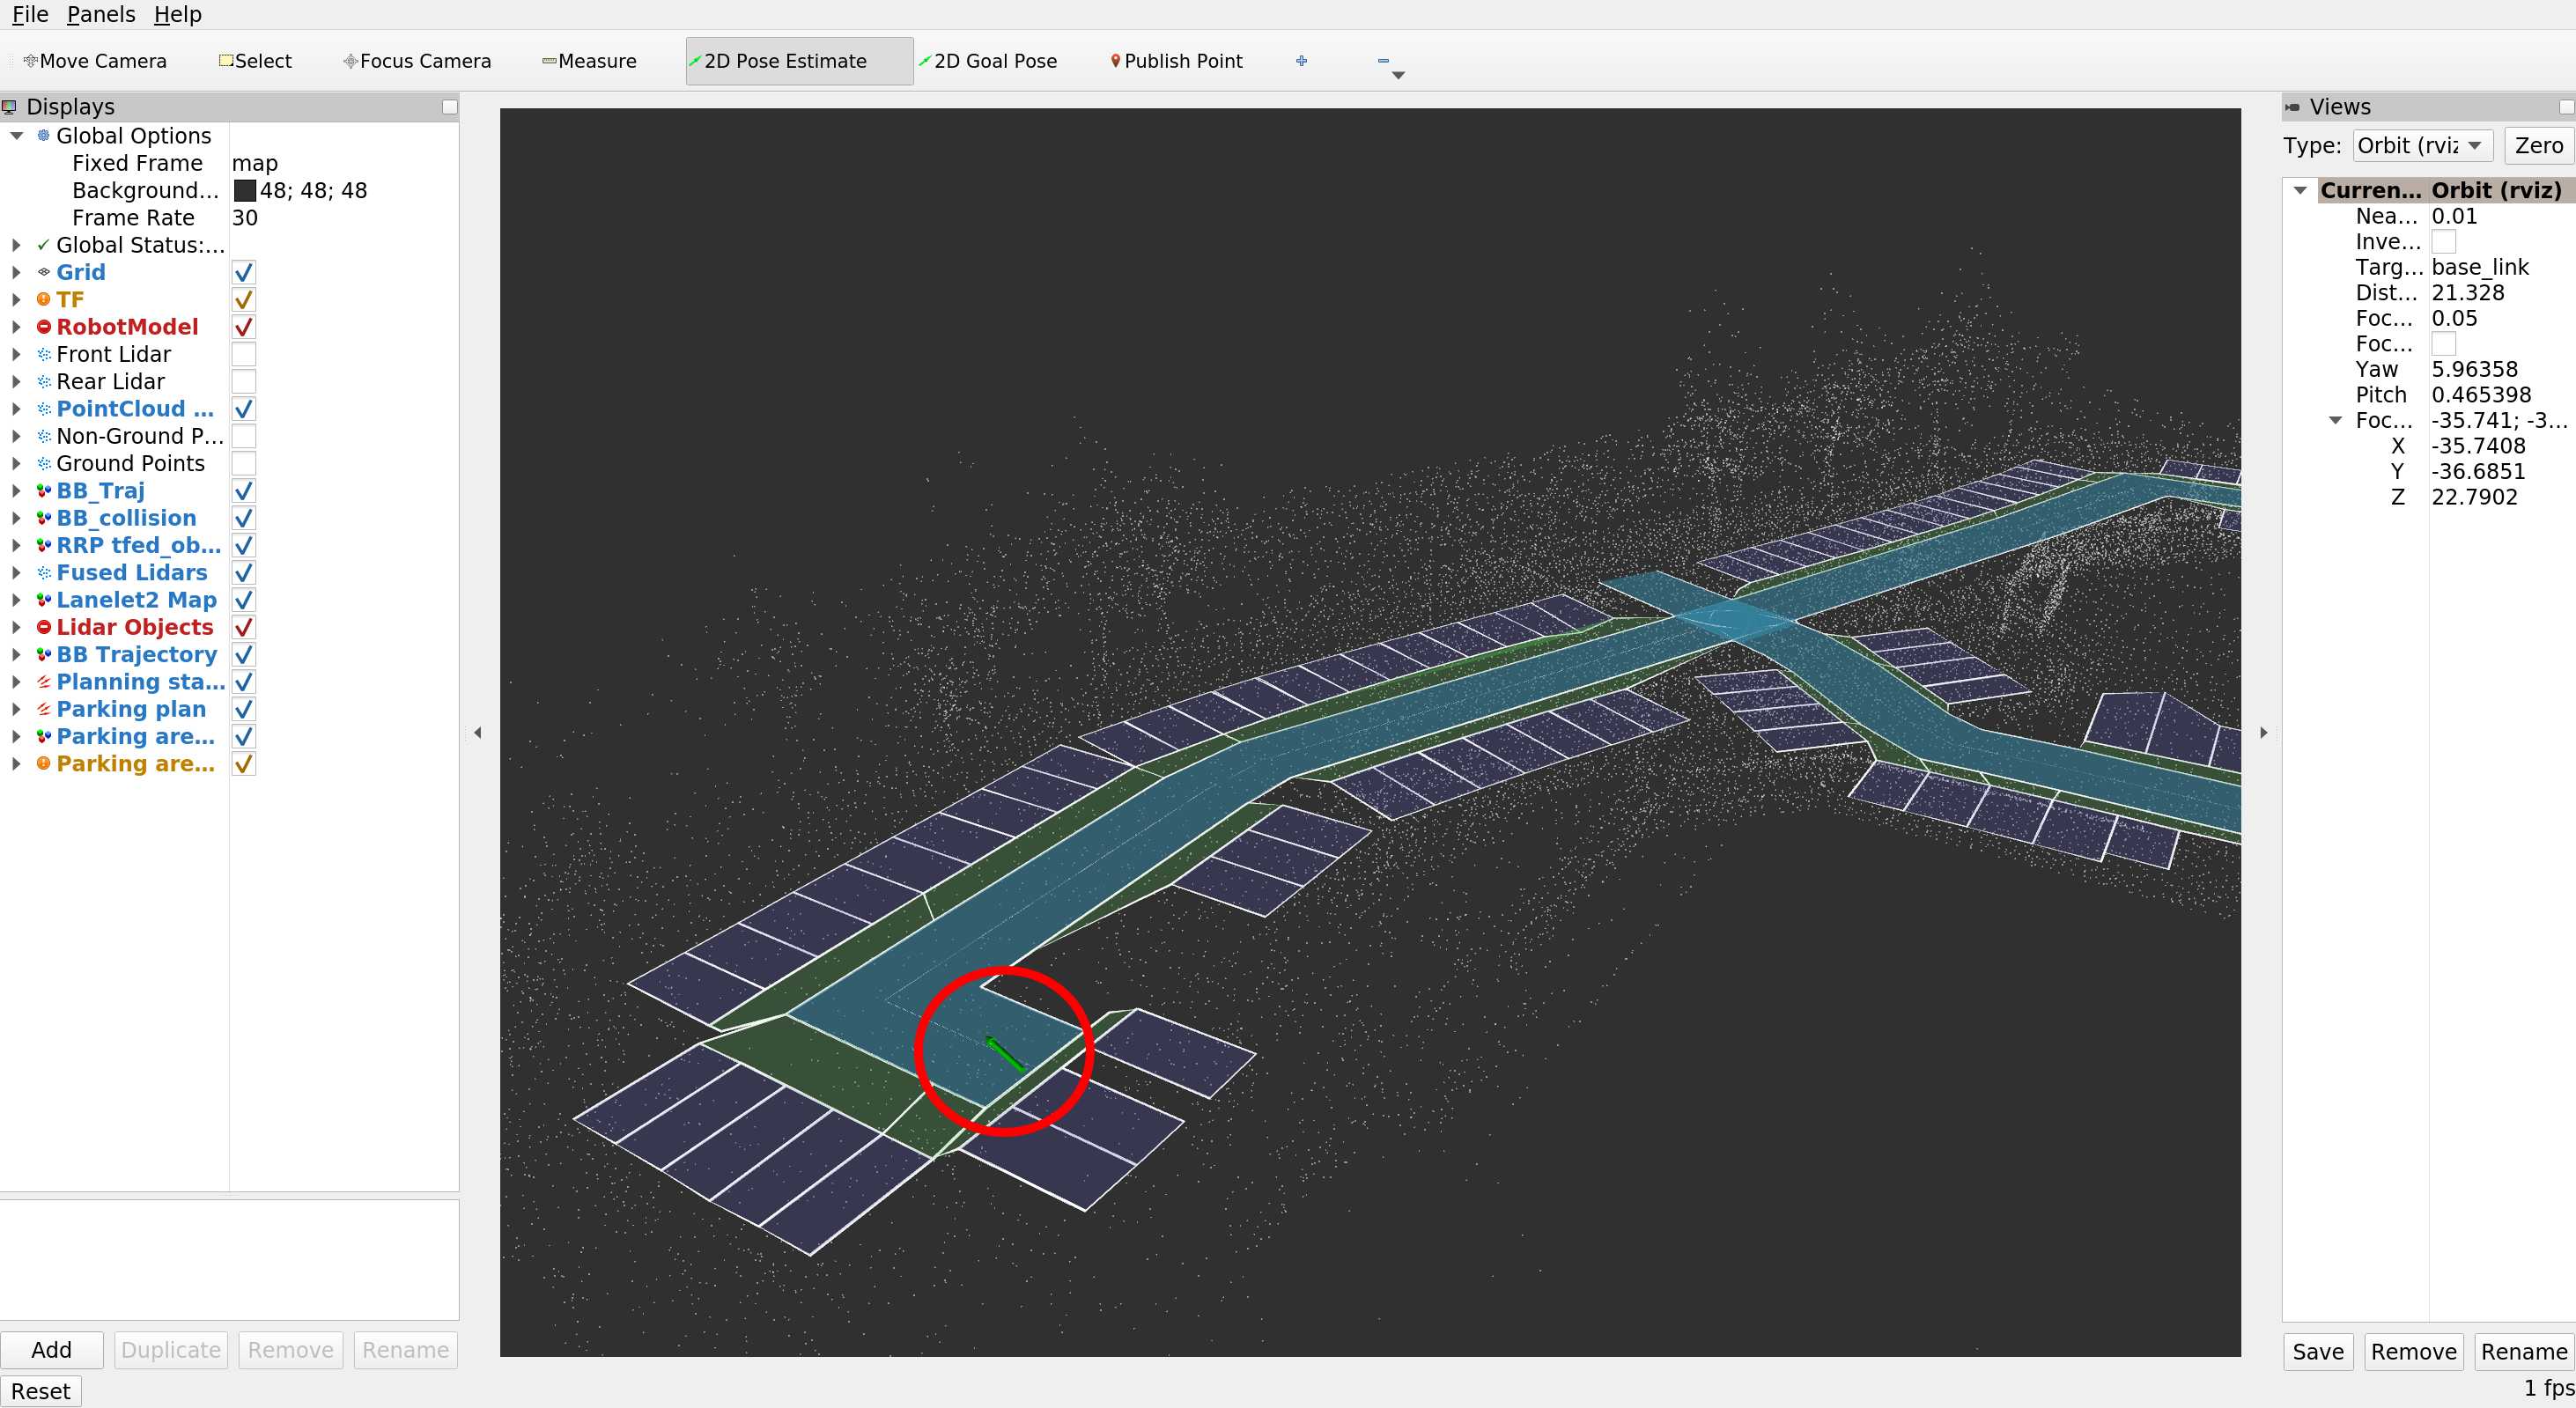
To drive around autonomously use 2D Goal Pose tool in rviz, remember to select pose within the blue roads on the map. If you have chosen the pose correctly you should see the planned path and robot should start moving towards the goal pose.
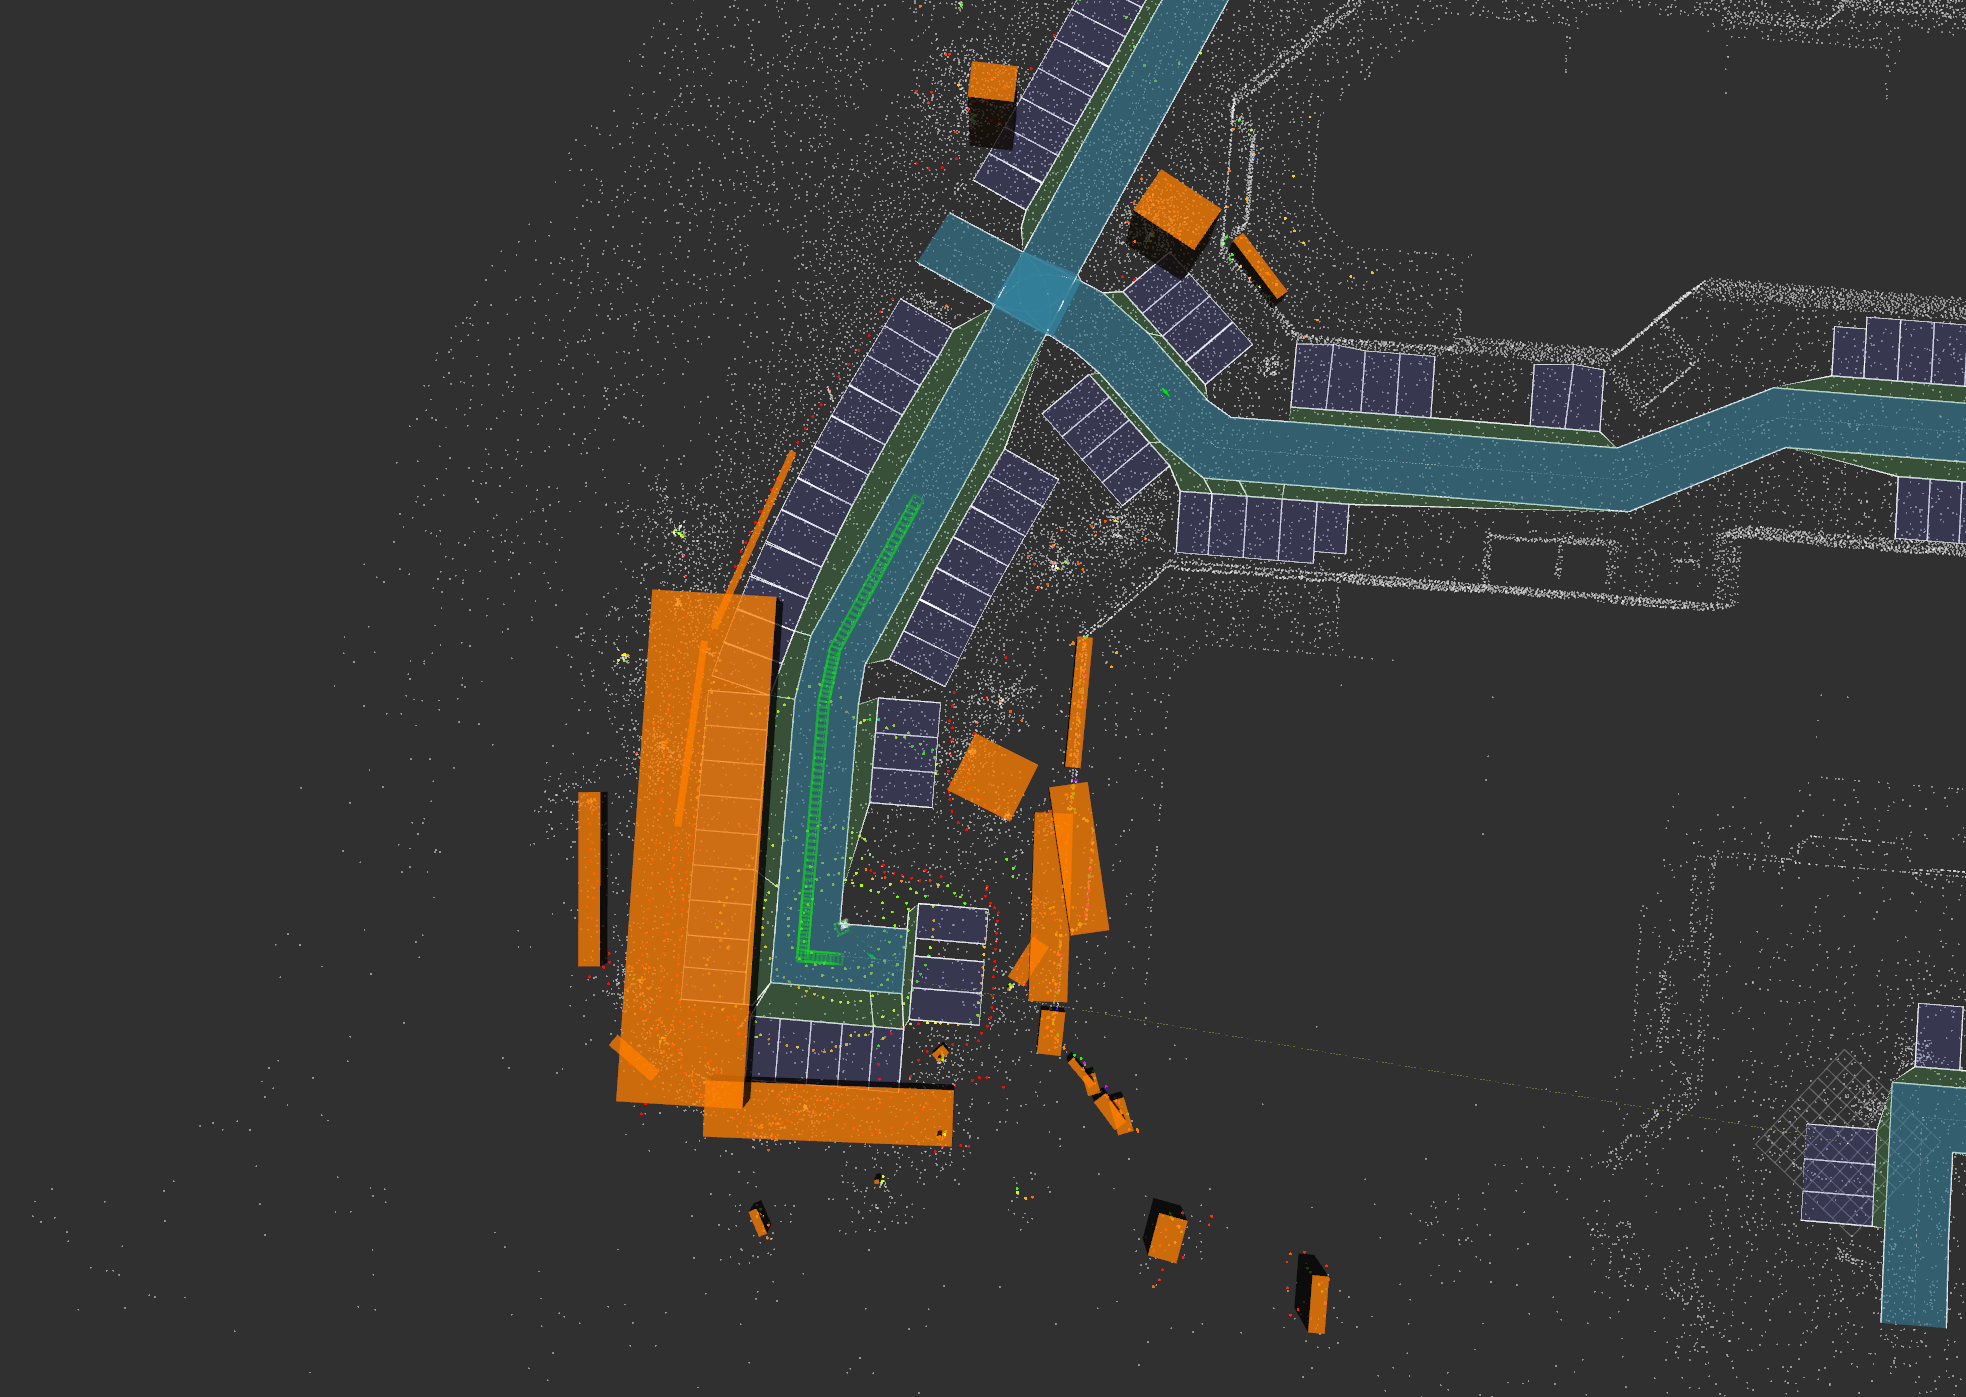
Below you can see working navigation in RViz.
Summary
This short demo is a great start to using Autoware.Auto and shows that it can be successfully deployed on Panther robot. It also gives a quick showcase of its usage in a known environment. If you are interested in learning more about Autoware.Auto usage with Panther robot, more tutorials will be coming in the future.
by Nicolas Duc, Husarion
Need help with this article or experiencing issues with software or hardware? 🤔
- Feel free to share your thoughts and questions on our Community Forum. 💬
- To contact service support, please use our dedicated Issue Form. 📝
- Alternatively, you can also contact our support team directly at: support@husarion.com. 📧