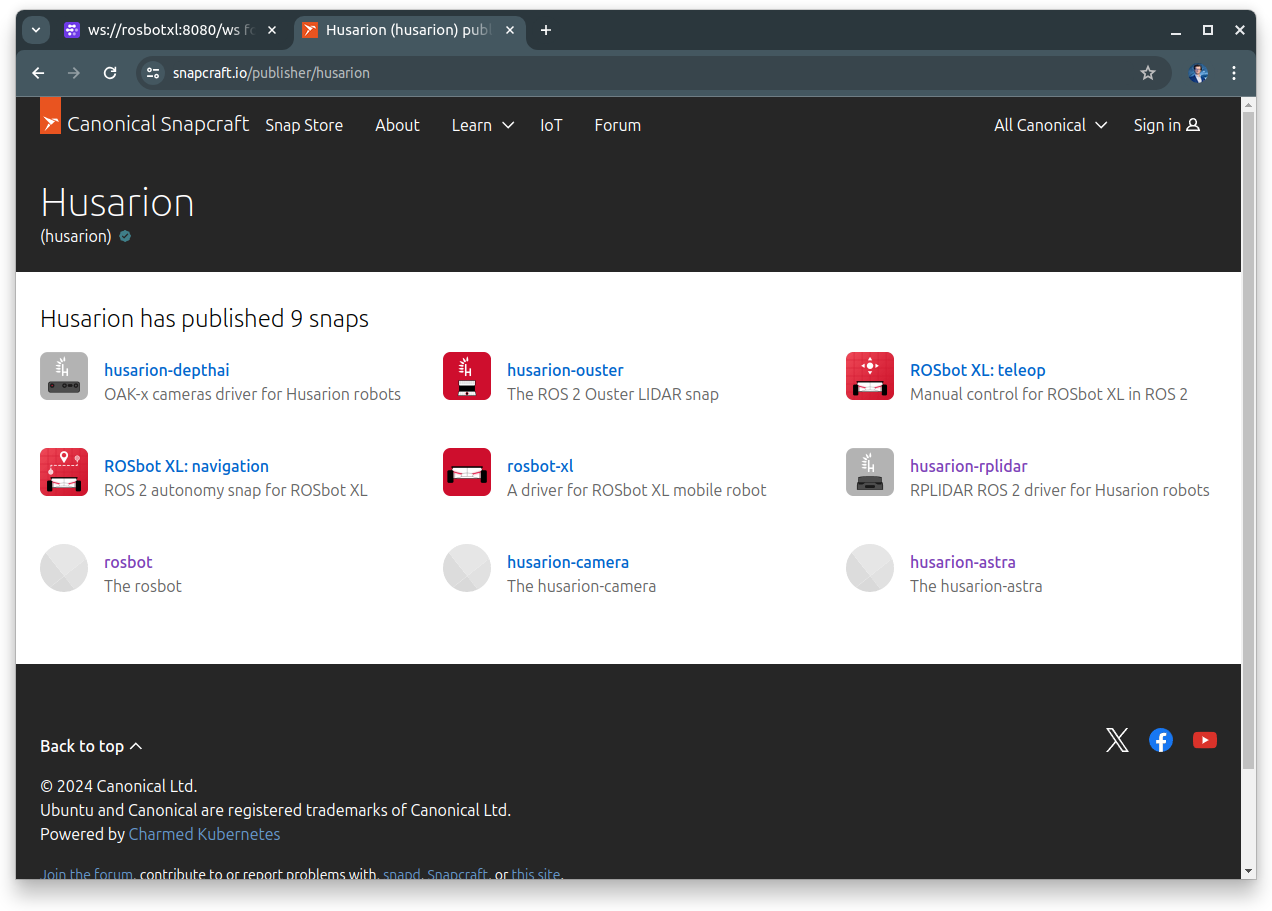
ROSbot XL Remote Access with Snaps

In the ROSbot XL Quick Start Guide we show how to run ROSbot XL ROS 2 driver using a Docker deployment. Recently we have introduced a set of snaps available on snapcraft.io that makes the ROSbot XL setup much easier.
Using rosbot-xl snap
Accessing the robot shell
Connect your laptop and ROSbot XL with the Ethernet cable and turn the robot on. ROSbot XL runs the DHCP server so you don't need to setup a static IP address on your laptop.
To access the ROSbot XL ssh shell just run:
ssh husarion@192.168.77.2
Connecting to Wi-Fi
Connect ROSbot XL to your Wi-Fi network by editing this file:
vim /etc/netplan/01-network-manager-all.yaml
Put your Wi-Fi network credentials in this section:
    wlan0:
      dhcp4: true
      dhcp6: true
      optional: true
      access-points:
        "PLACE_YOUR_WIFI_SSID_HERE":
          password: "PLACE_YOUR_WIFI_PASSWORD_HERE"
Apply the new network configuration with
sudo netplan apply
Connecting to Husarnet VPN
To access the robot over the Internet setup an account at https://app.husarnet.com/, create a new network, copy the Join Code and run:
sudo husarnet join <PASTE_YOUR_JOINCODE_HERE> rosbotxl
Husarnet is already preinstalled on ROSbot XL, so that's all.
You also need to connect your computer to the same Husarnet Network. Find installation instruction for your operating system here and connect your computer with husarnet join command.
When you have your laptop and robot VPN connected, you can access the ssh shell from anywhere with:
ssh husarion@rosbotxl

Disabling the Shutdown Service on ROSbot XL
There is a safe shutdown systemd service running on ROSbot XL that handles power-off button on the rear panel of ROSbot XL. Thanks to this service the power board don't cut the battery imidietely but allows operating system to shutdown securely.
This functionality is already embedded in the rosbot-xl snap, so before installing it, disable the safe shutdown service first:
sudo systemctl disable db-server.service
sudo systemctl stop db-server.service
Installing rosbot-xl Snap

Just run this command:
sudo snap install rosbot-xl
![]()
Basic usage
After you have rosbot-xl snap installed check if all required insterfaces are connected:
sudo snap connections rosbot-xl
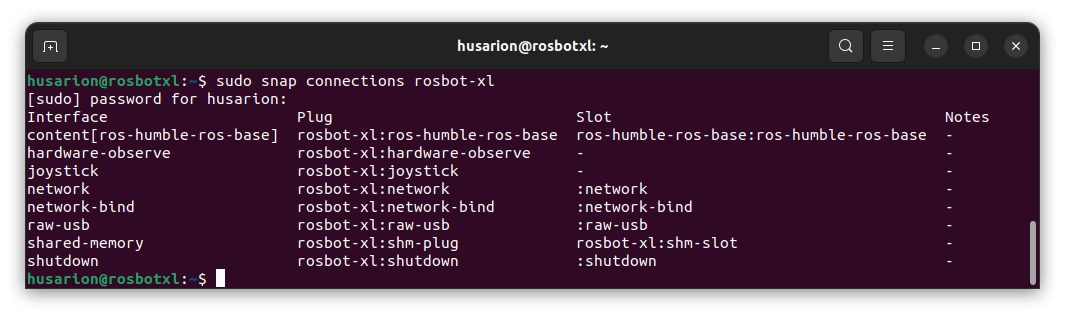
In the current version of rosbot-xl snap two interfaces required by a gamepad control service are not connected. Connect them with:
sudo snap connect rosbot-xl:joystick
sudo snap connect rosbot-xl:hardware-observe
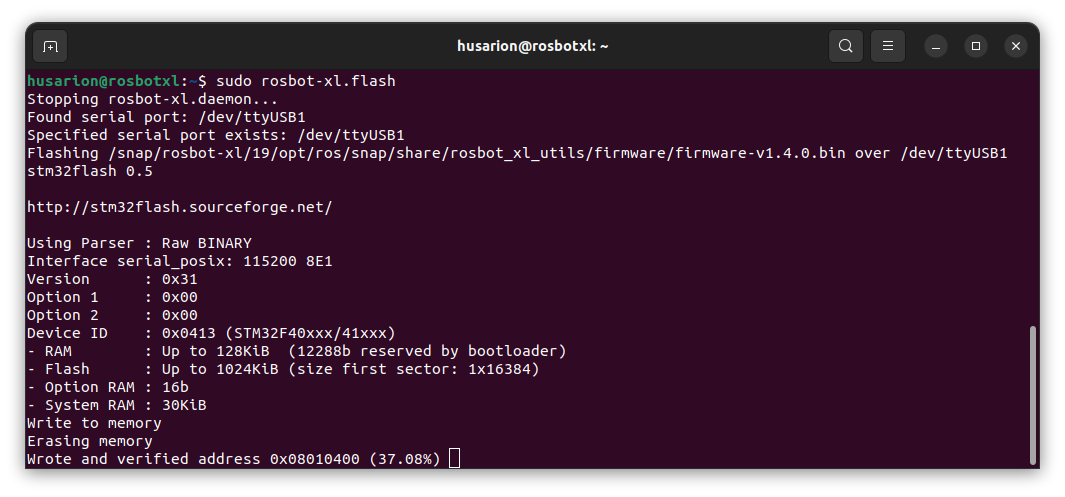
To make sure the right firmware version runs on the internal STM32F4 microcontroller, flash the firmware directly from the snap:
sudo rosbot-xl.flash
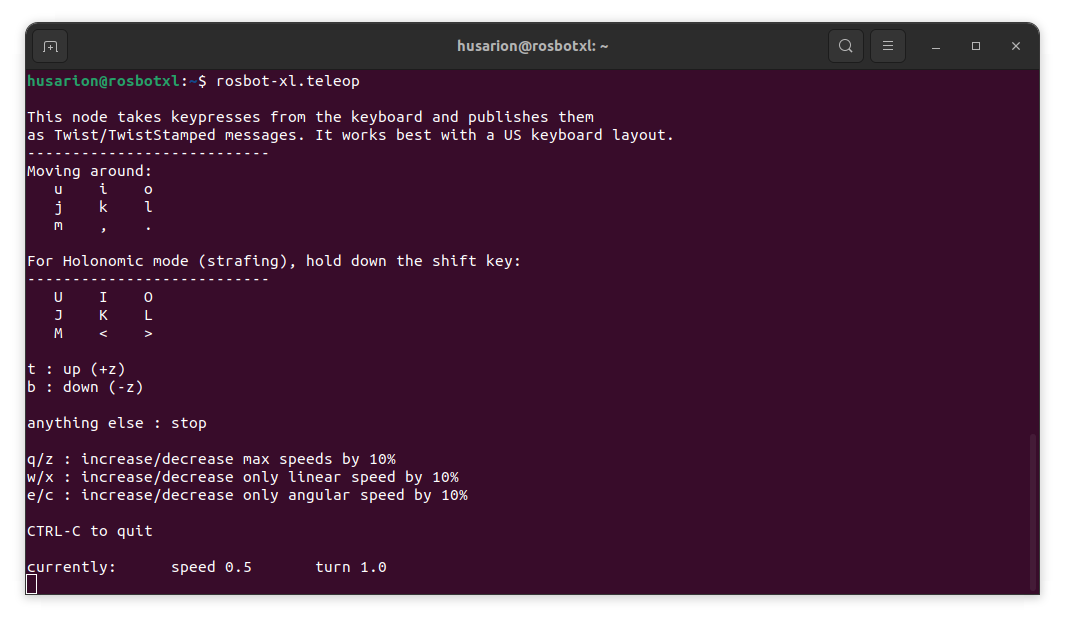
Now let's open a teleop node to control the robot from the terminal:
sudo rosbot-xl.teleop
In the next step, we will enable the rosbot-xl.joy service that will allow us to control the robot by using a Logitech F710 gamepad.
A single snap can run multiple services operating in the background. To list available services in ROSbot XL snap and check their current status run:
sudo snap services rosbot-xl
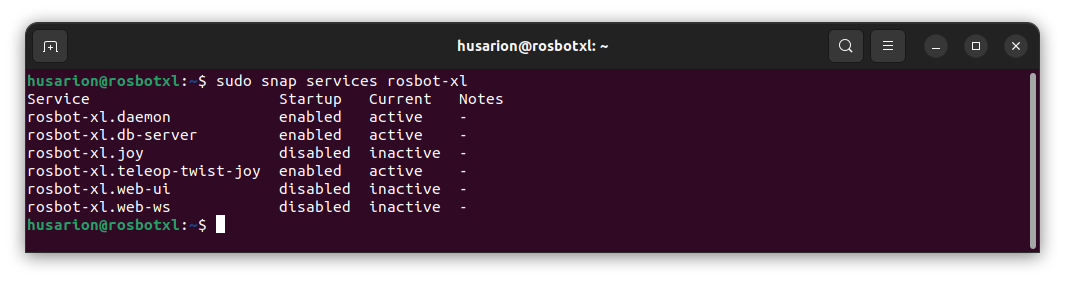
As you can see, the rosbot-xl.joy service is not running (inactive state), and will not start on boot (disabled state).
Before we enable the rosbot-xl.joy connect the gamepad dongle to one of USB-A ports at the ROSbot XL rear panel. After that, start and enable the service:
sudo snap start rosbot-xl.joy --enable
Now you should be able to control the robot from a gamepad (remember to hold the LB button that is the dead man switch).
Enabling a Web UI
As you can see on the screenshot above rosbot-xl snap contains two additional services:
rosbot-xl.web-uiruns a web server with a customizable web user interface for ROSbot XLrosbot-xl.web-wsruns a foxglove bridge that is a bridge between ROS nodes running on the robot, and web user interface running in the browser.
To start both services, you can just run:
sudo rosbot-xl.start-web-ui
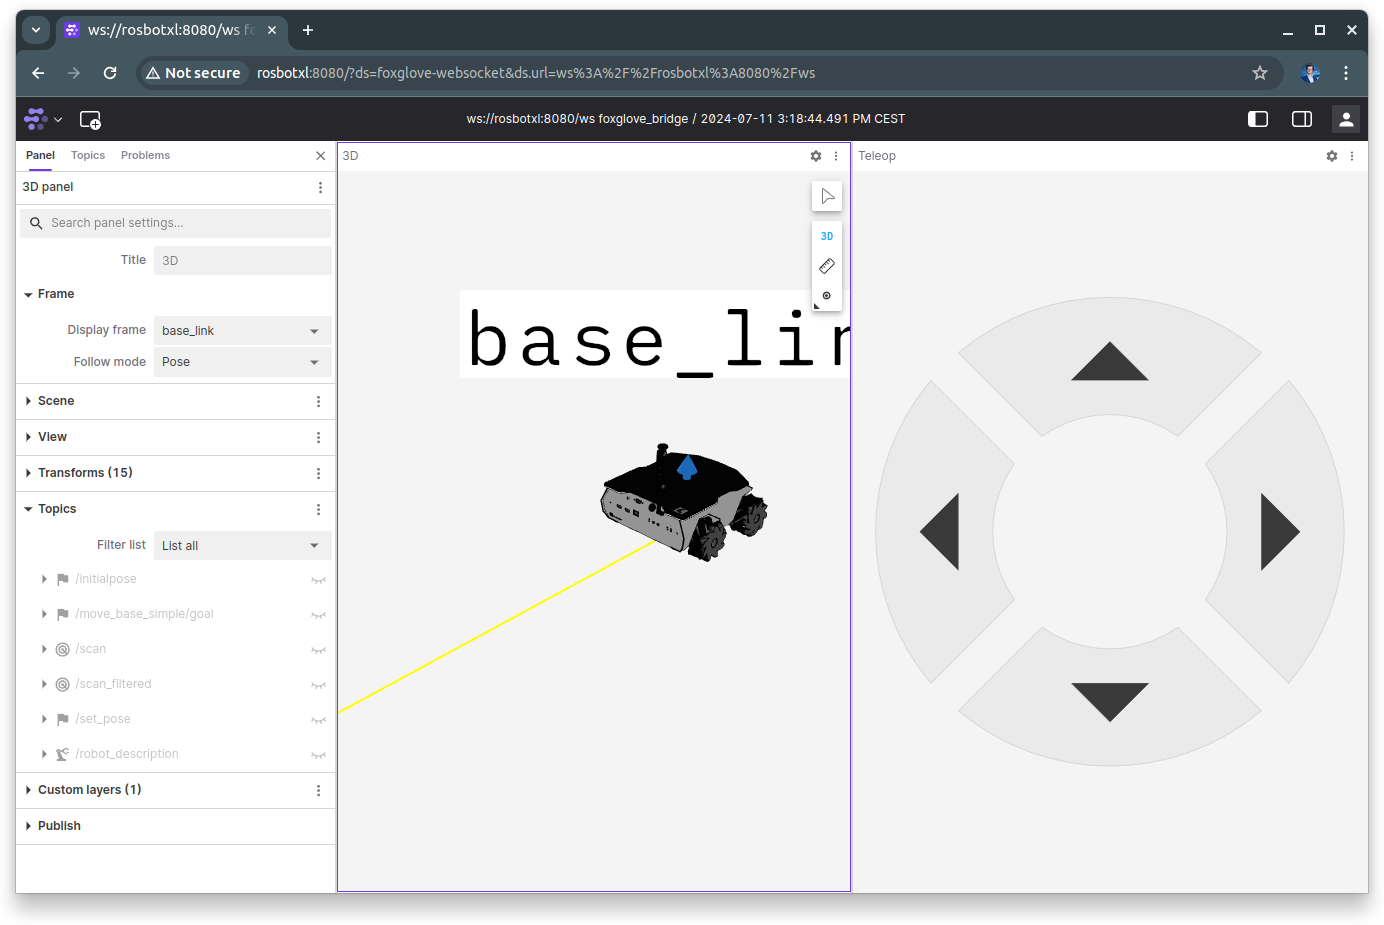
Now to open a web user interface, just paste this link in your web browser:
http://rosbotxl:8080/ui
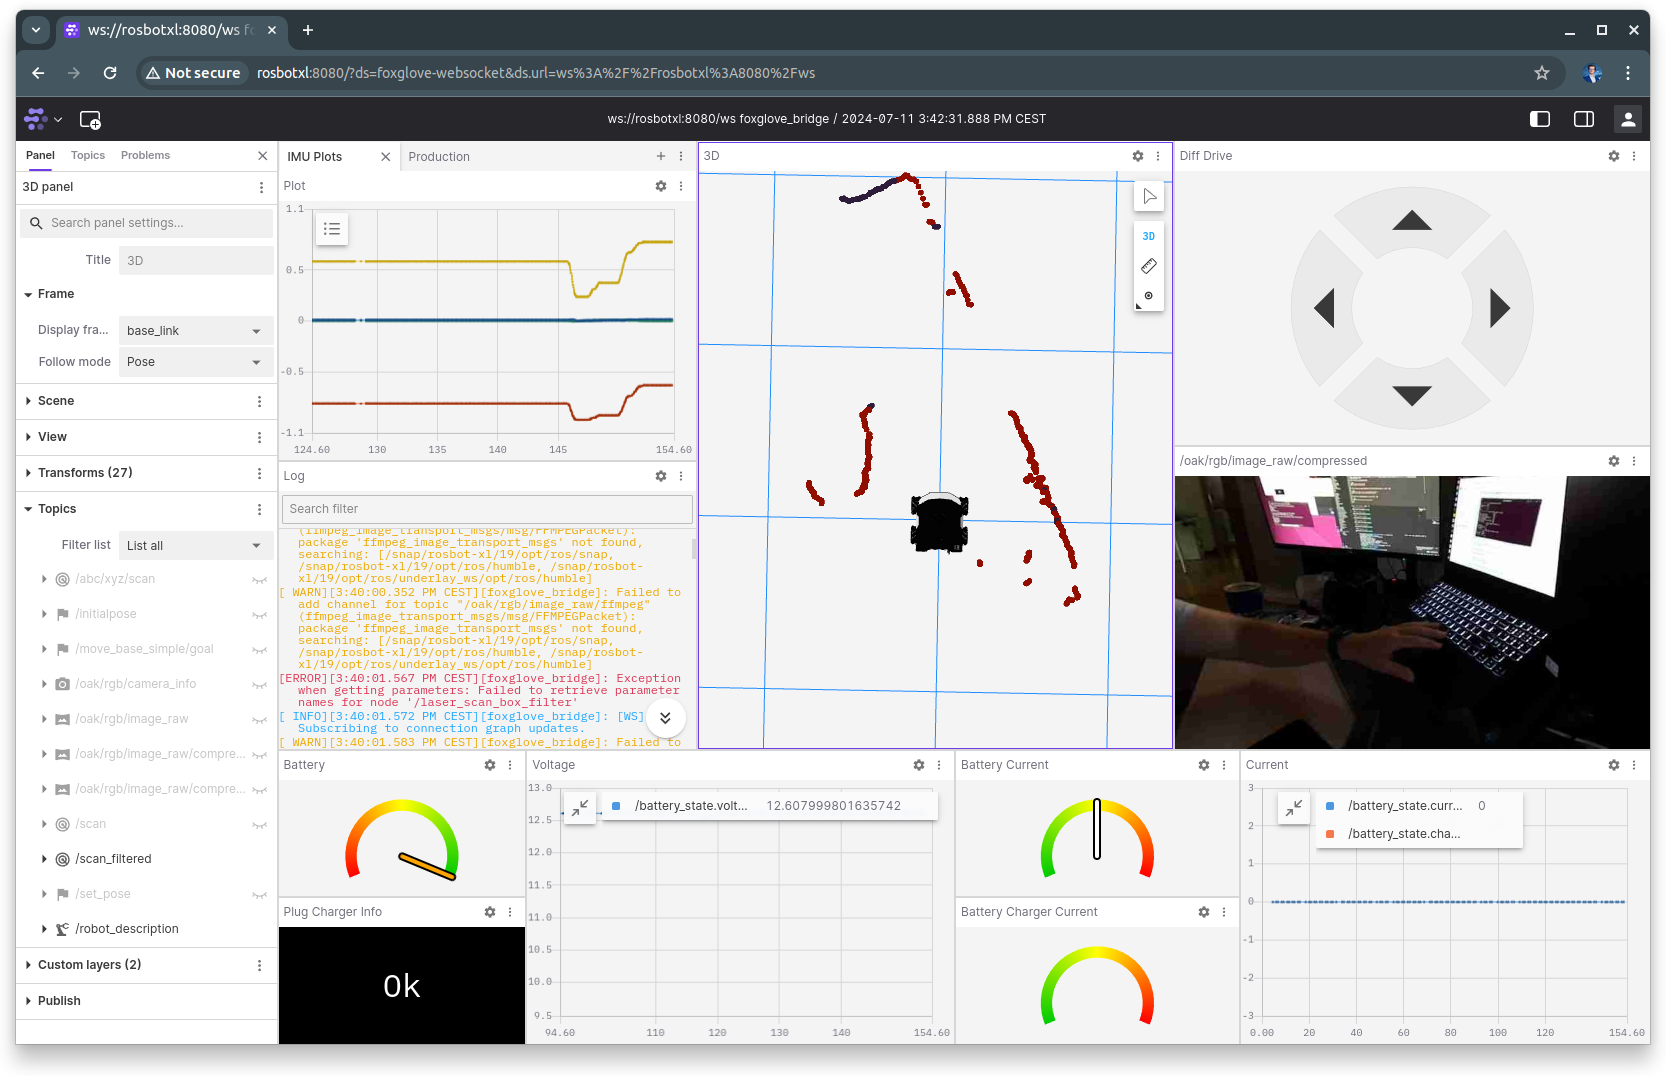
You should see the web user interface available:
There are multiple layouts available, and you can list them in the /var/snap/rosbot-xl/common/ directory on ROSbot XL:

To set a new layout just run:
sudo snap set rosbot-xl webui.layout=sensors
And reload your browser window:
You can also create your own layout, just remember to store them in the /var/snap/rosbot-xl/common/ directory and name them like foxglove-mycustomlayout.json.
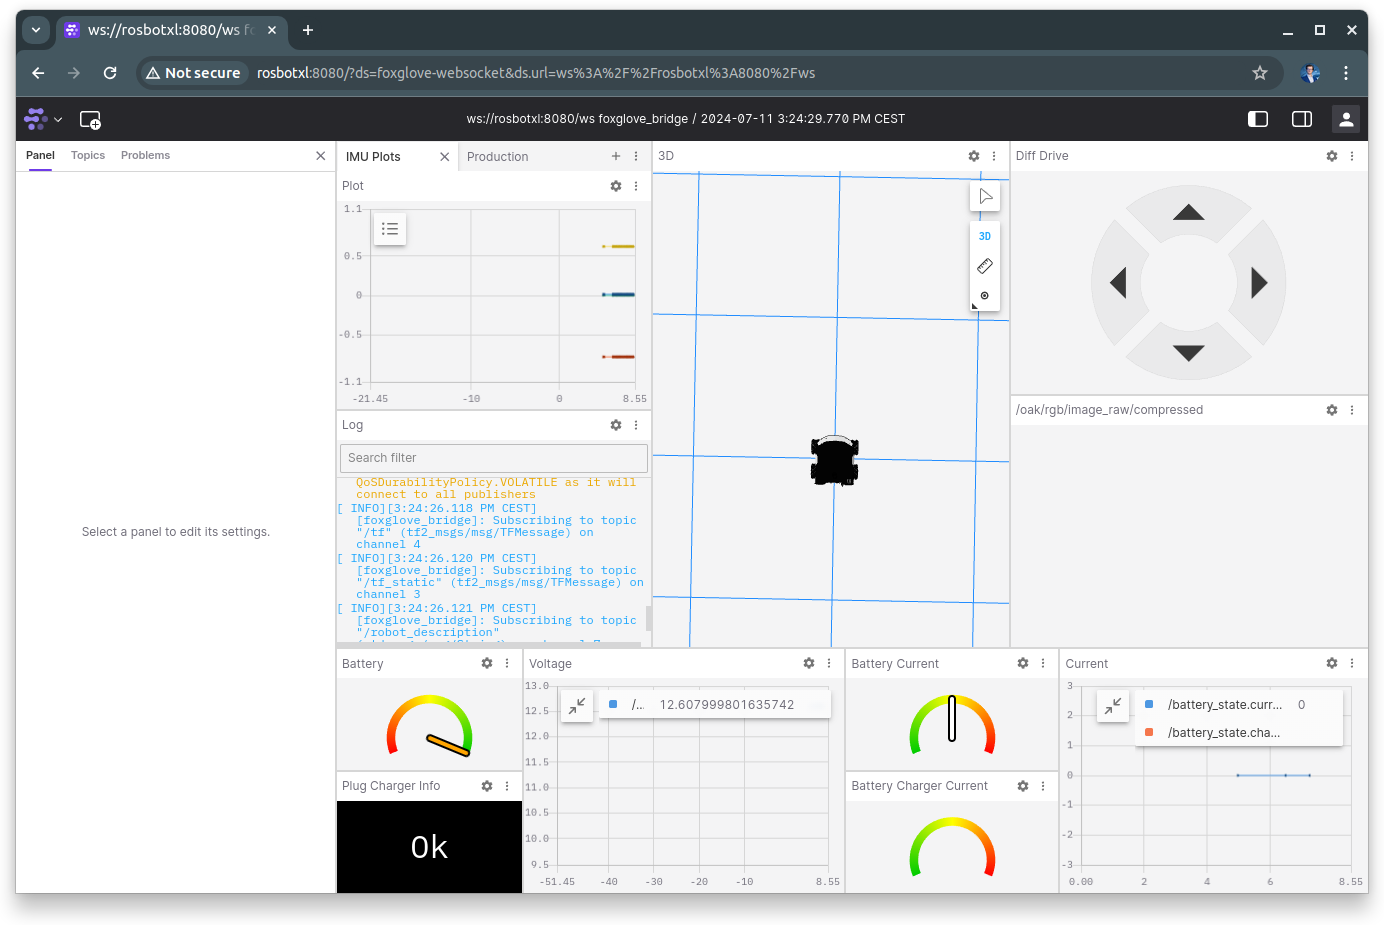
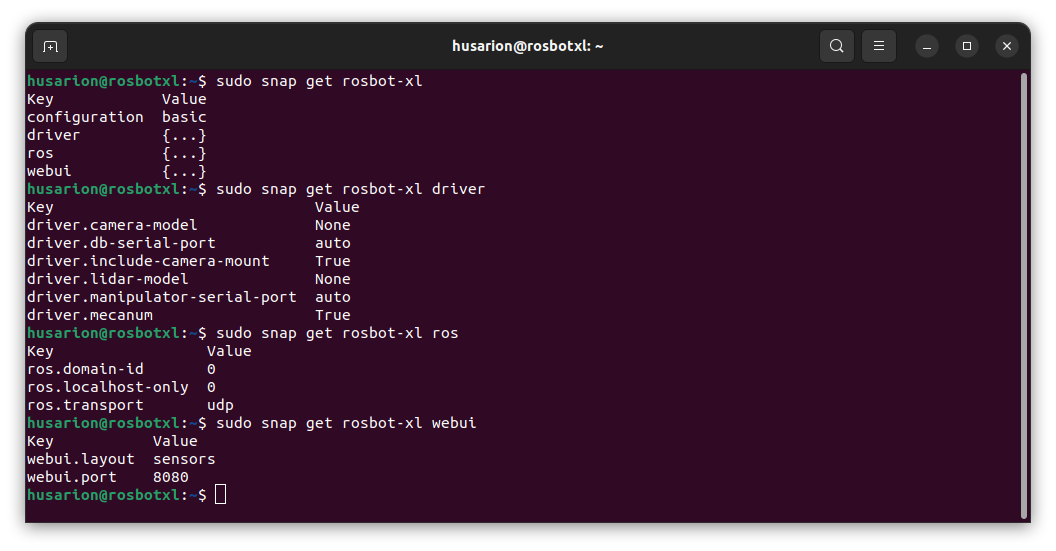
We are choosing the layout with a rosbot-xl snap parameters. There are more parameters available:
In the provided layout there is an empty window where the image from a camera should be available. Also the layout is configured to show the LIDAR scans.
We don't see them, because we have not installed husarion-depthai and husarion-rplidar snaps.
Install them with the following commands:
sudo snap install husarion-depthai
sudo snap install husarion-rplidar
To see the image from camera and LIDAR scans, set also those parameters in rosbot-xl snap:
sudo snap set rosbot-xl driver.lidar-model=slamtec_rplidar_s1
sudo snap set rosbot-xl driver.include-camera-mount=True
Also select the right LIDAR model in husarion-rplidar snap:
sudo snap set husarion-rplidar configuration=s1
After we launch and configure all snaps the result is as follows:
Thanks for watching 🙂
Now it's time for Q&A ...