ROSbot 2 PRO - quick start
This tutorial is out of date for all ROSbots 2 PRO shipped after 2023-09-07 and for ROSbots 2 PRO with the Husarion OS image installed. For these robots, the current How To Start is a compatible tutorial for ROSbot 2R.
The tutorial is valid for ROSbots 2 PRO sent until 2023-09-07 and for those with an old system image uploaded.
ROSbot 2 PRO is an autonomous, open source robot platform for research and quick prototyping use cases. It can be used as a learning platform for Robot Operating System (ROS) as well as a base for a variety of robotic applications like inspection robots, custom service robots etc.
Unboxing
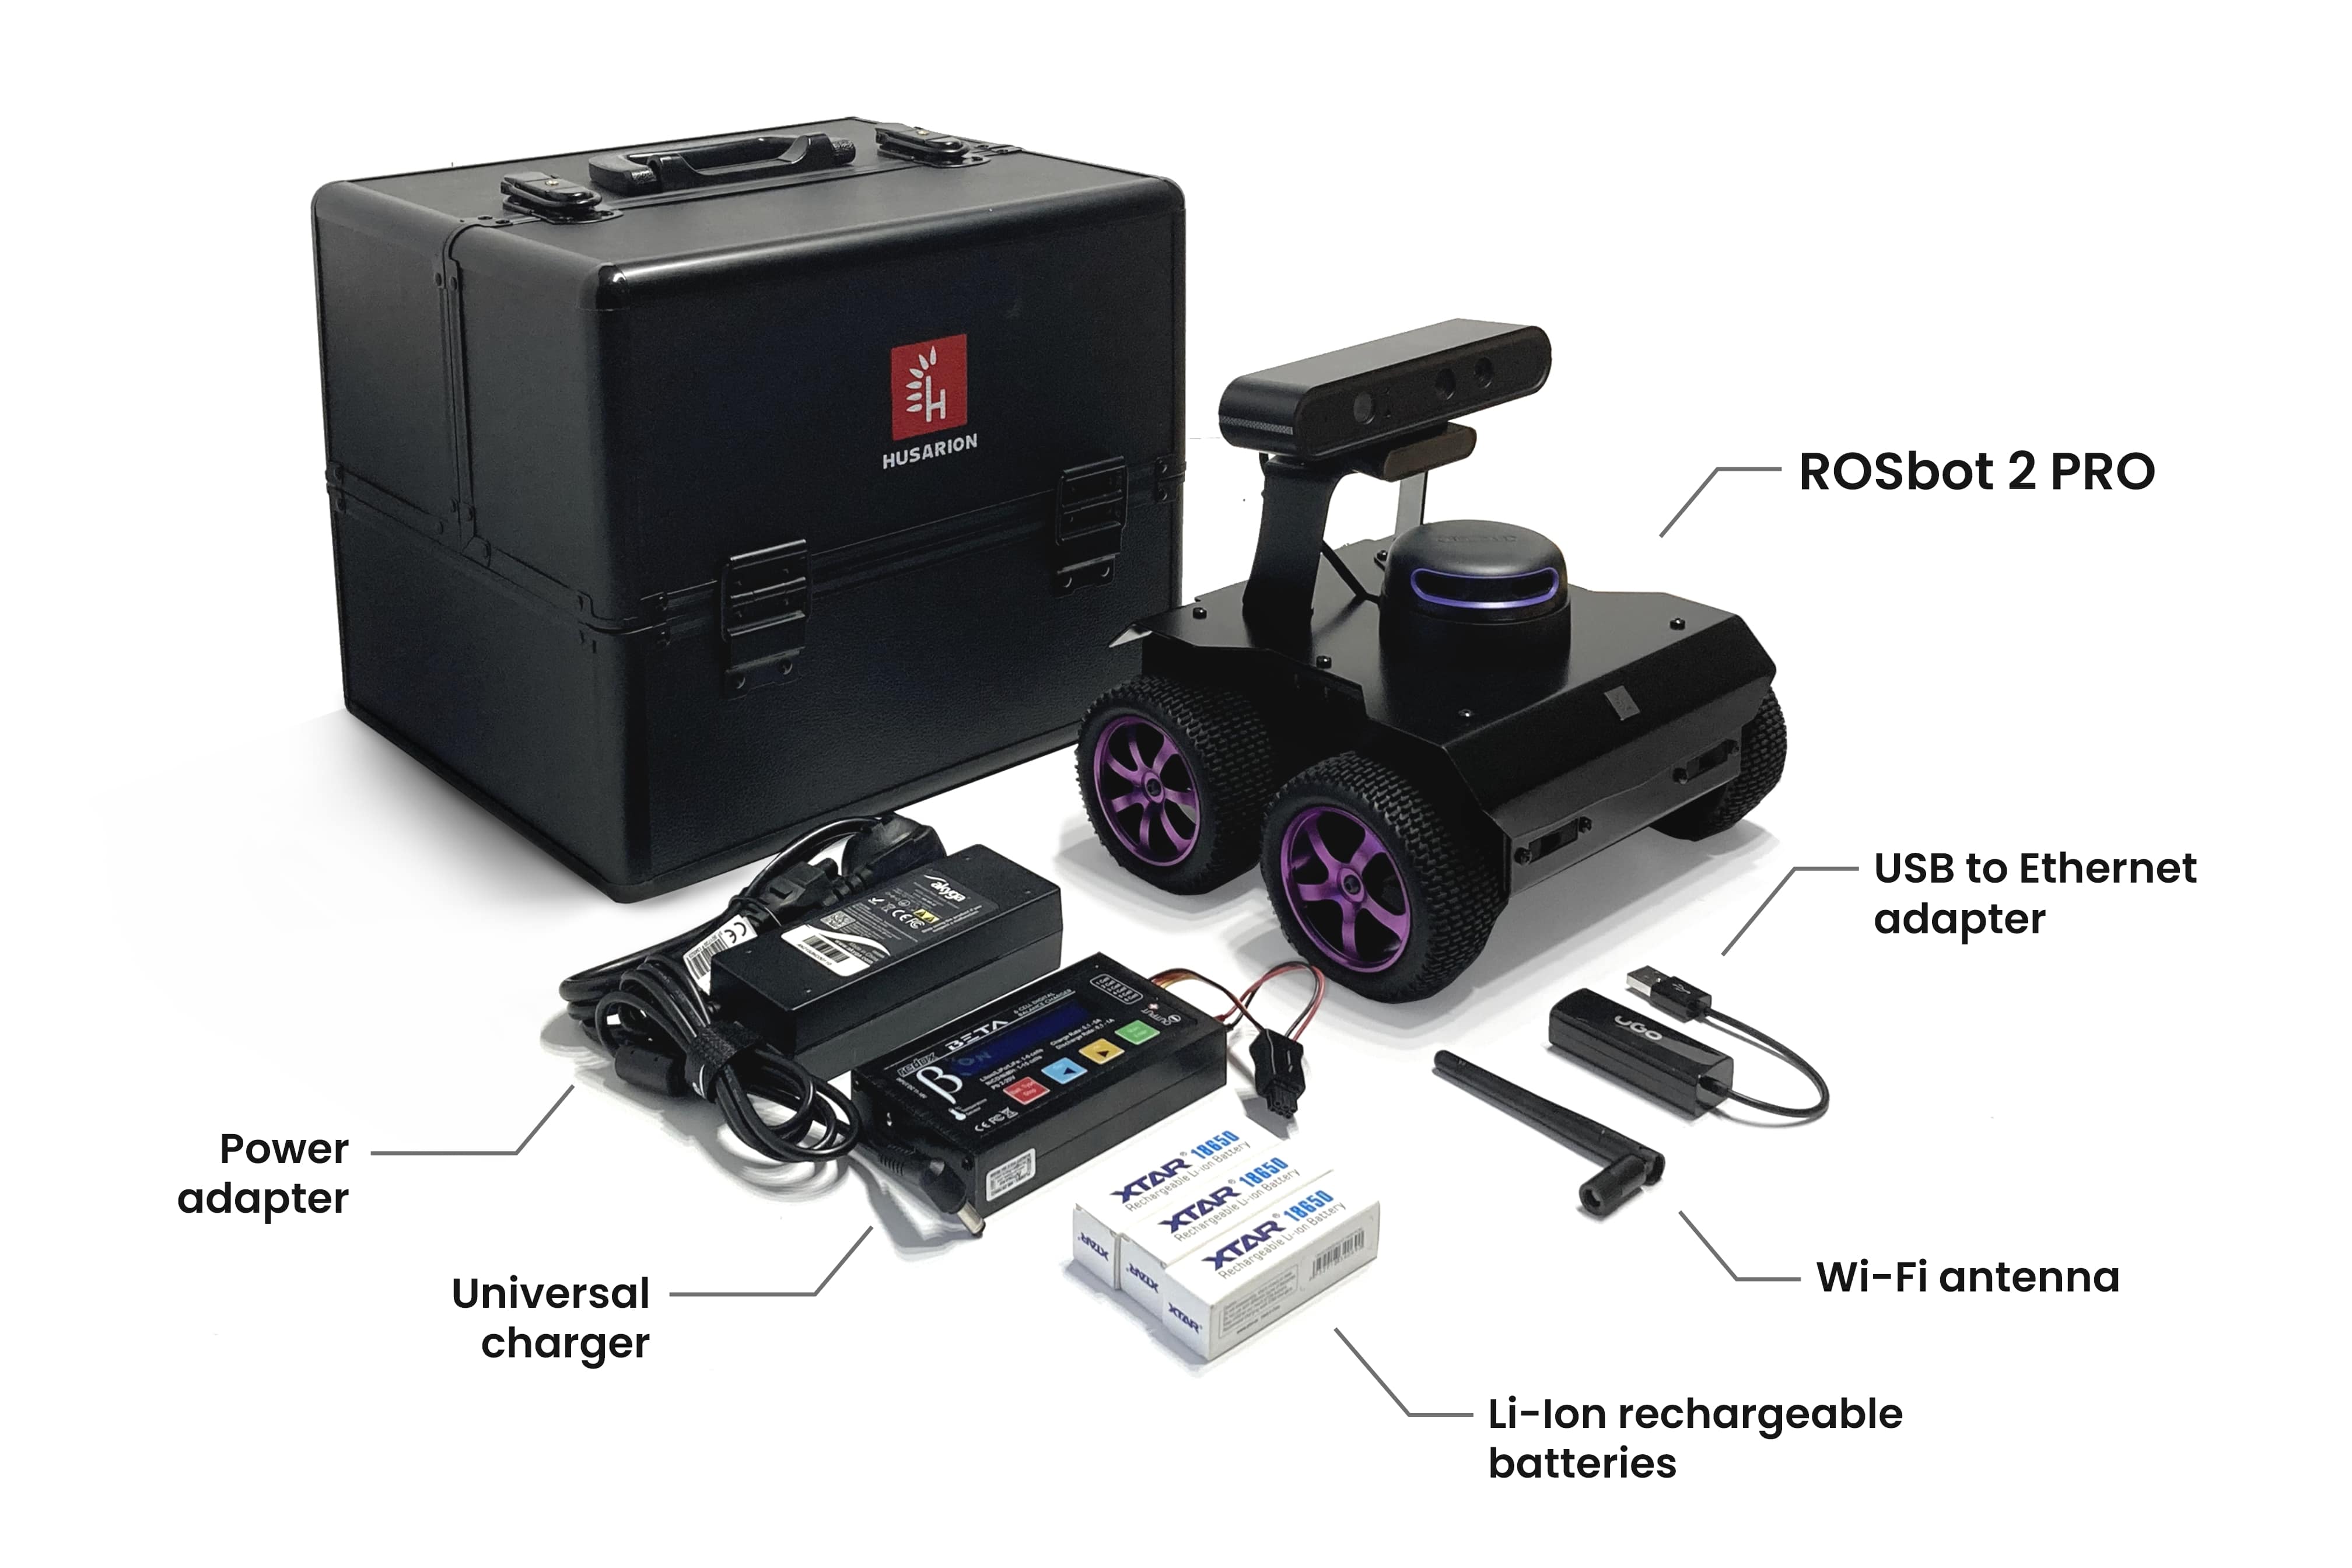
What's in the box:
- carrying case
- ROSbot 2 PRO (with optional 3D camera and LiDAR already assembled)
- Wi-Fi 2.4GHz antenna
- 3x 18650 Li-Ion rechargeable batteries
- a universal charger with power adapter
- charging cable
- microSD card with the software for ROSbot
- USB to Ethernet adapter
Additionally, to launch a robot for the first time you will need:
- a screwdriver
- USB-HDMI cable, mouse and keyboard OR Ethernet cable

Inserting Li-ION batteries and mounting Wi-Fi antenna
Your ROSbot is assembled, but to get it ready to work, you need to provide a power supply and attach the antenna.
To mount batteries:
- turn ROSbot upside down
- unscrew battery cover mounted with two screws
- remove the battery cover
- place batteries accordingly to the symbols, keeping the black strip under the batteries
- place the battery cover back in position and mount it with screws
To charge the batteries, follow this guide.
To attach the antenna, simply screw it to the SMA antenna connector on the rear panel of ROSbot.
Installing ROSbot's system image
ROSbot 2 PRO is shipped with pre-installed ROS Foxy OS image. If you have just received your brand new ROSbot and want to install ROS Noetic, or if you have an old ROS Melodic OS image and wish to install ROS Foxy, you can go to the next step.
In some cases you will need to restore ROSbot system to its default settings:
- in case of accidental damage of the system,
- to update the OS to the newest version with the supported documentation,
- to clear all user changes and restore factory settings.
Please find the OS reinstallation guide here.
Connecting ROSbot to the Wi-Fi network
To perform the initial network configuration, you need to access ROSbot's Linux terminal first. There are two options of doing that:
Option 1: Using display, mouse and keyboard
ROSbot is basically a computer running Ubuntu, so let's open it like a standard PC.
- Plug in a display with HDMI, mouse and keyboard into the USB port on the rear panel of the ROSbot.
- Turn on the robot and wait until it boots.
- Connect to a Wi-Fi network using Ubuntu GUI.
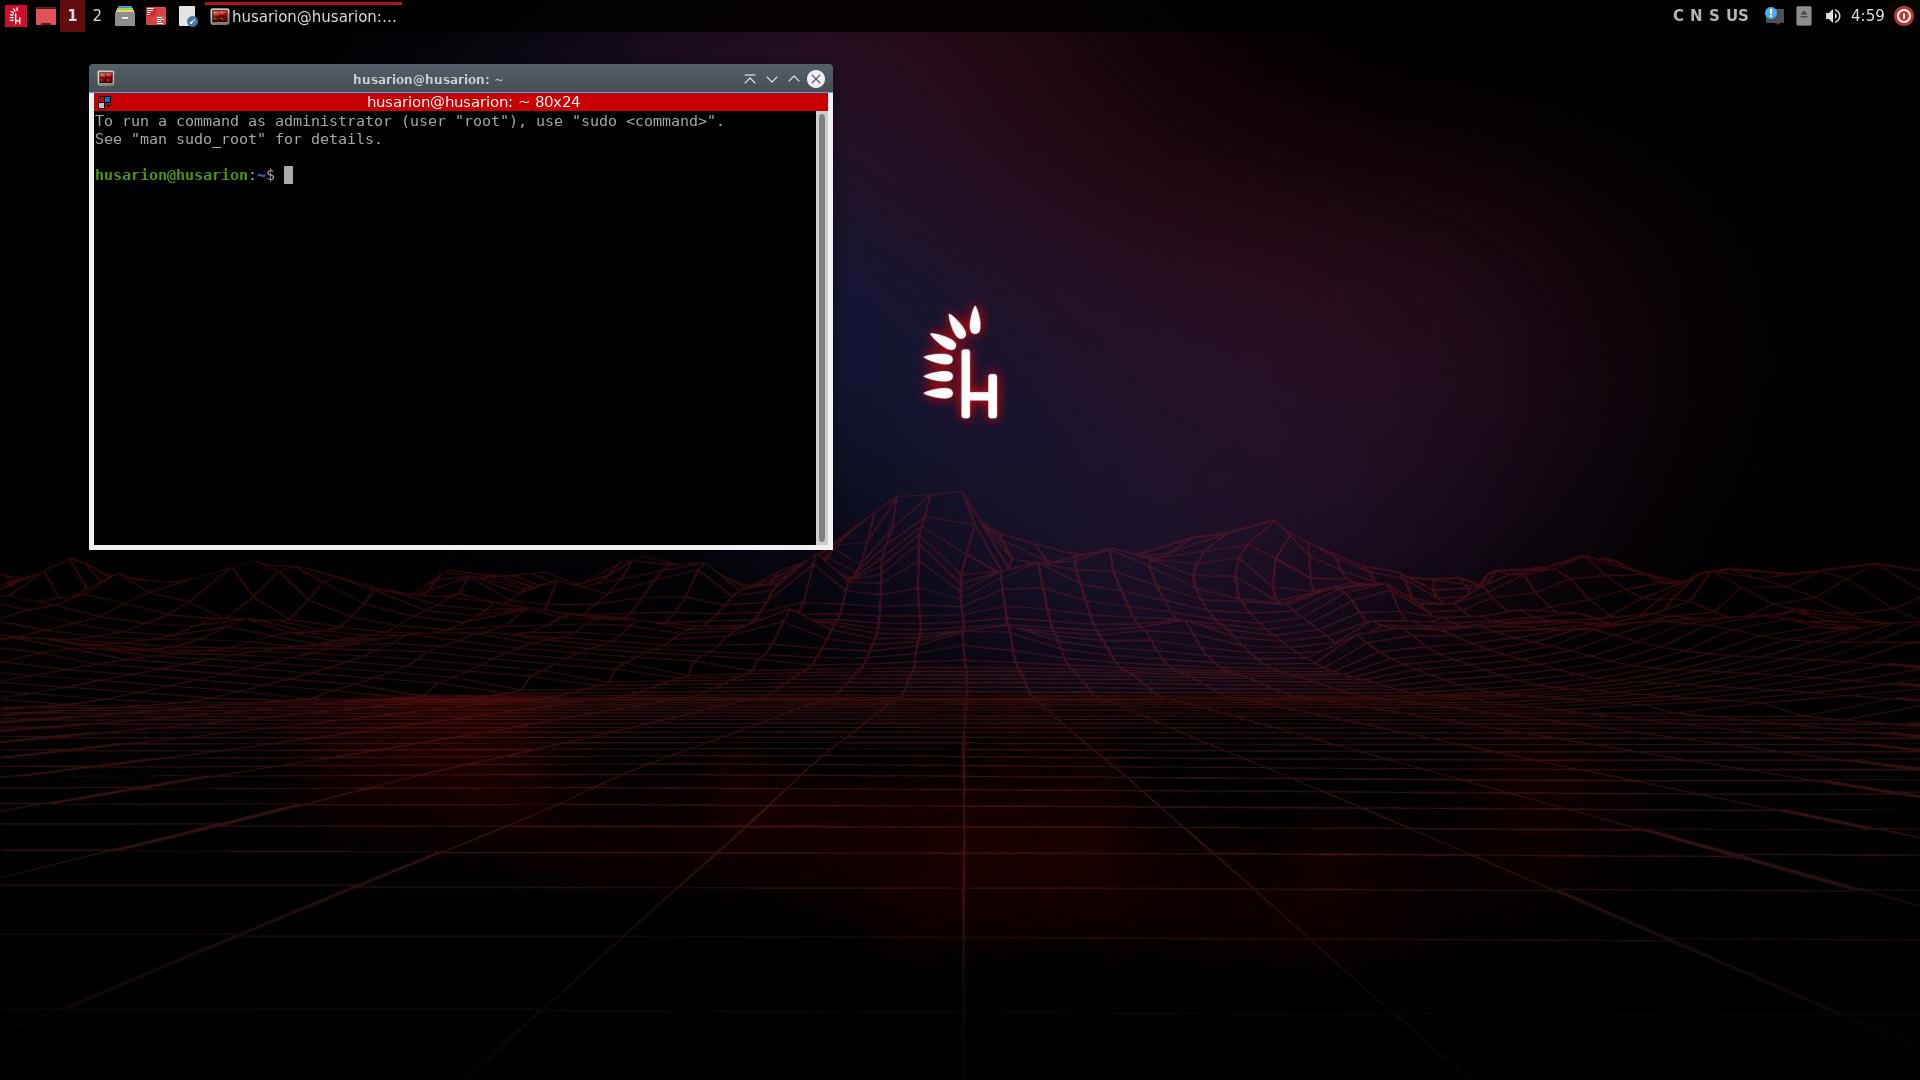
- Open Linux terminal and type
ifconfigto find your IP address. Save it for later.
ROSbot's graphical desktop environment requires about 3 minutes to start during first boot. Subsequent boots require only about 1 minute after power on.
Option 2: Using Ethernet adapter
In the ROSbot 2 PRO set, there is one USB-Ethernet card.
-
Turn on the robot and wait until it boots.
-
Plug in the Ethernet adapter (included in a set) to a USB port on the rear panel of the ROSbot.
-
Plug one end of the Ethernet cable into your computer and another one to the adapter.
-
To connect to the ROSbot via ssh, type in your terminal application:
user@mylaptop:/home/user$ssh husarion@192.168.0.1
The default password for user husarion is also husarion.
- Connect to a Wi-Fi network.
- In the terminal, type
nmtuiand press Enter. You should see:
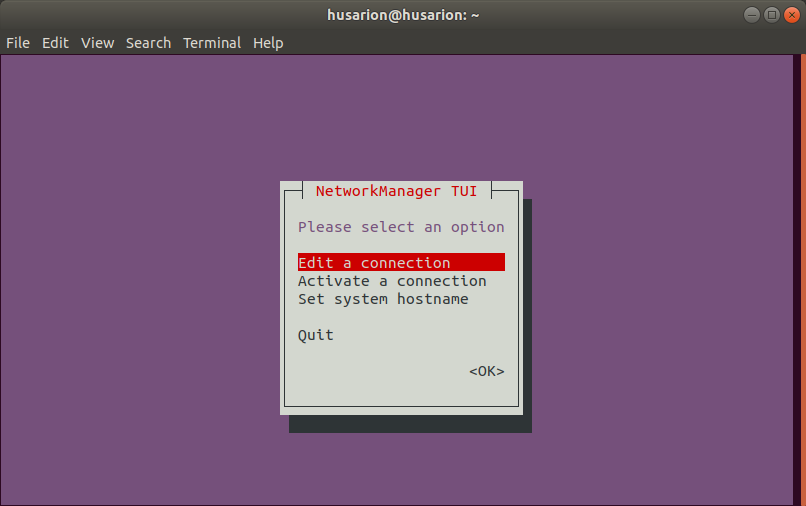
- Go to
Activate a connectionand tapEnter
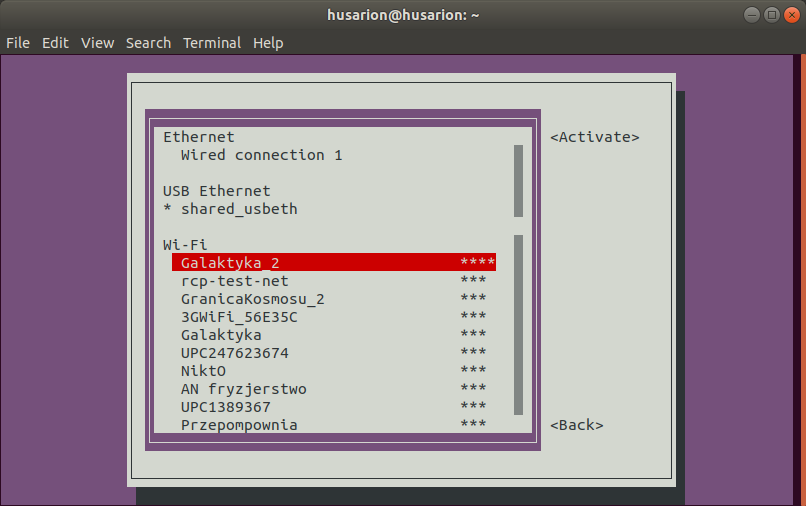
- Chose your Wi-Fi network and tap
Enterone more time. Enter your password, confirm it and pressEscto get back to the main menu.
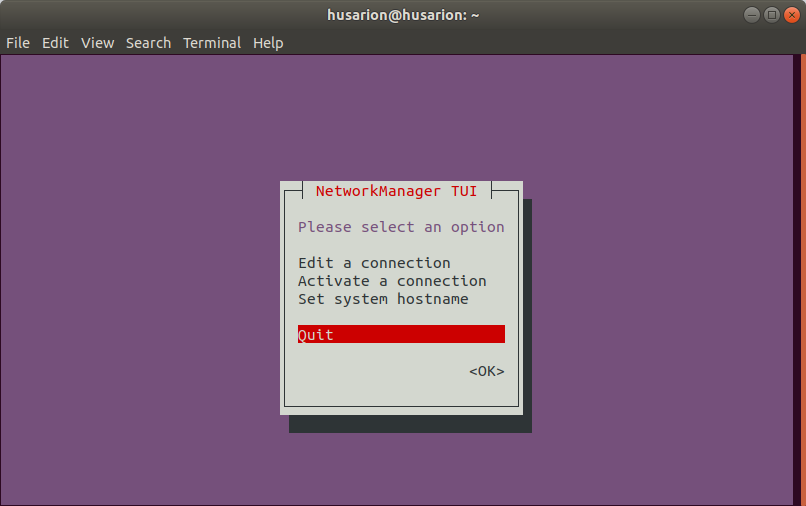
- Use
Quitto closenmtui.
- Type
ifconfigto find your IP address. Save it for later.
Remote access in LAN
While ROSbot is connected to Wi-Fi network, you can access it by using its IPv4 address by:
ssh husarion@<ROSBOT_IP>
Remote access over the Internet (VPN)
If LAN access is not enough, you can access the ROSbot over the Internet using Husarnet. You can find the full guide on how to do it here.
ROSbot ROS packages
At this stage, your ROSbot should be up and running, with a remote (LAN or VPN) connection from your laptop.
You can run ROSbot's ROS packages natively on your ROSbot's host OS, by just cloning and building rosbot_ros repo, however the more convenient way is using Docker images for that.
Pulling basic docker images for ROSbot
- ROS 2 Foxy OS image
- ROS Noetic OS image
1. Create the /home/husarion/.env file
nano /home/husarion/.env
with the following content:
SERIAL_PORT=/dev/ttyS4
LIDAR_SERIAL=/dev/ttyUSB0
RPLIDAR_BAUDRATE=256000
Press ctrl + o and then ctrl + x to save and quit.
2. Create a new file /home/husarion/compose.yaml
nano /home/husarion/compose.yaml
and paste the following content inside:
services:
  astra:
    image: husarion/astra:humble
    container_name: astra
    devices:
      - /dev/bus/usb/
    volumes:
      - ./astra-params.yaml:/ros2_ws/install/astra_camera/share/astra_camera/params/astra_mini_params.yaml
    environment:
      - RMW_IMPLEMENTATION
    command: ros2 launch astra_camera astra_mini.launch.py

  rplidar:
    image: husarion/rplidar:humble
    container_name: rplidar
    restart: unless-stopped
    devices:
      - ${LIDAR_SERIAL:?err}:/dev/ttyUSB0
    environment:
      - RMW_IMPLEMENTATION
    command: >
        ros2 launch sllidar_ros2 sllidar_launch.py
        serial_baudrate:=${RPLIDAR_BAUDRATE:-256000}

  microros:
    image: husarion/micro-ros-agent:humble
    container_name: microros
    restart: unless-stopped
    devices:
      - ${SERIAL_PORT:?err}
    environment:
      - RMW_IMPLEMENTATION=rmw_fastrtps_cpp
    command: ros2 run micro_ros_agent micro_ros_agent serial -D $SERIAL_PORT serial -b 576000 # -v6

  rosbot:
    image: husarion/rosbot:humble
    container_name: rosbot
    restart: unless-stopped
    environment:
      - RMW_IMPLEMENTATION
    command: ros2 launch rosbot_bringup bringup.launch.py
Press ctrl + o and then ctrl + x to save and quit.
3. Create a new file /home/husarion/astra-params.yaml
nano /home/husarion/astra-params.yaml
and paste the following content inside:
camera_name : "camera"
color_width: 640
color_height: 480
color_fps: 30
enable_color: true

# IR camera width/height/FPS
ir_width: 640
ir_height: 480
ir_fps: 30
enable_ir: false

# depth camera width/height/FPS
depth_width: 640
depth_height: 480
depth_fps: 30
enable_depth: false

# open depth to color alignment (hardware alignment)
depth_align: false
serial_number: ""
number_of_devices: 1

# UVC camera, only for dabai, dabai DCW serial
uvc_camera.enable: false
uvc_camera.format: "mjpeg"
uvc_camera.vid: 0x0
uvc_camera.pid: 0x0
uvc_camera.retry_count: 100

color_roi.x : -1
color_roi.y : -1
color_roi.width: -1
color_roi.height: -1
depth_roi.x : -1
depth_roi.y : -1
depth_roi.width: -1
depth_roi.height: -1

# depth scale times
depth_scale : 1
publish_tf: true
tf_publish_rate: 10.0
reconnect_timeout: 6.0
Press ctrl + o and then ctrl + x to save and quit.
4. Pull docker images
docker compose pull
5. Flash the firmware
docker stop rosbot microros || true && docker run \
--rm -it --privileged \
husarion/rosbot:humble \
/flash-firmware.py /root/firmware.bin
6. Perform DDS configuration
Both Fast DDS and Cyclone DDS are pre-installed in the ROS 2 Foxy system image for ROSbot 2 PRO. However, Fast DDS is the preferred option.
To enable it, update ~/.bashrc file by executing the following commands:
echo "RMW_IMPLEMENTATION=rmw_fastrtps_cpp" >> ~/.bashrc
source ~/.bashrc
7. Launch ROS nodes
To launch basic ROSbot nodes, paste the following command in the ROSbot's terminal:
docker compose up -d rosbot microros
At this point, ROS nodes from the containers are available on the level of the host operating system.
To ensure that ROS topics are visible, stop the currently running ROS daemon:
ros2 daemon stop
Check available ROS topics:
ros2 topic list
1. Create the /home/husarion/.env file
nano /home/husarion/.env
with the following content:
SERIAL_PORT=/dev/ttyS4
ROS_IP=127.0.0.1
ROS_MASTER_URI=http://127.0.0.1:11311
Press ctrl + o and then ctrl + x to save and quit.
2. Create a new file /home/husarion/compose.yaml
nano /home/husarion/compose.yaml
and paste the following content inside:
services:

  ros-master:
    image: ros:noetic-ros-core
    container_name: ros-master
    restart: unless-stopped
    network_mode: host
    tty: true
    environment:
      - ROS_IP=${ROS_IP:-127.0.0.1}
    command: roscore

  rosbot:
    image: husarion/rosbot:noetic
    container_name: rosbot
    restart: unless-stopped
    network_mode: host
    tty: true
    devices:
      - ${SERIAL_PORT}
    environment:
      - SERIAL_PORT=${SERIAL_PORT:?You need to define SERIAL_PORT env}
      - ROS_MASTER_URI=${ROS_MASTER_URI:-http://127.0.0.1:11311}
      - ROS_IP=${ROS_IP:-127.0.0.1}
    command: roslaunch --wait rosbot_bringup rosbot_docker.launch

  rplidar:
    image: husarion/rplidar:noetic
    container_name: rplidar
    restart: unless-stopped
    network_mode: host
    devices:
      - /dev/ttyUSB0
    environment:
      - ROS_MASTER_URI=${ROS_MASTER_URI:-http://127.0.0.1:11311}
      - ROS_IP=${ROS_IP:-127.0.0.1}
    command: roslaunch --wait rplidar_ros rplidar_a3.launch

  astra:
    image: husarion/astra:noetic
    container_name: astra
    restart: unless-stopped
    network_mode: host
    devices:
      - /dev/bus/usb
    environment:
      - ROS_MASTER_URI=${ROS_MASTER_URI:-http://127.0.0.1:11311}
      - ROS_IP=${ROS_IP:-127.0.0.1}
    command: roslaunch --wait astra_camera astra.launch
Press ctrl + o and then ctrl + x to save and quit.
3. Pull docker images
docker compose pull
4. Flash the firmware
-
for differential drive (regular wheels):
husarion@rosbot:/home/husarion$docker stop rosbot ros-master || true && docker run --rm -it --privileged \husarion/rosbot:noetic \/flash-firmware.py /root/firmware_diff.bin -
for omnidirectional wheeled ROSbot (mecanum wheels):
husarion@rosbot:/home/husarion$docker stop rosbot ros-master || true && docker run --rm -it --privileged \husarion/rosbot:noetic \/flash-firmware.py /root/firmware_mecanum.bin
5. Launch ROS nodes
To launch basic ROSbot nodes, paste the following command in the ROSbot's terminal:
docker compose up -d ros-master rosbot
At this point, ROS nodes from the containers are available on the level of the host operating system.
Check available ROS topics:
rostopic list

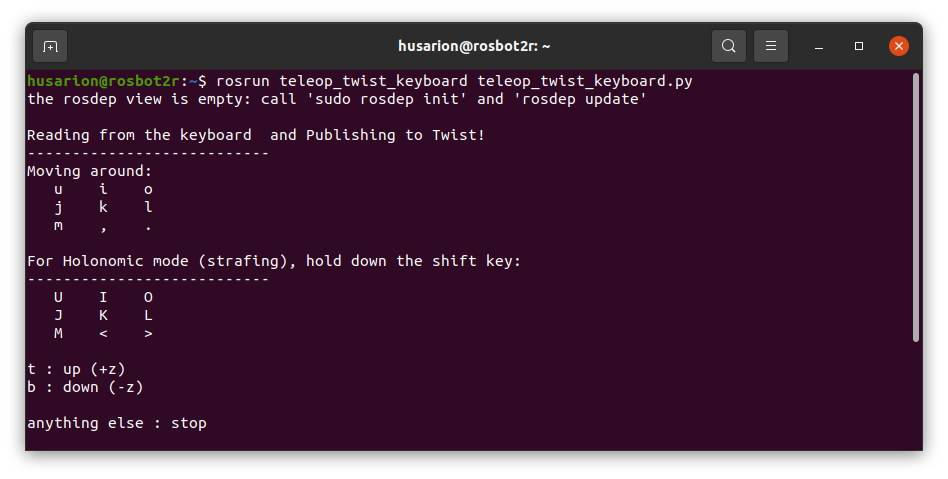
Manual ROSbot driving with teleop_twist_keyboard
Now launch a teleop_twist_keyboard ROS node for manual ROSbot control:
- ROS 2 Foxy OS image
- Noetic OS image
ros2 run teleop_twist_keyboard teleop_twist_keyboard
rosrun teleop_twist_keyboard teleop_twist_keyboard.py
After running the command, you will see the usage instruction:
Reference projects
Now you know how to access ROSbot's ROS node from the Linux terminal.
Running ROS natively is fine for relatively small projects. For more complex ones, the full dockerized setup is a better approach.
Next demos start ROSbot's containers in different configuration, so remember to stop the basic setup at first:
docker compose down
Before starting the following projects, execute these two commands to avoid errors related to the SERIAL_PORT variable:
export SERIAL_PORT=/dev/ttyS4
echo "export SERIAL_PORT=/dev/ttyS4" >> ~/.bashrc
Find available projects below:
| link | description |
|---|---|
| rosbot-gamepad | Control the robot manually using a Logitech F710 gamepad |
| rosbot-telepresence | Stream a live video from Orbbec Astra to a window on your PC. Control the robot using teleop-twist-keyboard |
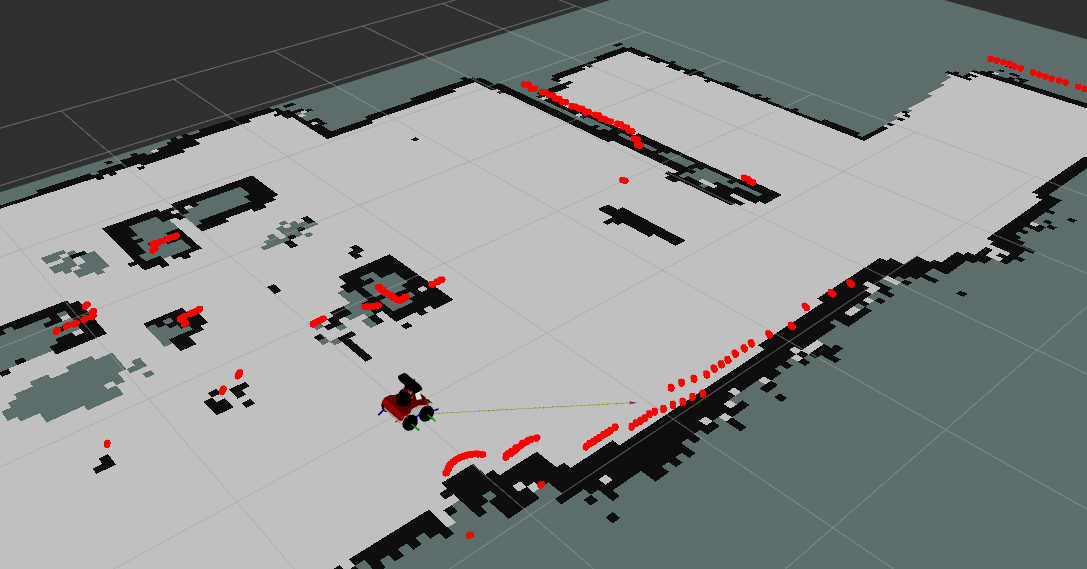
| rosbot-autonomy | A combination of mapping and navigation projects allowing simultaneous mapping and navigation in unknown environments. |
Here is an example map generated with the rosbot-autonomy project.
ROS / ROS 2 Tutorials
- ROS
- ROS 2
ROS (Robot Operating System) offers libraries and tools to help software developers create robotic applications. It provides hardware abstraction, device drivers, libraries, visualizers, message-passing, package management, and more. It's very powerful and functional tool dedicated to design robots. We created the set of ROS Tutorials dedicated for this platform to make it easier to familiarize yourself with these frameworks.
ROS 2 (Robot Operating System 2) provides libraries and tools to help software developers create robotic applications. We've put together a series of ROS 2 Tutorials dedicated for this platform that serve as a practical introduction to ROS 2. You can run them on any of our ROSbots, either on a physical robot or in the simulation environment. These step-by-step guides are tailored to accommodate both beginners embarking on their ROS 2 journey and experienced users looking to deepen their understanding of robot navigation.