![]()
Blinky Mbed OS example
Supports Mbed OS 6.2.1
The example project is part of the Arm Mbed OS Official Examples and is the getting started example for Mbed OS. It contains an application that repeatedly blinks an LED on the Mbed OS supporting boards.
This template contains configuration files for CORE2 target.
Mbed Studio IDE installation and configuration
To install the Mbed Studio IDE follow instructions from this manual:
We recommend you to switch default compiler to Arm Embedded GCC Compiler 9-2019-q4-major. Instruction on how to do that can be found here:
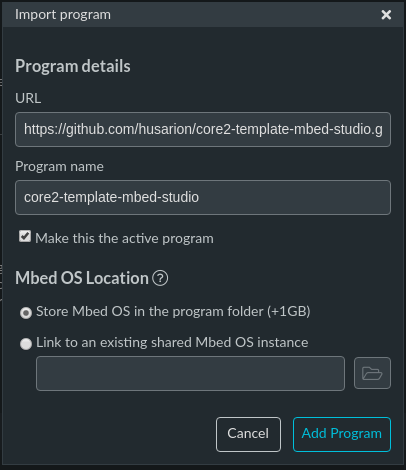
Importing a Blinky program
- Open Mbed Studio IDE.
- From menu select
File -> Import Program... - In Import program dialog box paste link to this repository:
https://github.com/husarion/core2-template-mbed-studio - In Mbed OS Location select first option if you want to download a new copy of Mbed OS and store it in your program folder. In case you want to share single instance of the Mbed OS library among many programs download it to a known location and proceed with the option number two.
- Finalize the import by clicking Add Program.
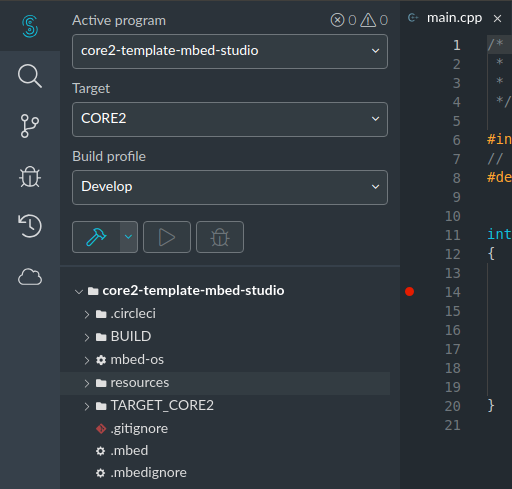
Selecting a custom build target
After importing program you click on target drop-down list and chose CORE2.
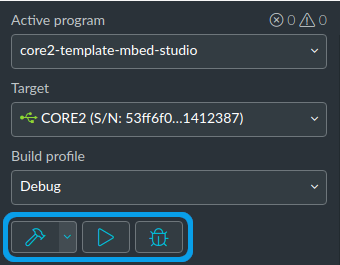
Building and running
-
From the Build profile drop-down list select one of the profiles:
- Debug (default)
- Develop
- Release
-
Clicking the hammer icon will compile your project and generate
bin,elfandhexfiles. -
Clicking on the play icon will build the example and flash it to the connected board (only with connected St-link).
-
Clicking the bug icon will start debug session (only with connected St-link).
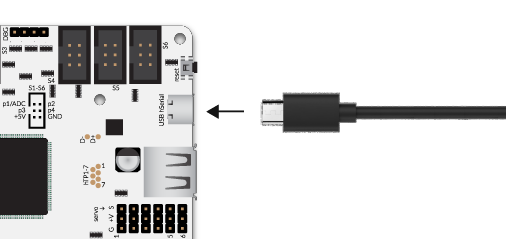
Flashing code to CORE2
To flash your build code to CORE2 you can use different tools depends on what is your hardware set. In case you are using bare CORE2 you have to use USB cable connected to your computer and CORE2. If you are using CORE2-ROS you can use USB cable and stm32loader preinstalled in our Ubuntu images.
Using usb cable
Connect your USB cable to CORE2 hSerial port and your computer.
Download and extract Husarion tools. Open directory corresponding to your processor architecture.
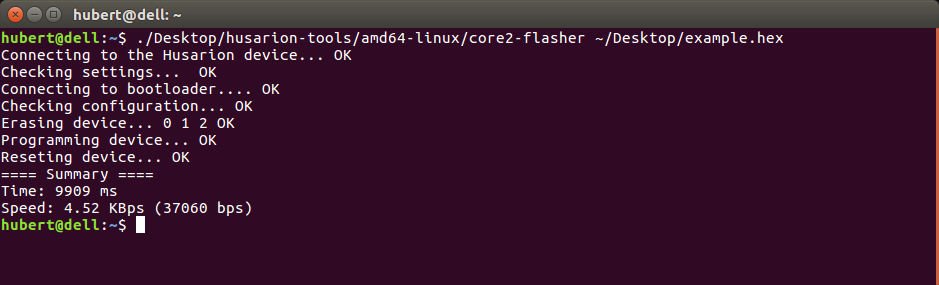
Next you just have to run core2-flasher and point hex file you want to flash.
.<directory>/core2-flasher <directory>/example.hex
For example:
./core2-flasher ~/Mbed Programs/core2-template-mbed-studio/BUILD/CORE2/GCC_ARM/core2-template-mbed-studio.hex
Everything went OK, if you will see output similar to this:
Using stm32loader
Full manual of using this tool, available only for CORE2-ROS you can find here.
Application functionality
The main() function is the single thread in the application. It toggles the state of a digital output connected to an LED on the board.
Expected output
The LED on your target turns on and off every 500 milliseconds.
Debugging code using ST-link
- Attach your ST-LINK probe to CORE2, power-up the board and connect the programmer to your computer.
- Open Target drop-down list and click on Manage custom targets button.
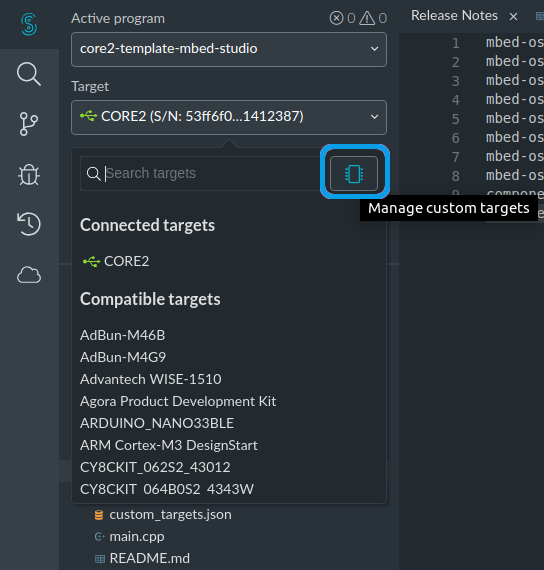
Following dialog box should appear:
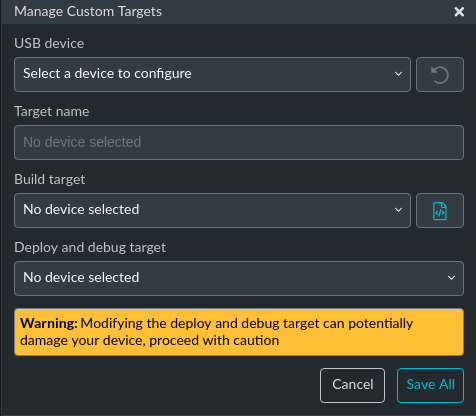
- From the USB device drop-down list choose the detected ST-LINK probe.
- From the Build target drop-down list choose the CORE2 target. Remaining fields should populate automatically.
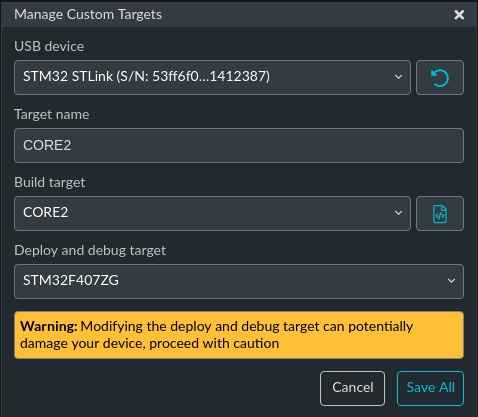
- Save the configuration with Save all.
Troubleshooting
If you have problems, you can review the documentation for suggestions on what could be wrong and how to fix it.
Related Links
- Mbed OS Stats API.
- Mbed OS Configuration.
- Mbed OS Serial Communication.
- Mbed OS bare metal.
- Mbed boards.
License and contributions
The software is provided under Apache-2.0 license. Contributions to this project are accepted under the same license. Please see contributing.md for more info.
This project contains code from other projects. The original license text is included in those source files. They must comply with our license guide.