Getting started with CORE2 + LEGO Mindstorms
In this tutorial we will help you build autonomic, mechatronic 3-wheels robots. Robot have to be equipped with two motors, two ultrasonic distance meter sensors, a power supply and the CORE2 each one. You can drive your robot via Husarion Cloud Husarion Cloud using W, S, A, D keys, changing speed with Q, Z keys and turn on automatic mode with E key or hBtn1. The task of the wallBOT is to drive by a wall on the right, bypassing obstacles left side. And the task of the shadowBOT is to follow the tracked object.
See wallBOT video on YouTube:
See shadowBOT video on YouTube:
| RoboCORE / CORE2 port name | module connected | position in wallBOT | position in shadowBOT |
| hSens1 | LEGO Distance Sensor | facing right | facing forward-right |
| hSens2 | LEGO Distance Sensor | facing forward | facing forward-left |
| hMot1 / hMotA | EV3 Large Servo Motor | left one | left one |
| hMot4 / hMotD | EV3 Large Servo Motor | right one | right one |
Building and Connections
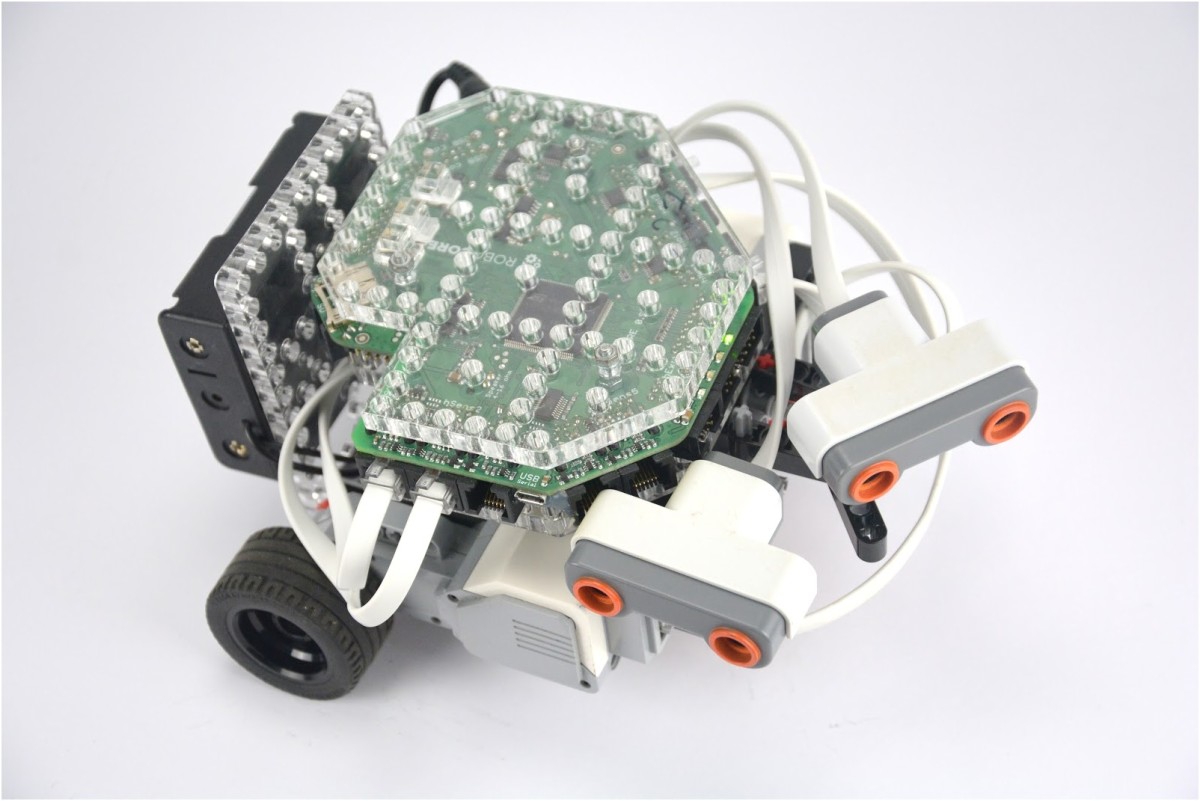
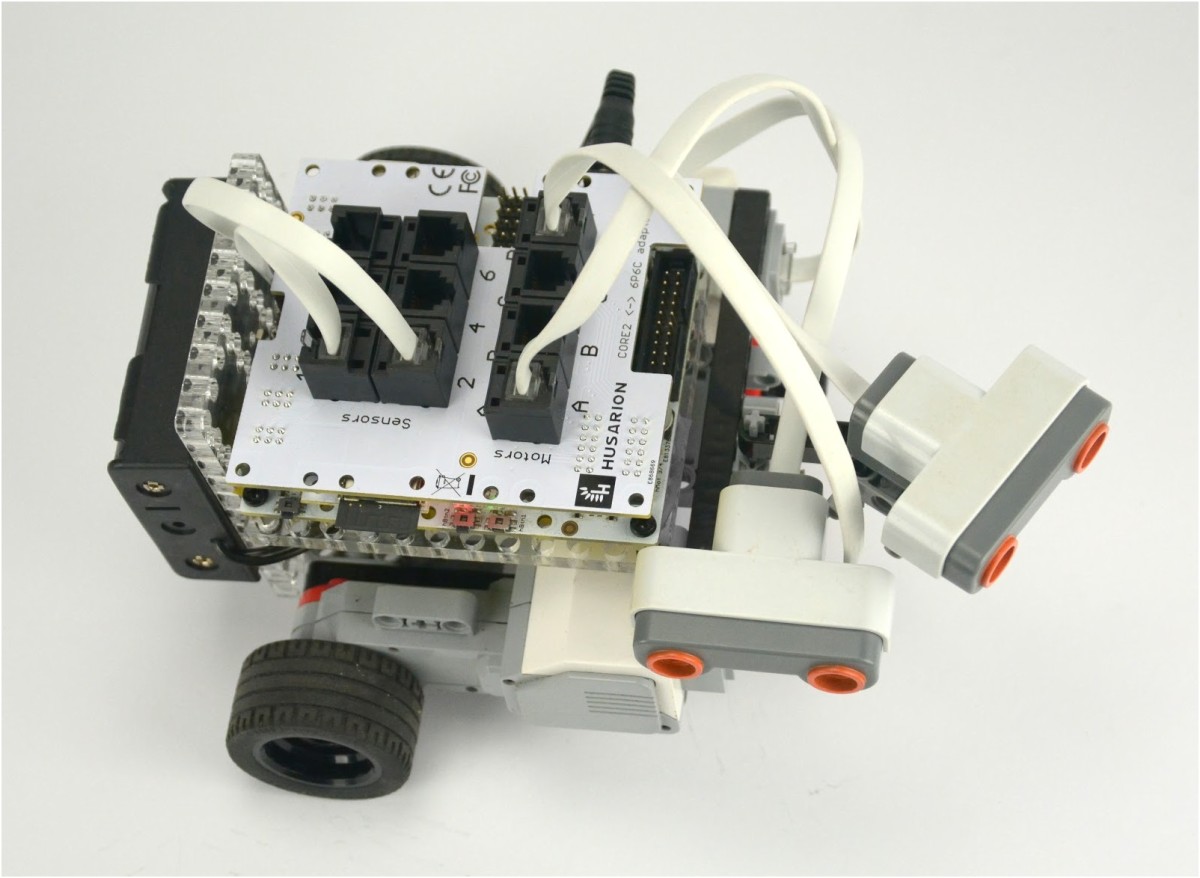
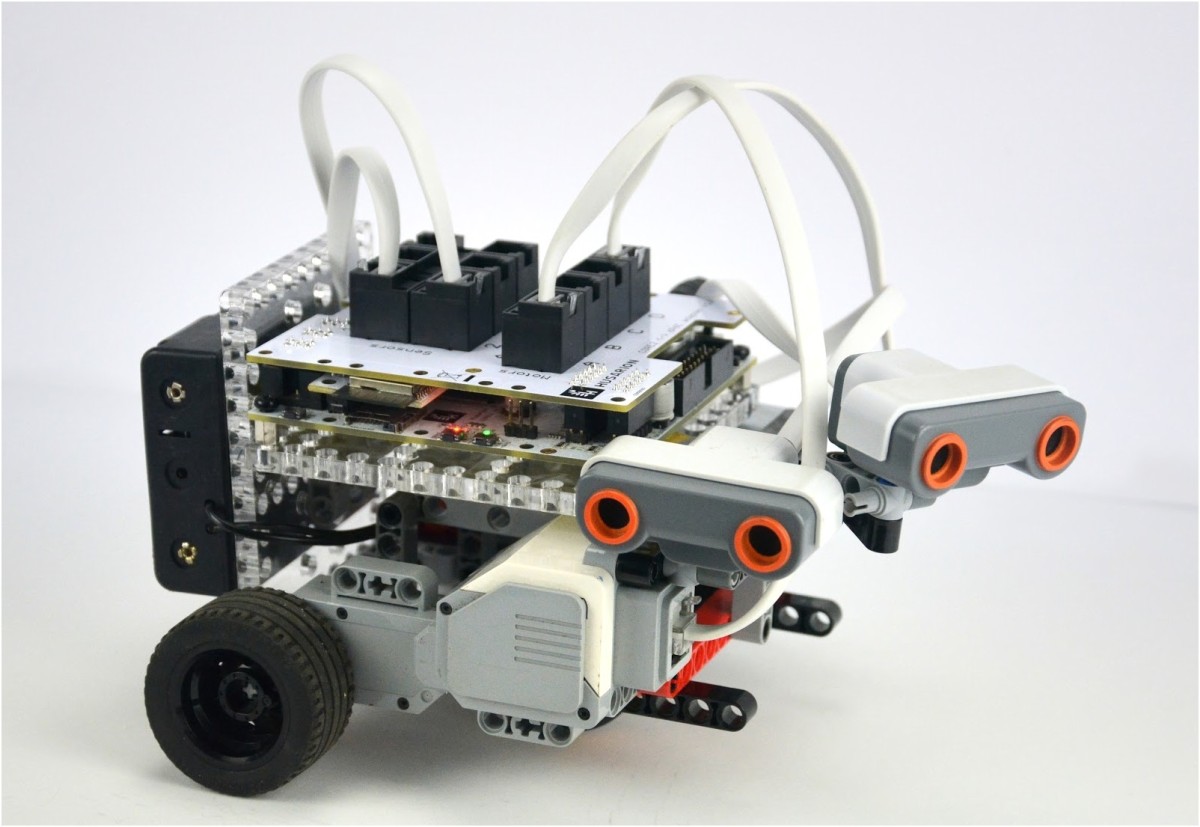
WallBOT
One of sensors will detect the wall on the right side of the robot. It should be placed in the front of the robot and face to the right. Connect this sensor to hSens1 port. Your robot need another sensor facing ahead to detect any obstacles and evade them. Connect it to hSens2 port. Left motor should be connected to A motor port and the right one to D motor port.
Assembled robot with CORE2 controller and CORE2brick adapter
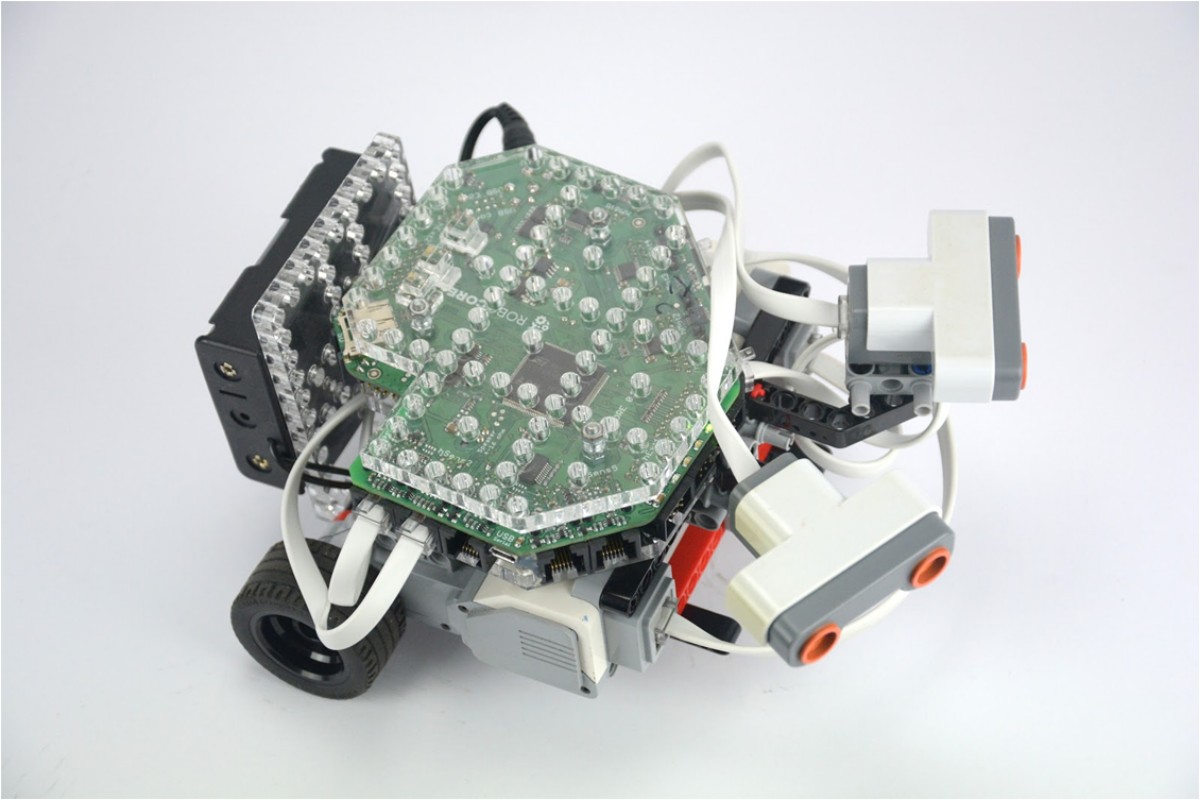
Assembled robot with RoboCORE controller
Assembled robot with CORE2 controller and CORE2brick adapter - side view
ShadowBOT
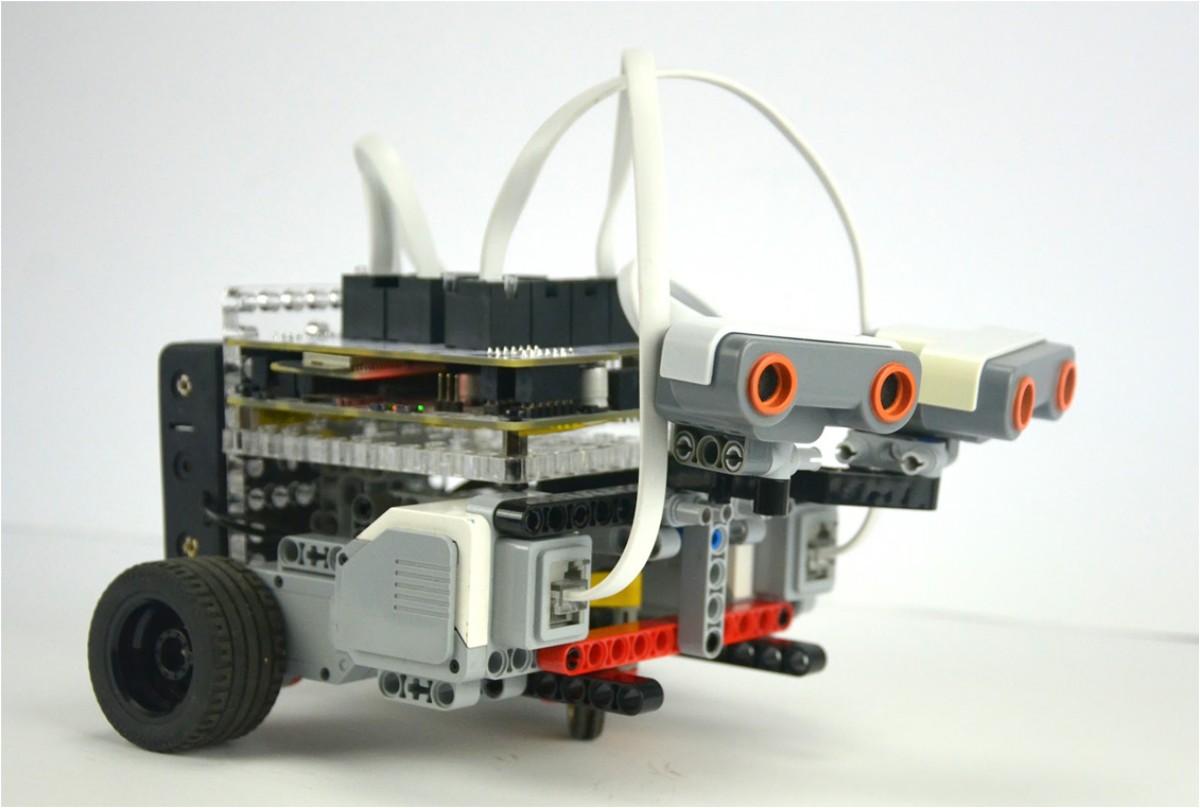
Sensors will detect object in front of the robot therefore you need to place both sensors on the front of the robot. Right one should be directed a little bit to the right, and the left one symmetrically to the left.
Connect right sensor to hSens1 port and left one to hSens2 port. Left motor should be connected to A motor port and the right one to D motor port.
Assembled robot with CORE2 controller and CORE2brick adapter
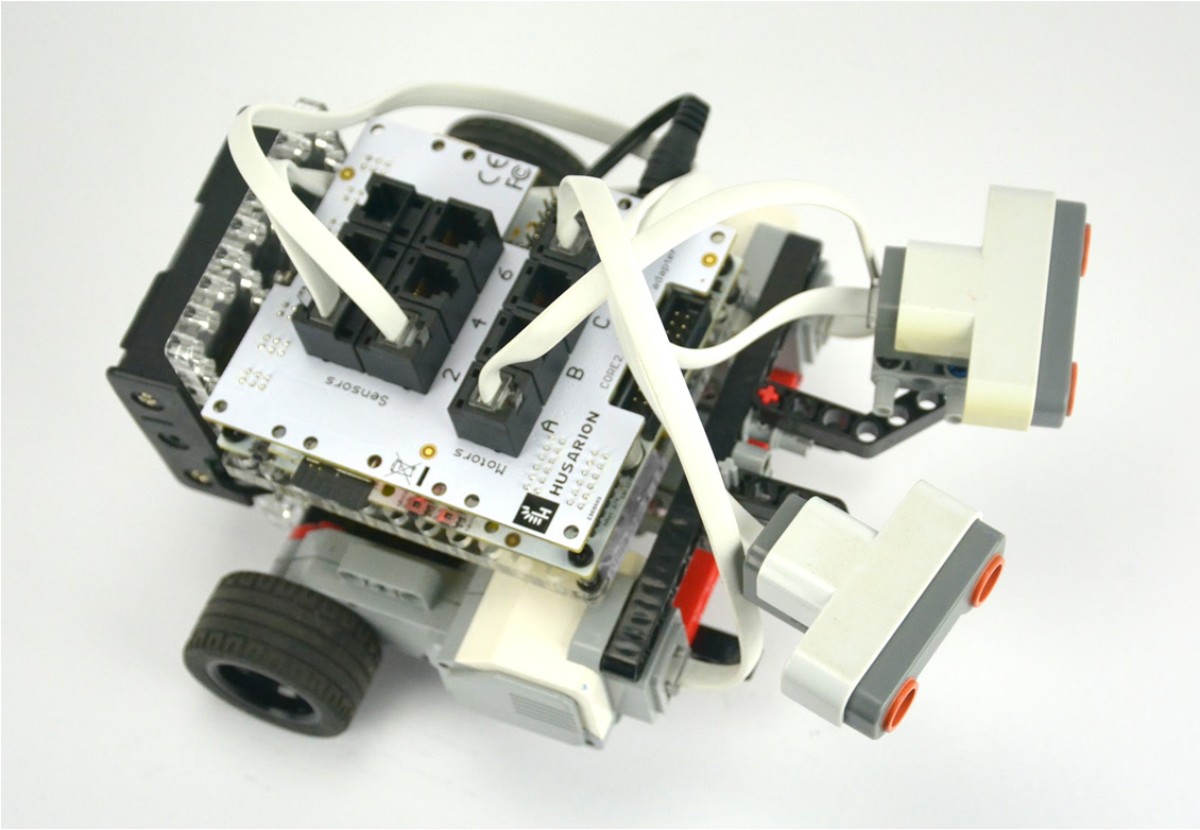
Assembled robot with RoboCORE controller
Assembled robot with CORE2 controller and CORE2brick adapter - side view
Code
After assembling your robot, you can run the following program. You can do it either offline with Visual Studio Code (how to).
WallBOT
#include "hFramework.h"
#include "hCloudClient.h"
#include <Lego_Ultrasonic.h>
using namespace hSensors;

bool KeyW, KeyS, KeyA, KeyD;
float dif_r, dif_f, dif_r_last, sensor_f_dist, sensor_r_dist, moveForward, moveRight, driveL, driveR;
bool automatic = false;
float speed = 0.1;

float stopDist = 15;
float outDist = 60;
float turnRatio = 0.7;
float sensor_f_dist_zero = 18;
float sensor_r_dist_zero = 12;

void cfgHandler(){ platform.ui.loadHtml({Resource::WEBIDE, "/ui.html"}); }

void onKeyEvent(KeyEventType type, KeyCode code)
{
   platform.ui.onKeyEvent = [](KeyEventType type, KeyCode code) {
       bool isPressed = (type == KeyEventType::Pressed);
       if (code == KeyCode::Key_W || code == KeyCode::Up)      KeyW = isPressed;
       if (code == KeyCode::Key_S || code == KeyCode::Down)    KeyS = isPressed;
       if (code == KeyCode::Key_A || code == KeyCode::Left)    KeyA = isPressed;
       if (code == KeyCode::Key_D || code == KeyCode::Right)   KeyD = isPressed;
       if (isPressed && code == KeyCode::Key_E) automatic = !automatic;
       if (isPressed && code == KeyCode::Key_Z) speed -= 0.1;
       if (isPressed && code == KeyCode::Key_Q) speed += 0.1;
       if (speed > 1) speed = 1;
       else if (speed < 0) speed = 0;
   };
}
void hMain()
{
   // Code for RoboCORE
   platform.begin(&Usb);
   // Code for CORE2
   //platform.begin(&RPi);

   platform.ui.configHandler = cfgHandler;
   platform.ui.onKeyEvent = onKeyEvent;
   platform.ui.setProjectId("@@@PROJECT_ID@@@");

   hBtn1.setOnPressHandler([] {automatic = !automatic;});

   // Code for RoboCORE:
   Lego_Ultrasonic sensor_f(hSens2);
   Lego_Ultrasonic sensor_r(hSens1);

   // Code for CORE2
   //hLegoSensor_i2c sensor_f_port(hSens2);
   //hLegoSensor_i2c sensor_r_port(hSens1);
   //Lego_Ultrasonic sensor_f(sensor_f_port);
   //Lego_Ultrasonic sensor_r(sensor_r_port);

   for (;;) {
       sensor_f_dist = sensor_f.readDist();
       sensor_r_dist = sensor_r.readDist();

       dif_r = 0;
       if (sensor_r_dist > -1) dif_r = sensor_r_dist- sensor_r_dist_zero;
       if (dif_r < 0) {
           LED3.on();
       } else {
           LED3.off();
       }
       if (dif_r > sensor_r_dist_zero*1.8) dif_r = sensor_r_dist_zero*1.8;
       dif_f = 0;
       if (sensor_f_dist < sensor_f_dist_zero && sensor_f_dist > -1) {
           dif_f = sensor_f_dist_zero - sensor_f_dist;
           dif_r = 0;
           LED1.on();
       } else {
           LED1.off();
       }

       moveForward=1;
       moveRight = dif_r * 0.08 - (dif_r_last - dif_r) * 0.01 - dif_f * 0.25;

       if (!automatic || KeyW || KeyA || KeyS || KeyD) {
           automatic = false;
           moveForward = 1 * (int)KeyW - 1 * (int)KeyS;
           moveRight = 1 * (int)KeyD - 1 * (int)KeyA;
       }
       driveL = (moveForward + moveRight * turnRatio) * speed * 1000;
       driveR = (moveForward - moveRight * turnRatio) * speed * 1000;

       //Code for RoboCORE
       hMot4.setPower(-driveR); // right motor
       hMot1.setPower(-driveL); // left motor
       //Code for CORE2
       //hMot4.setPower(driveR); // right motor
       //hMot1.setPower(driveL); // left motor

       sys.delay(50);
   }
}
ShadowBOT
#include "hFramework.h"
#include "hCloudClient.h"
#include <Lego_Ultrasonic.h>
using namespace hSensors;

bool KeyW, KeyS, KeyA, KeyD;
float distL, distR, moveForward, moveRight, driveL, driveR;
int stateL, stateR, directionR;
bool automatic = false;
float speed = 0.1;

float stopDist = 15;
float outDist = 60;
float turnRatio = 1.2;

void cfgHandler(){ platform.ui.loadHtml({Resource::WEBIDE, "/ui.html"}); }

void onKeyEvent(KeyEventType type, KeyCode code)
{
    platform.ui.onKeyEvent = [](KeyEventType type, KeyCode code) {
        bool isPressed = (type == KeyEventType::Pressed);
        if (code == KeyCode::Key_W || code == KeyCode::Up)      KeyW = isPressed;
        if (code == KeyCode::Key_S || code == KeyCode::Down)    KeyS = isPressed;
        if (code == KeyCode::Key_A || code == KeyCode::Left)    KeyA = isPressed;
        if (code == KeyCode::Key_D || code == KeyCode::Right)   KeyD = isPressed;

        if (isPressed && code == KeyCode::Key_E) automatic = !automatic;
        if (isPressed && code == KeyCode::Key_Z) speed -= 0.1;
        if (isPressed && code == KeyCode::Key_Q) speed += 0.1;
        if (speed > 1) speed = 1;
        else if (speed < 0) speed = 0;
    };
}

void hMain()
{
    // Code for RoboCORE
    platform.begin(&Usb);
    // Code for CORE2
    //platform.begin(&RPi);

    platform.ui.configHandler = cfgHandler;
    platform.ui.onKeyEvent = onKeyEvent;
    platform.ui.setProjectId("@@@PROJECT_ID@@@");

    hBtn1.setOnPressHandler([] {automatic = !automatic;});

    // Code for RoboCORE:
    Lego_Ultrasonic sensor_l(hSens2);
    Lego_Ultrasonic sensor_r(hSens1);
    // Code for CORE2
    //hLegoSensor_i2c sensor_l_port(hSens2);
    //hLegoSensor_i2c sensor_r_port(hSens1);
    //Lego_Ultrasonic sensor_l(sensor_l_port);
    //Lego_Ultrasonic sensor_r(sensor_r_port);

    for (;;) {
        distL = sensor_l.readDist();
        distR = sensor_r.readDist();

        stateL = 1;
        stateR = 1;
        if (distL < stopDist)   stateL = 0;
        if (distR < stopDist)   stateR = 0;
        if (distL > outDist)    stateL = 2;
        if (distR > outDist)    stateR = 2;
        if (distR > 0 && distR < outDist && distL > 0 && distL < outDist) {
            directionR = distR < distL; LED1.on();}else{LED1.off();}

        if (stateL == 1 && stateR == 1) {
            moveForward = 1;
            if (directionR) { moveRight = 0.5; }
            else { moveRight = -0.5; }
        }
        if (stateL == 2 || stateR == 2) {
            moveForward = 0.2;
            if (directionR) { moveRight = 1; }
            else { moveRight = -1; }
        }
        if (stateL == 2 && stateR == 2) {
            moveForward = 0;
            if (directionR) { moveRight = 1; }
            else { moveRight = -1; }
        }
        if (stateL == 0 || stateR == 0) {
            moveForward = 0;
            moveRight = 0;
        }

        if (!automatic || KeyW || KeyA || KeyS || KeyD) {
            automatic = false;
            moveForward = 1 * (int)KeyW - 1 * (int)KeyS;
            moveRight = 1 * (int)KeyD - 1 * (int)KeyA;
        }
        driveL = (moveForward + moveRight * turnRatio) * speed * 1000;
        driveR = (moveForward - moveRight * turnRatio) * speed * 1000;

        // Code for RoboCORE
        hMot4.setPower(-driveR); // right motor
        hMot1.setPower(-driveL); // left motor
        // Code for CORE2
        //hMot4.setPower(driveR); // right motor
        //hMot1.setPower(driveL); // left motor

        sys.delay(50);
    }
}
Useful links
-
Open source hFramework libraries for LEGO Mindstorms sensors - https://github.com/husarion/hSensors
-
RoboCORE hardware documentation - https://wiki.husarion.com/robocore:hardware:description
-
CORE2 hardware documentation - /core2/manuals/core2/
-
Configuring offline dev tools - /core2/tutorials/howtostart/offline-development-tools/
-
Husarion cloud to manage all your CORE2 or RoboCORE based robots. Web IDE (Integrated Development Environment) is online, so you can develop a code directly from a web browser. Write control algorithms and web user interface for your robot and control it from anywhere - https://cloud.husarion.com/
-
hConfig app to connect CORE2 to the internet and cloud.husarion.com - https://play.google.com/store/apps/details?id=com.husarion.configtool2
-
RoboCORE app to connect RoboCORE to the internet and cloud husarion.com. And to stream video through Web RTC - https://play.google.com/store/apps/details?id=io.robocore.rcapp.prod
-
hVideo app for CORE2. Pair your phone with your CORE2 based robot and integrate video streaming with its user interface - https://play.google.com/store/apps/details?id=com.husarion.video2