Telepresence robot kit manual
Overview
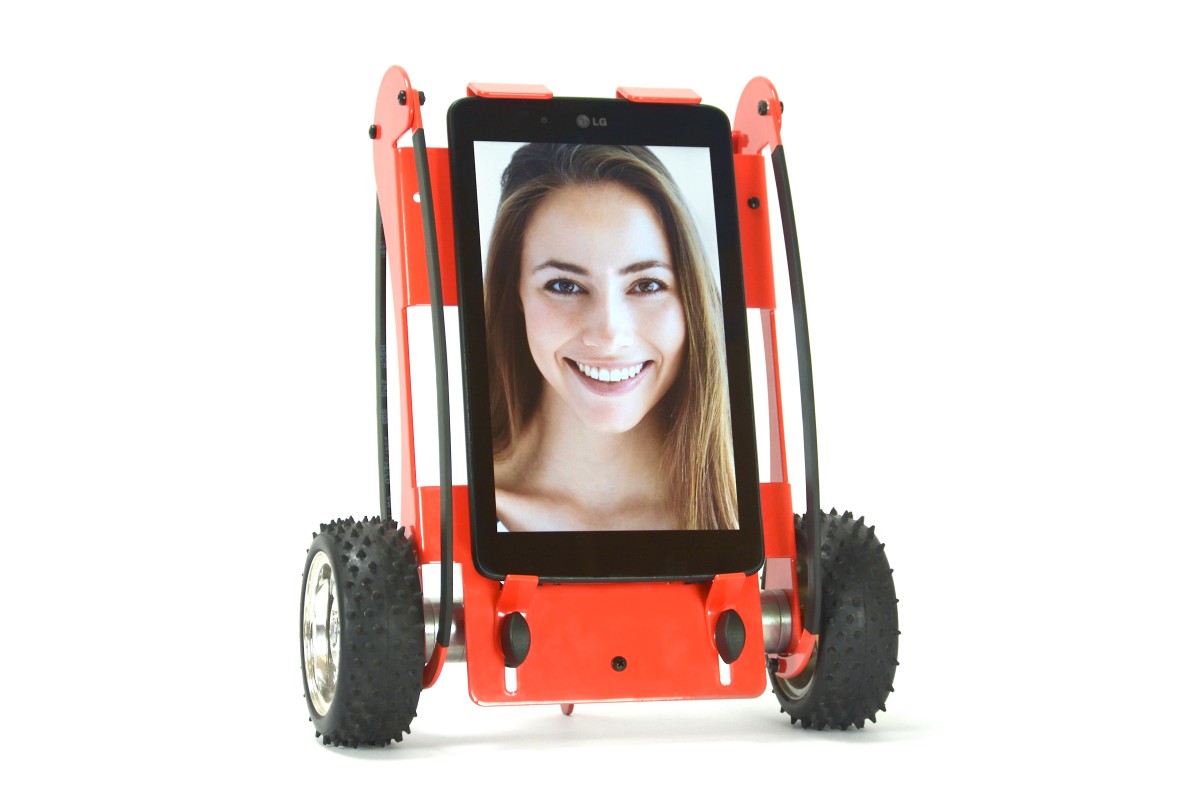
Telepresence robot kit is a development kit based on Husarion CORE2 controller. It integrates:
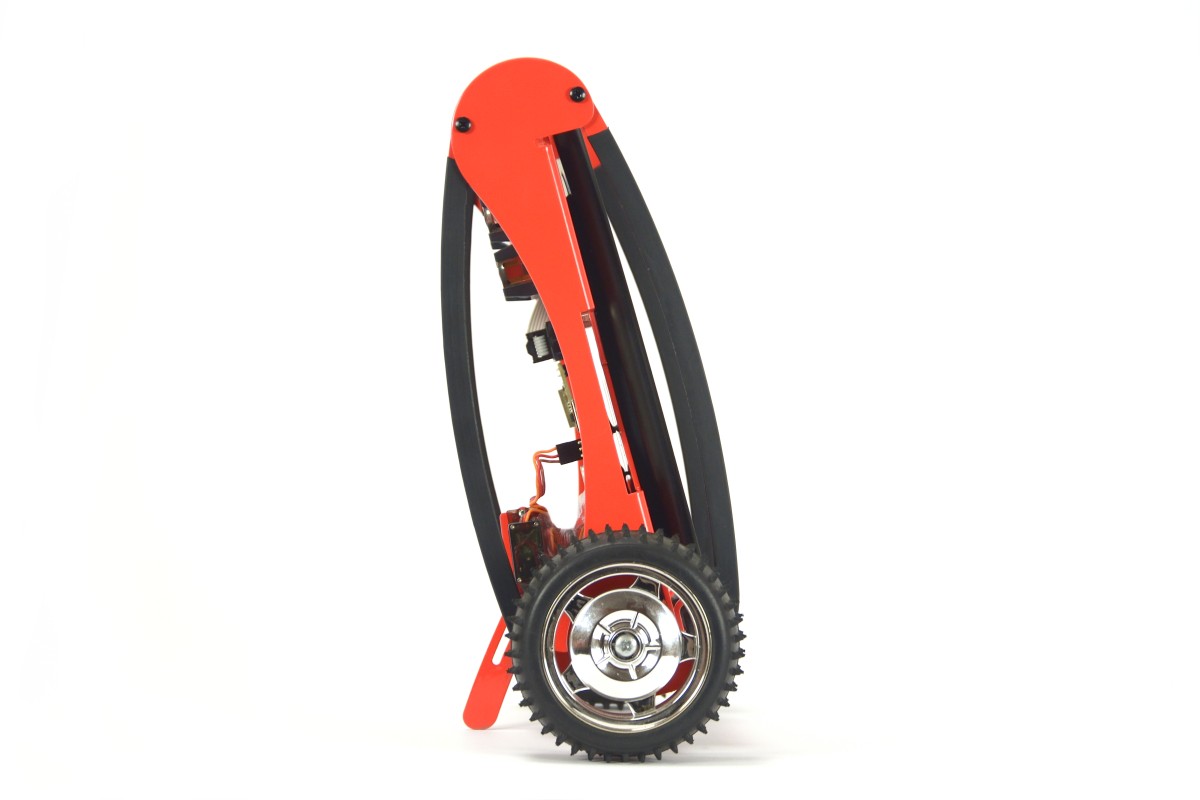
- 2-wheels solid frame containing DC motors with encoders and an alluminium bumpers
- IMU inertial sensor (accelerometer + gyro)
- 3 x Li-Ion batteries 18650
- Li-Ion charger
- Screwdriver
If you don't have one, you can purchase the complete kit here.
Hardware guide
Specification
| Attribute | Description |
|---|---|
| Dimensions with camera and LiDAR | 100 x 232 x 260mm / 3.94 x 9.13 x 10.24in [L x W x H] |
| Weight | 0.95kg / 33.5oz (without tablet) |
| Wheel diameter / Clearance | 85mm / 9mm |
| Chassis material | Powder-coated aluminum plate, 2mm thick |
| Maximum speed | 0.5 m/s |
| Battery life | 3h - 6h |
| Maximum tablet dimensions | 202 x 136 x 9mm / 7.95 x 5.35 x 0.35in (iPad mini 7,9") |
Components description
| Component | Quantity | Description |
|---|---|---|
| CORE2 | 1 | CORE2 is real-time controller, based on STM32F407 microcontroller |
| DC motor | 2 | Xinhe Motor XH-25D Motor used: RF-370, 6VDC nominal, 5000rpm No load speed at the output shaft: 165 rpm Stall torque: 2.9 kg*cm Stall current: 2.2A Gear ratio: ~34 (exact ratio is 30613/900) Encoder: magnetic, 48ppr, 12 poles |
| IMU sensor | 1 | Powerful 9-Axis Accel/Gyro/Magnetometer sensor with MPU-9250 |
| Batteries | 3 | Li-Ion 18650 protected, rechargeable batteries, 2600mAh capacity, 3.7V nominal voltage Note: Device may be shipped interchangeably with similar batteries. |
| Servo | 1 | Tower Pro MG90S micro servo to move the foot. More details here. |
Assembly
To make your robot work properly, you need to complete few following steps written below. Start with mechanical assembly:
- Put each wheel on the coupler and screw it on with M4 screw.
- Put CORE2 on the designated place and fix it with four M3 screws.
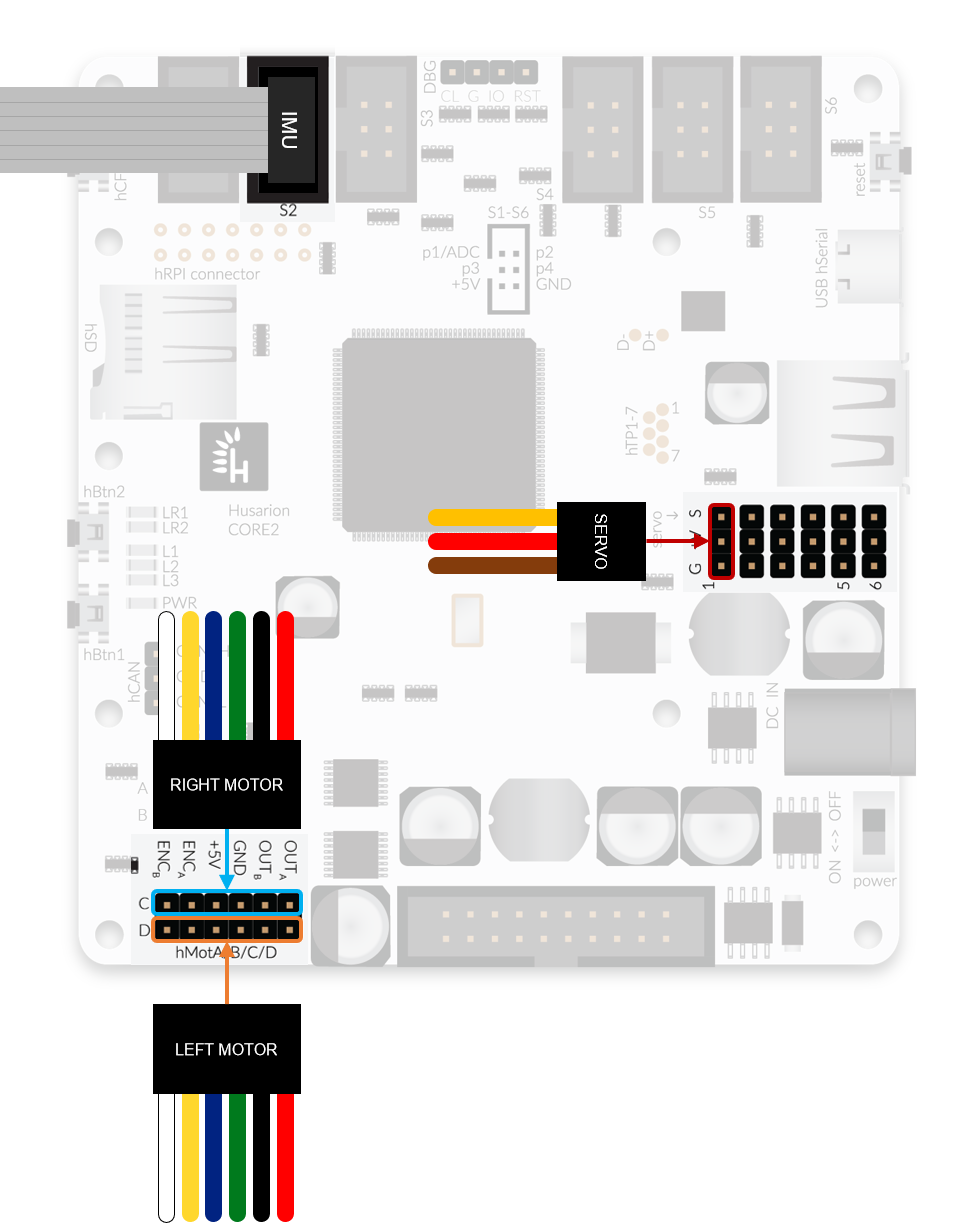
Cables
Connect the peripherals:
- Left motor to hMotD
- Right motor to hMotC
- Servo to servo1
- IMU to hSens2
- Insert three Li-ion 18650 batteries into the battery holder
- Plug in DC power cable.
very important: DC motors with encoders and servo should be connected to proper ports like this:

Charging
Telepresence robot gets power from 3 Li-Ion cells. As with all reachargeable batteries they should be treated in an appropriate way. The basic rules are:
- Use the charger included in the kit. If you don't have one, use a charger for Li-Ion or Li-Poly batteries with at most 1A charging current and balancing feature.
- Don't discharge the batteries below 3.5V per cell (10.5V for all cells). Further discharge can trigger the overdischarge protection, built into each cell. In such case some of chargers would not allow to charge batteries because of too low voltage - the protection simply cut-offs on of terminals. The charger can interpret this as damaged battery and will not charge it. The workaround for that is to connect the battery to the other current-limited voltage source for a few seconds - it will turn off the protection and the battery would charge again with normal charger as before (if it is not damaged).
- Use robot UI or LED controls to monitor the battery state. The best option is when the firmware disables the motors in case of low battery state. Such feature will help you to avoid discharging batteries too much.
- If you don't use robot for a long time, leave the batteries partially charged (about 11.4V for all cells). It's a recommended charge level for a long-term storage.
Software
Programming and interface
- Place your robot with CORE2 facing up and turn it on.
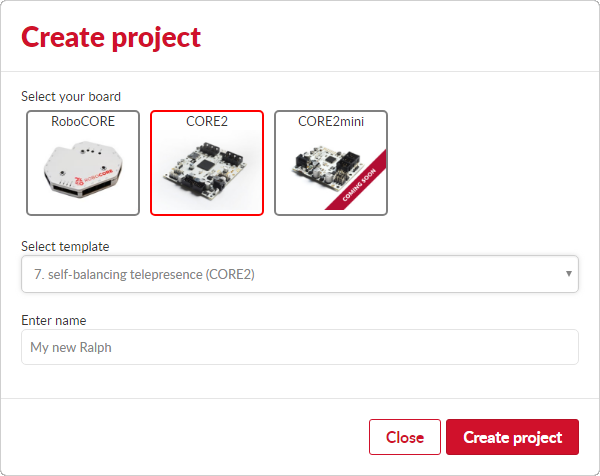
- Open WebIDE (cloud.husarion.com) and create a new project using template 'self-balancing telepresence' and upload it to your CORE2.
- When robot is programmed, open its user interface and click 'Turn off motors'.
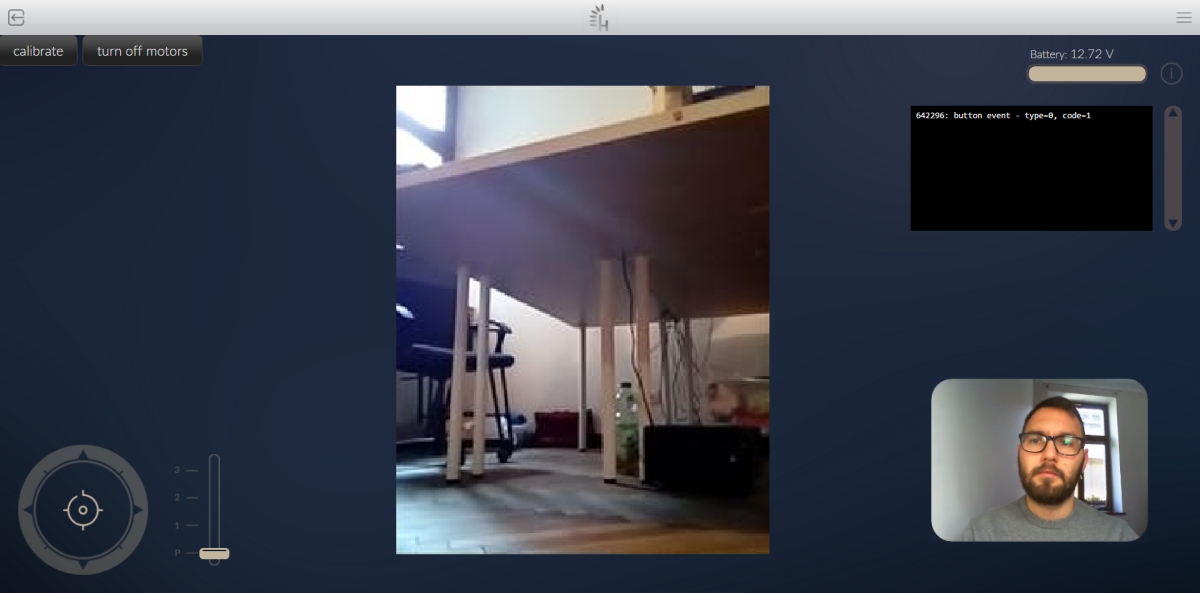
- Pinch upper part of your robot and by pushing it back and forward set it to balanced vertical orientation.
- When you find proper position (when you are using the less force to hold it stable) click on 'Calibrate' button in Web UI.
- Now after clicking 'turn on motors' your robot will start balancing correctly.
To steer your robot use WSAD keys or arrows. Use G key to switch leg position and 1, 2, 3 keys to change gears.
Docs and links
All helpful documents and links in one place:
- Telepresence robot kit Safety Instructions - important!