hFramework library development
If you like to develop hFramework together with our Community, or to adapt it to your purposes, this is a way how to do it.
Preparation
You need to collect all required software.
If you using Windows:
Install Chocolatey following this guide: https://chocolatey.org/install
After Chocolatey installation, in the same terminal type: choco install git and follow the instructions. It will automatically install Git for Windows.
For all operating systems:
Open Visual Studio Code and install "Husarion" extension in VSC ([Ctrl]+[Shift]+[X] and find "Husarion") if you have not done this before.
Cloning hFramework repository
Press [Ctrl]+[Shift]+[P] and type Git: Clone, then type https://github.com/husarion/hFramework.git, then specify the destination folder, e.g. C:\Husarion.
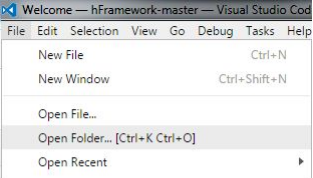
Next you have to open this repository by clicking File -> Open Folder... and chose for example C:\Husarion\hFramework.
Then press [Ctrl]+[Shift]+[P] and type Git: Checkout to..., choose origin/master. The access to master branch is limited but you can work with devel branch.
hFramework sourcecode compilation
Open a terminal in VSCode and enter following commands:
if you use cmd.exe:
del CMakeCache.txt
del build.ninja
mkdir build\stm32_core2_1.0.0
cd build\stm32_core2_1.0.0
set PATH=%PATH%;%HOMEPATH%\.vscode\HusarionTools\bin
cmake ../.. -DBOARD_TYPE=core2 -DPORT=stm32 -DHFRAMEWORK_PATH=. -GNinja
ninja
if you use bash (Windows & mingw - eg. gitforwindows.org):
rm CMakeCache.txt
rm build.ninja
mkdir build
cd build
mkdir stm32_core2_1.0.0
cd stm32_core2_1.0.0
export PATH="$PATH:$HOMEPATH/.vscode/HusarionTools/bin"
cmake ../.. -DBOARD_TYPE=core2 -DPORT=stm32 -DHFRAMEWORK_PATH=. -GNinja
ninja
if you use bash (Linux):
rm CMakeCache.txt
rm build.ninja
mkdir build
mkdir build/stm32_core2_1.0.0
cd build/stm32_core2_1.0.0
export PATH="$PATH:$HOMEPATH/.vscode/HusarionTools/bin"
cmake ../.. -DBOARD_TYPE=core2 -DPORT=stm32 -DHFRAMEWORK_PATH=. -GNinja
ninja
Compiler should run and create static library for hFramework. After a while, you shall see the following output on the terminal:

Using the library compiled by yourself
Create a new folder for your project.
In VSCode File -> Open Folder
In the opened window find the directory you just created. Project tree should be empty.
Press [Ctrl]+[Shift]+[P]. Small console will open on the top.
Type “Create Husarion project” and press Enter to accept.
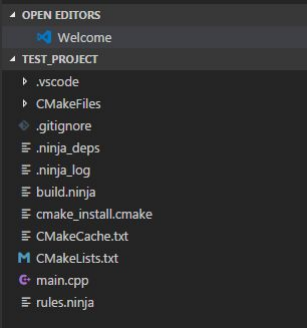
In the project tree you should find files like on this screenshot:
Before the first build you have to comment some modules (remember to save "ctrl + s"). Open CMakeLists.txt and comment the lines:
#enable_module(hCloudClient)
#enable_module(hSensors)
#enable_module(hModules)
#enable_module(hROS)`
- Press [Ctrl]+[Shift]+[P], type “Change Husarion project variable” and press [Enter].
- Type “HFRAMEWORK_PATH” and press [Enter].
- Type or copy the path to hFramework directory. Remember to use "/", not "\". Example:
C:/Husarion/hFramework
- Press [Ctrl]+[Shift]+[B] to build your project. If everything goes well, no message should pop up and in project tree you should find tree new output files:
myproject.bin
myproject.elf
myproject.hex
**That means you have successfully built your first project, together with hFramework sources.**
- In next step find folder
toolsin your.vscode\extensions\husarion.husarion-1.5.6\sdkdirectory, and copy this folder to hFramework repository that you cloned from git, e.g.C:/Husarion/hFramework. - To program CORE2 via USB, click [Ctrl]+[Shift]+[P] and select "Flash project to CORE2".
If you are using Windows:
Make sure that you replaced USB driver for your CORE2 to the "WinUSB (v6.1.7600.16385)" using Zadig.
P.S. To get back to the previous version of the USB driver you need to open "device manager" in Windows and uninstall USB connection associated with FTDI/CORE2, together with the driver for this device (tick the checkbox). In uninstallation confirmation windows select a checkbox to uninstall the driver and click OK.